Although I'm sure I've seen it used in quilts, my source for this block is my dreams. A couple days ago, it appeared in my dreams and woke up thinking this could be a gentle entry into the more liberated style of blocks we'll be making for the
Block Lotto in 2010.
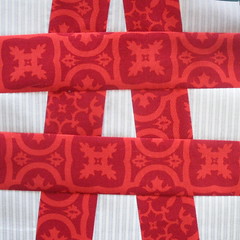
I think this Tic-Tac-Toe block could be the basis of a great kid's quilt–can't you see some x's and o's quilting into those "squares"? But I can also see if used in a more adult modern quilt.
Fabrics & Cutting
For an 8.5 inch (8 inches, finished size) block, you'll need a 9-to-10 inch square of background fabric and a width of fabric (WOF), cut selvedge-to-selvedge 1-to-2.5 inches wide. In this example, I started with the 10 inch square and 1.5 inch strip on the left. If you are using FQs, just cut two 20-ish inch wdiths, like the photo on the right.
Making the Block
(Remember you can click any of the photos for a larger image and closer look.)

1. Begin with the background square. Make two straight cuts from top to bottom edges. While your lines need to be straight, they can be as slanted as you like. You may want to keep them at least 2 inches from the corners and no closer than 1 inch to each other.

2. Insert the bright strip into each of your cuts, sew it along both edges to the background to "re-assemble" the square and press the seams toward the strips.

3. Rotate the block 90 degrees and repeat the process. Make two straight edge-to-edge cuts from top to bottom.
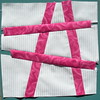
4. Insert strips and press seams toward the bright strips. Don't worry if they don't reach edge-to-edge, because you'll be squaring-up and trimming the block to final size. Do pay attention lining up the background pieces so that your first strips end up being aligned.
5. Square and trim the block to 8.5 inches. If you started with a 10 inch background square, like I did, you'll have a lot of wiggle room to make an artistic cut . . . just make sure that you end up with 9 background "squares" in your Tic-Tac-Toe grid (and that the smallest will not disappear in a seam allowance when it's sewn into a quilt.

Design Considerations
If you make a block with wider strips, you need to be careful that as the block-in-progress grows wider and taller, that, when you trim it to size (in this case 8.5 inches square), that you end up with a complete tic-tac-toe grid with 9 background spaces. In the example below, I started with a 10 inch square of background and 2.5 inch bright strips.

As I was adding my fat strips (2.5 inches), I realized that my block had become too wide, so I removed some background from the center before adding the final seam.

After removing part of the center, I measured (using a large square ruler) to make sure that, after it was trimmed to 8.5 inches square, I would end up with 9 background squares (and a complete tic-tac-toe grid), then I stitched it together and continued.

I also measured when deciding where to make the second pair of slices to make sure to end up with a complete tic-tac-toe block when it was trimmed to size.
As you can see, if you fat strips, your block will end up consisting of more featured bright fabric and less background.

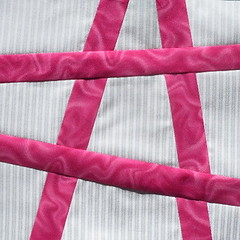
Another design consideration is the angle of the cuts you make. The greater the angle, the more likely it will be that your "lines" would exactly match up, like in this block.
It isn't a mistake, it's just what happens. Line up the strips as well as possible and don't worry if they aren't perfect.
To see a comparison of using different sized strips, check out mine below. Here are a selection of blocks, side-by-side, made with strips that are, from top-to-bottom, left-to-right, 1 inch (green), 1.25 inch (gold), 1.5 inch (pink), 1.75 inch (red) 2 inches (yellow) 2.25 inches (blue) and 2.5 inches (red-orange).


