Wednesday, June 26, 2013

Is it Luck or Synchronicity?

Lately, I've been lucky and won some wonderful things from blog giveaways.


Luck or Synchronicity?

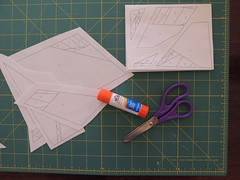
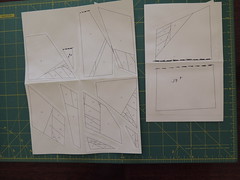
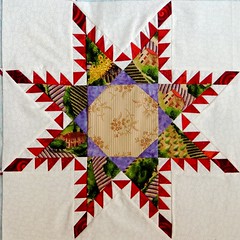
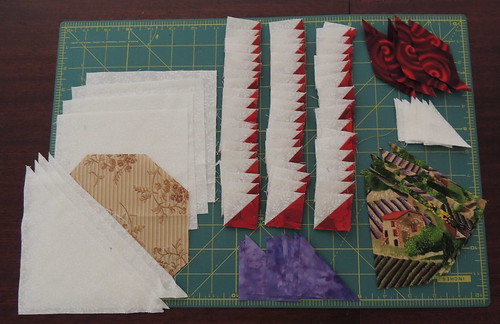
The latest is the Feathered Stars book and add-a-quarter ruler, from Quiltmaker. When I entered the drawing a few weeks ago, I knew I had committed to, but not yet begun the #365-feathers project. I plan to make my first paper foundation pieced feathered star from that book later today.

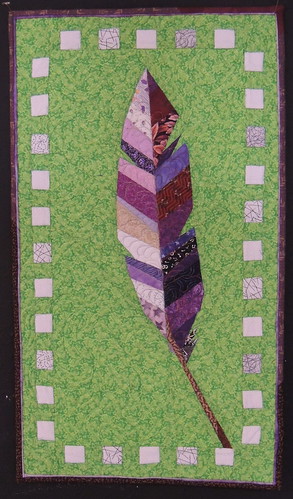
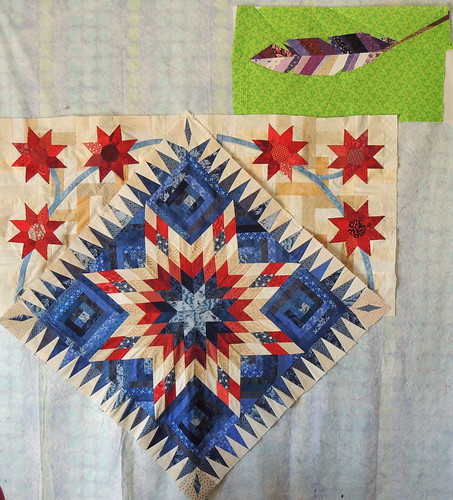
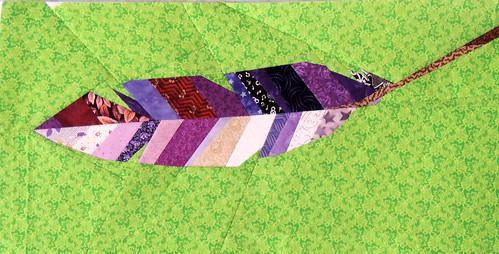
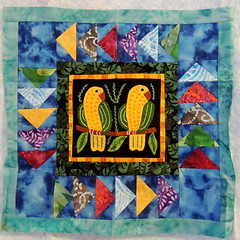
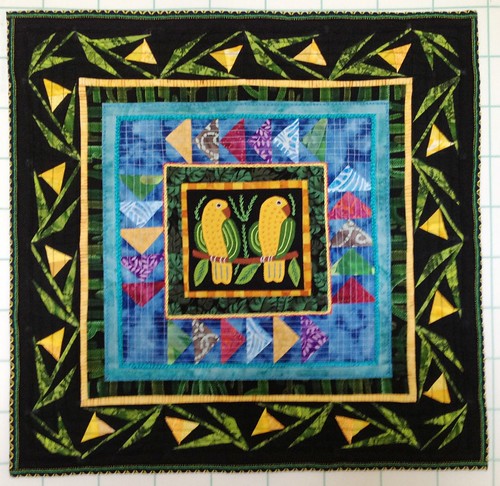
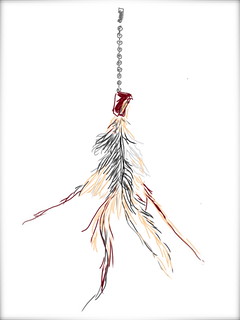
But, as for the rest, some happy instances of synchronicity have happened. I was thrilled to win Judy Dales ' class book on designing and sewing curves from Angie's Blog. Until it arrived and I was flipping through it, I had forgotten all about this bird ... which became my project number 8 of the Daily Feather.

The Bird in the book and my effort

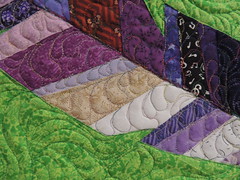
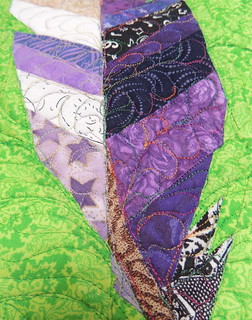
I love this bird so much ... but am a little less than happy with my curved piecing.  Next, I plan to hand pieced another–I hope that by slowing down, I'll be able to really see how the pieces need to go together.

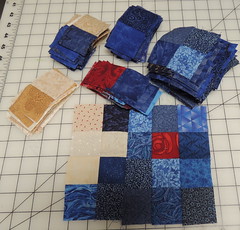
Then one day, as I was looking at fabrics with a future feather project in mind, I noticed the color palette I was thinking about was very close to those colors in the beautiful Pat Sloan fabrics in the fabric tassel, won on her blog ... so you can expect to see those beauties turning up as a daily feather in the future, too.

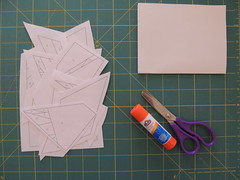
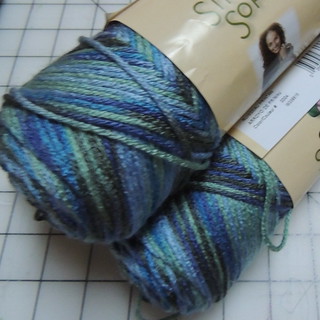
Those itty bitty paper pieces for making a miniature Dresden quilt have NOTHING to do with feathers, but I expect they will provide a necessary break if the feather theme starts to feel stale ... and what better fabrics to use than that pretty tone-on-tone rainbow, provided by Kathy.

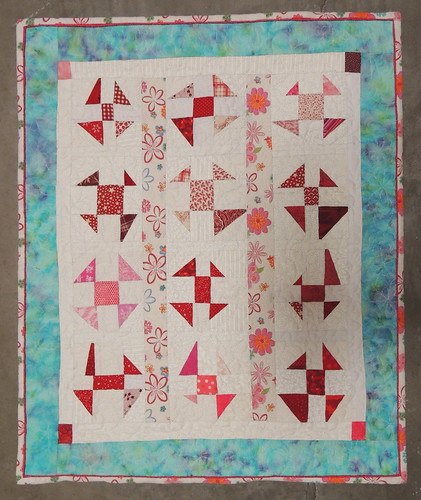
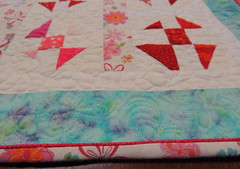
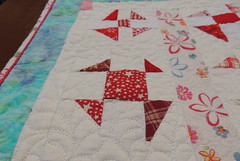
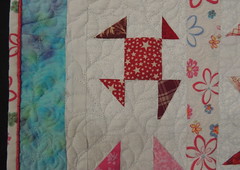
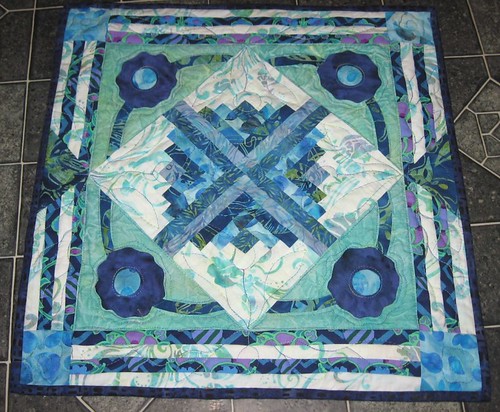
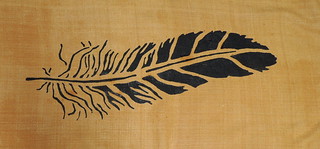
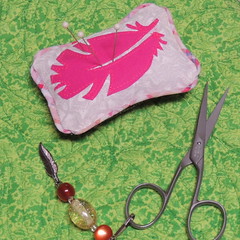
I don't know if I'm looking at the world through feather-colored glasses or if the universe is, in it's way, providing the support to keep me on this feathered path.  Either way, lately, I'm feeling like a lucky girl and the feather-themed ideas just keep coming.

I'm joining Esther's WOW list–her new BOM starts Friday! and WIPS Wednesday on Freshly pieced, because sometimes, progress is made, simply by deciding on fabrics or patterns and getting it organized in a way that it suddenly becomes do-able.

Sunday, June 23, 2013

Lazy Sunday Knitting


Knitting outside in the SunIt seems a little odd to sit outside on a hot sunny day and knit a scarf for winter ... but that's where you'd find me today.

And my plan for Sunday evening is TV, more knitting–inside with my feet up and likely a cat on my lap :-)

I chose to make the longer version of the pattern and it seems like this scarf will go on forever ... the making of it is definitely a good fit for slow stitching Sunday.

The end is in sight.  Next weekend, I hope to be back to stitching on fabric.

Saturday, June 22, 2013

Another Great Cotton (Round) Robin Revealed

The little round robin quilts from the Cotton Robin have been revealed, so I can share my photos of the quilts I touched along the way and my own quilt which is home again.

My Little Skier (Center)Here's the center I made. The appliqué design was adapted from a stitchery pattern from last year's Aurifil BOM.

I sent it on it's way, hoping it had enough personality and sufficient color clues to the quilters who would add to it and no additional notes were required.

Here's what Glen Julie and MaryJane did with it.

I never considered such a literal interpretation of the theme, but the snow ball and delectable mountain blocks in the subsequent rounds were a sweet idea.

And here's my little skier girl in a finished quilt.


My Cotton Robin Quilt - Finished!

Center ReceivedThis is the first center I received.

It came from Marie, who asked that we use only batiks in the same colors as in her fabrics.  I knew I wanted to put it on point and to add appliqué.  I was tempted to float the block to make more room for appliqué but decided against it, because I wanted to leave room for the next person to have the space to add whatever border they designed for the little quilt.

Applique Detail - Quilt 1I didn't know that my Bernina was going to die ... and that the appliqué would have to be done by hand.  I brushed off my needle-turn skills and really enjoyed that peaceful calm of hand work as I stitched it.

(FYI, The flowers really aren't as purple as they seem in this detail photo–as much as I wanted to break the color rule, I complied).

After me, the quilt went to Glen for the outer border, and Kate for quilting and binding and looked like this:


Marie's finished quilt

Center +1 round ReceivedThe next quilt, which I now know is Kathleen's, had a beautiful Mola at the center, with several narrow plain borders framing it and a second round of colorful flying geese and another skinny plain border, added by Nan.

I decided to put the focus on the center by repeating those colors in more skinny plain fabric borders and a paper-pieced flowering vine (because Kathleen's note said she didn't care for appliqué).  It's been a while since I had paper pieced anything ... so it was good to re-visit that technique.

Detail of Second RoundHere's a detail photo of my round. I used scrappy yellows for the flowers, a couple of green and black prints and a yellow stripey batik. I couldn't resist adding the cactus print as a border to this tropical quilt–the colors were a perfect match and it someone seemed right to include a piece of the high desert where I live.

I really wish I could have kept this one for the next round and quilted it, but I sent it on to Jay and let her have all the fun. Here's the finished quilt.  I think she chose the PERFECT fabric for binding.

Kathleen's Quilt

Anne's center
The last quilt in my queue began as this asterisk-like block from Anne.  When I received it, two rounds had been added by Julie and Marie to complete the top and my task was quilting and binding.

I treated each of the design elements separately when I added the quilting ... and had lots of fun doing it.

The binding and piping colors were taken from the quilt's center.

Here are some detail photos and one and the finished quilt.

feather quilting detail Anne's quilt - quilting detail

Anne's quilt - detail of piped binding Anne's quilt - quilting detail

Anne's quilt detail

Anne's Quilt

Click over to the Big Reveal on the Cotton Robin group blog, to see ALL the quilts.  It's a pretty spectacular group of finishes.

I'm joining the link parties for Link a Finish Friday.

Friday, June 21, 2013

Seven Days Done ... 358 Days To Go

This week, I've played with paint, food, yarn, an iPad application and ... a bit of fabric as part of my #365-Feathers project. (Blogged on The Daily Feather) ... and I have to confess that it's been fun.

003 - Arugula as Wing FeathersAfter choosing feathers as a theme, I started seeing them everywhere ... even the arugula in my salad bowl seemed quite feather-y and became the basis of this project/lunch.   A search for feather patterns on Ravelry returned not only the expected feather-design lace patterns, but a pattern for a knitted feather ... of course I had to make one.

005 - knitted feather

I have already tried a few new things (which was one of the motivating factors for me), like making a large freezer paper stencil to paint on fabric for a pillow and sketching (a feather cat toy) on my iPad.

0004 - Cat's Feather Toy007 - Stenciled Feather   

OK, I admit that I HAVE played on the ArtStudio app before ... just never shared my sad efforts until this week :-)

In Action
Of course, there were (a few) quilt-related projects--here's my itty bitty pin cushion with appliqué feather and the first two in what I hope will become a series of feathered star blocks.


002 Feathered Star Quilt Block    005 - Another Feathered Star

Aside from the monthly Block Lotto, I am not very good at creating and producing on a schedule and so I view even seven consecutive days of feather-related projects as a victory.  Can I get a whoop whoop for creating seven feathers in seven days?  I'm also joining Glen's Linky Party for 365 projects.

If you were to begin a 365 adventure of your own, what theme would you choose?

I warn you, once you answer the hypothetical question ... the idea may persist until you decide, like I did, to start a 365 project of your own.

Wednesday, June 19, 2013

Breaking Down the Feathered Star

As part of my #365-feathers project, I've been making–among other things–feathered star blocks.  I hope that with each block, my technique will improve: there will be fewer mis-matched seams and chopped off feathers ... and that I'll get faster.

It's probably too soon to tell ... yet.  So far,  I've only made two blocks.

151 Pieces make a Feathered Star

With the second block, I broke the process into manageable pieces, to make it easier for me to break up the construction of a single block into smaller chunks of time.  It somehow makes the block seem more do-able for me.  Here's my breakdown:
  1. Select and cut fabrics. I prefer choosing fabrics for one block at a time, so I select and cut fabrics for one block.
  2. Make the triangle square feathers. There are 56 half-square-triangle units in each block.  Making them is the most time consuming step for me, and rates a session of it's own.  There are a lot of ways to make these 1 inch (finished size) units.  I created a downloadable tip sheet that you can find on the Tips, Tutorials and Projects page if you're interested. For these blocks, I use a printed grid that I created that will make the 56 HST units I need from two 9 by 15 inch rectangles of fabric. The photo above was taken after step 2 was complete.
  3. Sew the strips of feathers with added background triangles and diamonds.
  4. Sew the 9 sections.  I am using Marsha McCloskey's pattern and technique, where the feathers are first added to the eight background pieces (4 squares and 4 triangles) and then the star sections are added and then joined.  It feels a little inside-out, but it works best for me. 
  5. Assemble the star block, like a 9-patch.  
Here are my first two efforts.  They are Feathers # 002 and 005 for my Daily Feather

002 Feathered Star Quilt Block  005 - Another Feathered Star

I plan to make more and hope that with each block, I improve :-)

I'm sharing this post on Esther's WOW and WIP Wednesday on Freshly Pieced.

Monday, June 17, 2013

Transitions on my Design Wall

Design Wall - June 16

These are the border blocks for my Lone Star quilt and yesterday's daily feather for my 365 project, a feathered star block.

As often happens, the transition between projects can be jarring because of shift in colors and scale. The border blocks are for a 60-inch throw/wall quilt, my June project for a Lovely Year of Finishes.  The feathered star is 19 inches. It's the first in a series I plan to make for the Daily Feather.

Sunday, June 16, 2013

Record High Temperatures and Yet ...

New YarnIt makes no sense and yet I feel like knitting.

I picked up this yarn earlier this week and am going to make this scarf ... to be worn much much later this year.  (That gives me a lot of time to finish it, right?)

Maybe it's because the past week was Knit In Public Week.  I didn't see anyone publicly knitting in Santa Fe, but I carried this project around with me and managed a few public stitches.

My plan for Slow Stitch Sunday is to take this project out onto the deck this afternoon, with a big glass of ice tea and make some good progress with knitted stitches.  How about you?

Saturday, June 15, 2013

The sharpest knife in the drawer ... and something to do with it

Patrick RomeroThe sharpest knife in the drawer at my house is the one that I took to the farmer's market today to have sharpened.

Patrick Romero has no website nor business cards.  He just shows up at the Farmer's market twice a week and works his magic to make knives and scissors and tools sharp again. He also makes custom knives and tools.

This morning I remembered to take my big kitchen knife with me to the market. Until now, it was well used and definitely NOT the sharpest knife in the drawer.

Next I'll be taking my Dovo scissors.

Cutting–fabric or vegetables–is so much easier and more pleasant when our tools are sharp.  Most of my knives in the kitchen are 30 years old or older–purchased when I lived and worked in Europe and they are still going strong.

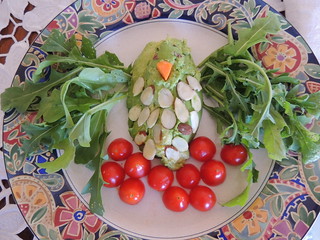
Lately, I've been making a lot of this salad–Hail to the Kale.  You can follow the link for the recipe (the photo also comes from there) or watch the video below.

It has a creamy, sweet and tangy sauce which is poured over the kale and then massaged in by using a curved blade like an Alaskan Ulu or a mezzaluna to cut the kale and mix things up ...

Which was my excuse for buying a new contender for sharpest knife in the drawer, this mincing knife.

Added to my rationalization was the great price I found for one online ... darn that internet :-)

Here's the video where I first found Hail to the Kale.


Like the Chef and the Dietitian in the video,  I often enjoy this salad for breakfast.

This weekend's theme for the Block Lotto weekend update linky party is sharing something UN-quilty, so I'm linking this post.

Friday, June 14, 2013

Feathered Feather–Finished

Feathered Feather
Two posts in a day because ... I finished the feathered feather table runner.

It measures 15 by 27 inches and is a perfect fit for the tall little table and chairs in the studio ... photos later after the weekend clean-up in the studio.

I super-sized half of the feathers block pattern that was offered on the Shape Moth blog as part of the Forest QAL–I described the process earlier in this blog post–and added a simple border. All the fabrics,  except the FQ I used for the background, came out of my scrap bins.

I had all kinds of silly fun when I decided to put quilted feathers inside the sections of the feather and added a large scale McTavish-ish fill pattern in the background.

I added the piped binding because it seemed like a perfect opportunity for more practice with the technique and, as we all know, practice makes perfect  ... or, at least, more perfect with each iteration..

Here are some detail photos of the the feathered feather, the swirly girly (my term) free-motion quilting  in the background and the piped binding.

Quilting Detail Detail - piped binding

Tomorrow I begin a new creative adventure of creating something every day. Glen blogged about it here: 365  At first, I thought it was an interesting idea and would be fun to follow along.  Then I downloaded the free peek (kindle version) from Amazon ... and before I knew it, I KNEW what my theme would be and I bought the kindle version of the book, 365: A Daily Creativity Journal: Make Something Every Day and Change Your Life!

My super-sized quilt block seemed to be a perfect image for the header of the new blog I've created for my #365 project.


(Now that it's quilted and bound, there may be a new banner image on The Daily Feather soon  :-)

The idea of creating something everyday is a bit daunting.  I know that I may fall flat on my face.

If you want to follow along, I'll be posting recaps here or you can follow the Daily Feather at http://365-feathers.blogspot.com

If you have a #365 project, I'd love to know about it ... and if you don't, it's always a good time to start. I suspect most of my projects will be quilt or fiber related, but you never know where something like this will lead you ...

I'm joining lots of linky parties today, including:

Can I get a Whoop Whoop on Confessions of a Fabric Addict
Finish It Up Friday on Crazy Mom Quilts
FMQ Friday on The Free Motion Quilting Project
Forest QAL on Shape Moth
Link a Finish Friday on Friday and Tanya Quilts
TGIFF on Quilt Matters

A Silly Idea

Quilting Feathers in the FeatherIt was, perhaps a silly idea to quilt feathers inside the sections of the super-sized foundation pieced feather.

But I couldn't resist that silly idea.

I also pushed myself to try some variegated thread that I had been gifted with long ago–something light on the light side and something colorful on the darker side.

Last night was all about trying new things and silly ideas.

Wednesday, June 12, 2013

Measuring Progress 2-Inches at a Time

pieced border in progressHere's what 672 two inch squares look like.

I've been cutting, counting and sewing them into units that will be used to make the border blocks for my patriotic quilt. Once I stacked and counted and pronounced myself done, it didn't seem all that impressive.

I wanted to use as much of the original fabrics as I could–the center of the quilt was constructed as part of a fabric exchange and challenge–so many of the two inch squares were cut one-at-a-time ... though eventually, I ran out and added more blue from my stash, cut in long width of fabric strips.

When the border blocks are finished (and I've made something yet to be decided for the corners), they'll be added to the quilt (which now has it's setting triangles attached) and I will finish up the appliqué by adding some leaves to my red daisies.

With Setting Triangles

Then, I  think I might be ready to quilt it ... but you never know.  Sometimes the quilts I make and I disagree about when they are "done."

I'm joining the lists for WIP Wednesdays on Esther's Blog and Freshly Pieced.  Anyone who loves appliqué or historic reproduction quilts should be sure to check out what Esther is working on for her next BOM.  It's stunning.

This is also my mid-month check-in post for a Lovely Year of Finishes.

Monday, June 10, 2013

Something Old, Something New and Coming Soon, Something Blue

Here's what's on my design wall today.

Design Wall - June 10

The familiar lone star waits on the wall for me to finish the appliqué on the setting triangles and begin to put it together.  After some assembly and the border is completed,  there will be more appliqué–and blue leaves will added to the stems.

The feather at the top of my wall is half of the Feathers block from the Forest QAL.

Feather

If you are comfortable with paper foundation piecing (PFP), there have been some amazing blocks in this QAL–mostly I have just followed and admired, but last week, I had the idea of making one of the feathers much larger. The block pattern (which has two feathers) is 12 inches square.  My feather is approximately 12 by 24 inches.

I may have made more work for myself when I decide to enlarge the pattern and keep it printable on 8 1/2 by 11 sheets of leave-in sheets. After printing the block pattern, I cut out the sections needed for this feather and then puzzled them together inside a 4 1/4 by 5 1/2 inch rectangle (which, when enlarged 200% would fit on my foundation sheets). A couple sections were longer than 5 1/2 inches and had to be split and then put back together again.  If you're curious, it looked like this (click to enlarge photos).

playing with paper, scissors and glue laying out the pieces paper foundations laid out to enlarge onto 8.5 x 11 sheets

It's been a while since I played with paper, scissors, glue and puzzles–while, at times, I wondered if I was just making it harder for myself (because I didn't want to have to remove the paper foundations), it still felt like play.

Sunday, June 09, 2013

Sunday Evening Appliqu-a-thon

Placing "Daisies" on BackgroundI used my lightbox and a large sheet of newsprint with some simple lines and boxes to keep the placement of the red English paper pieced daisy shapes consistent ... or, I hope, consistent enough.

This morning, I pinned the last three daisies in place with plans for what I am thinking of as an appliqu-a-thon, with hopes I can finish it up and move on to the next step for this WIP. It's turning out to be a very appropriate project for Slow Stitch Sunday ... because, for me, it's going much slower than usual.

It feels a little crazy that it's only the 9th of the month and I'm already concerned that it might not be finish-able by the end of the month, especially given some other plans and commitments and beginning to feel a little pressure about it.  An evening of meditative stitching will definitely help me relax and continue to enjoy.


Saturday, June 08, 2013

Seasonal Shift

Juice!Is there something in our DNA that makes our tastes change with the season? Maybe it's a nature-nuture question.  Whatever is behind it, I am noticing some seasonal shifts within me.   It's not even hot yet, but I don't feel like cooking and nothing appeals as much as fresh juice to start the day. I am still a fan of Green Lemonade, but this morning I made Super Red Beta-Carrot Juice, which is becoming another favorite.  Here's what's in the glass:

1 apple
1 beetroot
2 small carrots
2 celery sticks
1/2 lemon
a small slice of ginger

When I found green garlic at the farmer's market earlier this week, I knew I'd be making Edamame and Asparagus salad with Green Garlic.  I found this (uncredited) photo on Pinterest ... I have to pick up some fennel today so I can make mine.

I don't think it's just about what's fresh now; some foods I love in summer never appeal in winter.

Around the house, I keep pulling out the white/light stuff like the cutwork table cover on the dining table above, and this old fashioned scrappy quilt that's back on my bed.


Scrappy Quilt and New Pillow Shams

I also keep thinking I need to make some pretty light, white curtains for that room.

It may not always seem like it outside, but my body is telling me that summer is here.

Are you feeling the seasonal shift?

Friday, June 07, 2013

A Little Finish with a Long Story

I call this little doll quilt, Upcycled Shoo Flies, because it was begun when I was cleaning up some small red and pink and white scraps (from making free-pieced loving words for the Block Lotto) on my work table and instead of tossing them, I made a dozen 4-inch liberated shoo fly blocks. The finished little quilt measures 19 by 24 inches.

Recycled Flies- Wonky Flies Doll Quilt

If you like the wonky shoo fly blocks and think you'd like to make some of your own, check out my tutorial, Three Ways to Wonkify a Traditional Quilt Block.

After I put them together into this top, I wasn't quite happy with it.  When I won a strip of a vintage sheet, I  remade it with some of the floral strips.

Quilting from the backWhen I came back to this quilt early this year, I thought it would be fun to try quilting from the back in the plain border. I didn't have enough of the floral sheet for a back, so I pieced the back and used it fo borders on the back. First, I quilted the center of the quilt–feathers winding around the white background, outlining, then echoing the print in the floral strips. Then I flipped the quilt over, used painters' tape to mark the inside edge of the border and quilted the borders by outlining, then echoing the flowers in the print.

I felt like Murphy's law started working overtime as soon as I decided to finish up this long-ago pieced quilt.  I mentioned earlier this week how I started quilting it shortly after my Bernina came back from a trip to the dealer for a routine maintenance.  Actually it was exactly 2 weeks after ... and the machine stopped working (again) soon after I started quilting the feathers in the white background.

Aaargh - out of threadWhen I resumed the quilting earlier this week, I managed to get to the borders before I ran out of thread. Usually, I celebrate when I finish off a coneof thread ... but not this time. I didn't have any more of the Lace White thread, but I was feeling so motivated to finish this silly little lark of a project, so I decided to use another "white" of the same type of thread. Grace insists ... it's time to take a break

A couple nights ago, I was determined to keep going until it was done ... my cat, Grace Hopper, had other ideas and late Wednesday night, insisted I stop quilting and go upstairs to bed now.

I was able to finish yesterday evening ... and Grace was happy to keep me company while I stitched down the binding late last night. I had pulled out the last of the vintage sheet with a plan to use it for a hanging sleeve, but decided I liked it for the binding.  The tiny pink piping was added using Susan Cleveland's Piping Hot Binding technique.

Here are a few more detail photos of the finished quilt.

Upcycled Shoo Flies - Quilting detail front and back Upcycled Shoo Flies-piped binding Upcycled Shoo Flies-detail Upcycled Shoo Flies-quilting detail

This sweet little girly doll quilt makes me smile because it's truly a silk purse made from a sow's ear: a recycled sheet and small scraps that were on their way to the trash. Even though crazy things kept going wrong and a bossy cat got in the way, it's finally done.

Now I just have to decide where to hang it and appreciate it for a while.

I'm celebrating this finish by joining the linky parties on:
Can I get a Whoop Whoop?
Finish It Up Friday
Link a Finish Friday

And because Grace helped so much with this quilt:
Feline Friday
Related Posts Plugin for WordPress, Blogger...