It's probably too soon to tell ... yet. So far, I've only made two blocks.
With the second block, I broke the process into manageable pieces, to make it easier for me to break up the construction of a single block into smaller chunks of time. It somehow makes the block seem more do-able for me. Here's my breakdown:
I plan to make more and hope that with each block, I improve :-)
I'm sharing this post on Esther's WOW and WIP Wednesday on Freshly Pieced.
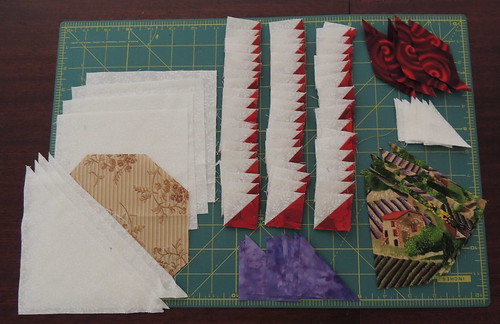
- Select and cut fabrics. I prefer choosing fabrics for one block at a time, so I select and cut fabrics for one block.
- Make the triangle square feathers. There are 56 half-square-triangle units in each block. Making them is the most time consuming step for me, and rates a session of it's own. There are a lot of ways to make these 1 inch (finished size) units. I created a downloadable tip sheet that you can find on the Tips, Tutorials and Projects page if you're interested. For these blocks, I use a printed grid that I created that will make the 56 HST units I need from two 9 by 15 inch rectangles of fabric. The photo above was taken after step 2 was complete.
- Sew the strips of feathers with added background triangles and diamonds.
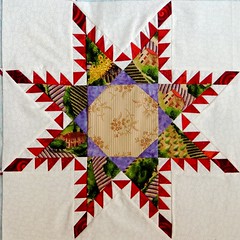
- Sew the 9 sections. I am using Marsha McCloskey's pattern and technique, where the feathers are first added to the eight background pieces (4 squares and 4 triangles) and then the star sections are added and then joined. It feels a little inside-out, but it works best for me.
- Assemble the star block, like a 9-patch.
Here are my first two efforts. They are Feathers # 002 and 005 for my Daily Feather.
I plan to make more and hope that with each block, I improve :-)
I'm sharing this post on Esther's WOW and WIP Wednesday on Freshly Pieced.


9 comments:
What a beautiful pattern! I have never seen this block before. I love the colors you have usesd. Can't wait to see the finished product.
Very nice! I love feathered stars!
I hadn't seen this before. It looks right up my alley, though. I love it. Yours look beautiful!
Your sewing order makes sense to me. Love the red one!
It's a challenging block even for quilters who have been sewing for a long time. Your steps are an organized approach perfect for success. Love what you've done already.
I've always loved the look of this block; but never tried it...I love yours
Very nice I really like your blocks :-)
Great tip sheet, Sophie. Thanks for putting all those methods together in one handy reference.
Your stars are so cool! Wow, so many HSTs in each block, but your method for organizing sounds like a great plan. You sure have some fun feathered stars as a result!
Oh wowwww Sophie, those stars real jim out at you. Sewing machines and I are not that fond of each other LOL. I'm not looking forward to LE centre blocks for that reason!!!!!! Cheers Glenda
Post a Comment