Showing posts with label design wall Monday. Show all posts

Monday, January 23, 2017

A Block and a Half ... and a New Quilt Pattern

Alternate Block and a Half ...
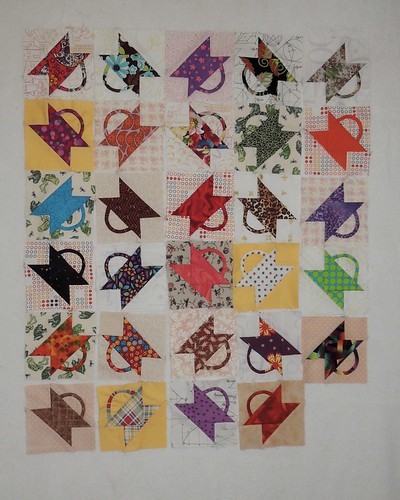
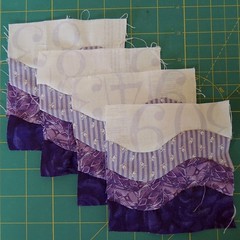
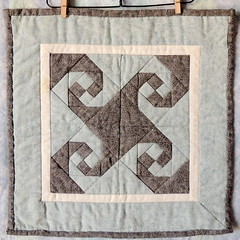
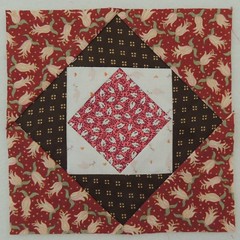
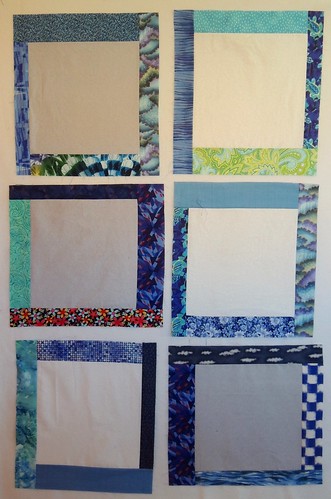
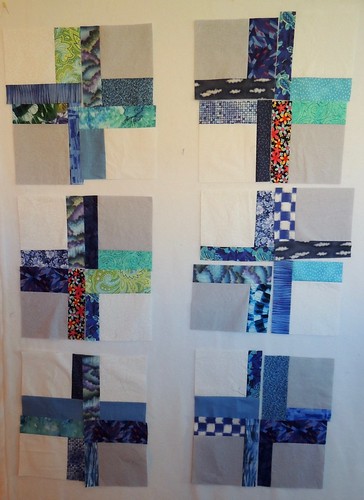
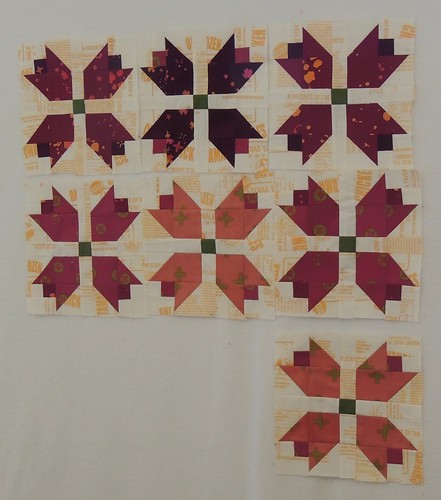
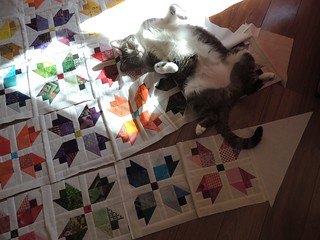
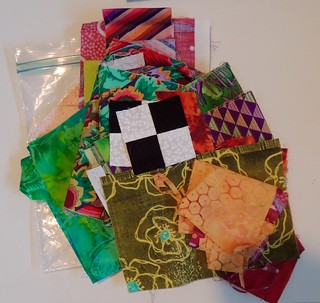
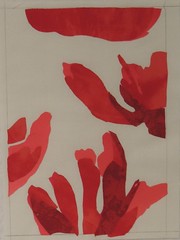
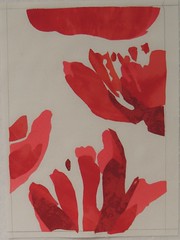
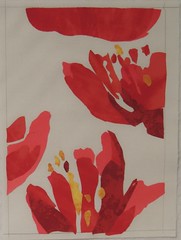
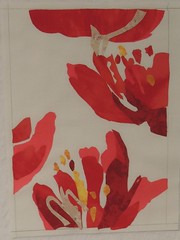
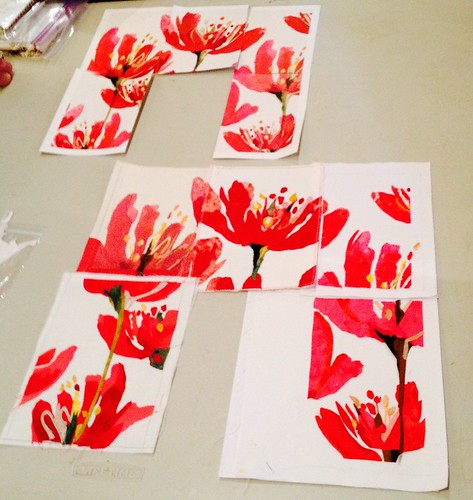
This block and a half doesn't seem like much of an achievement in terms of fabric and thread and blocks, but  ... it is what's I've been making and what's on my design wall at the moment.

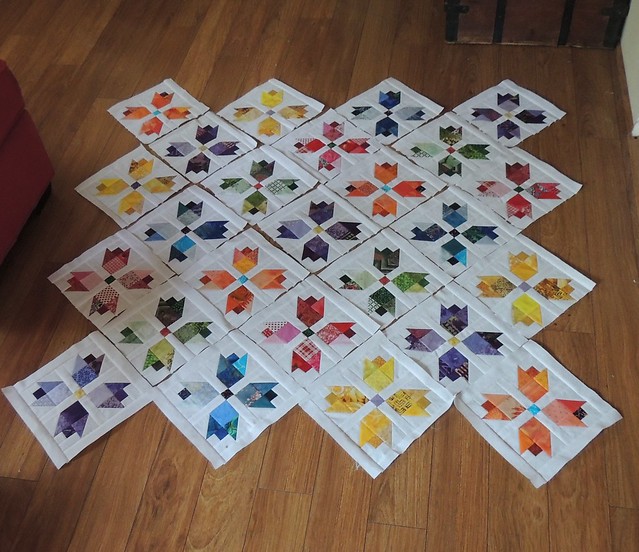
I made them as part of putting together The Three Bears - A fill-in-the-blocks quilt pattern.

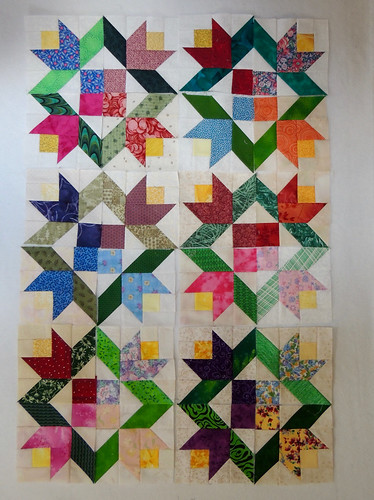
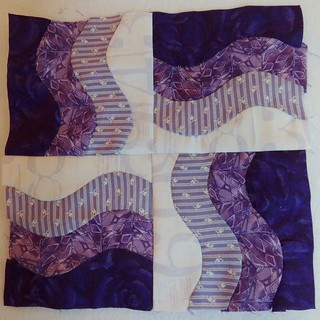
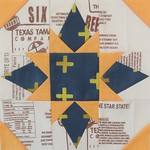
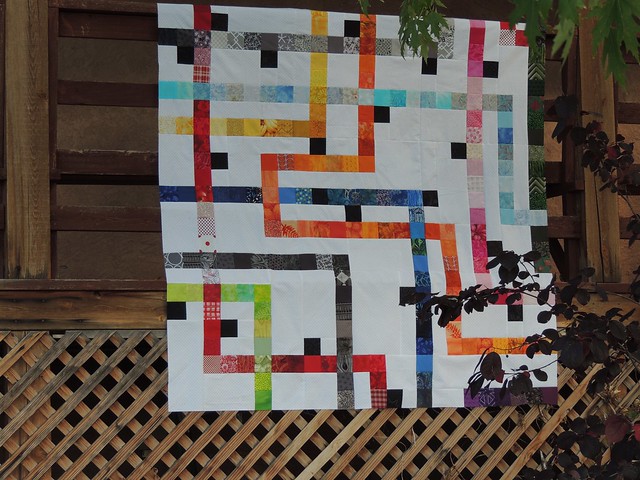
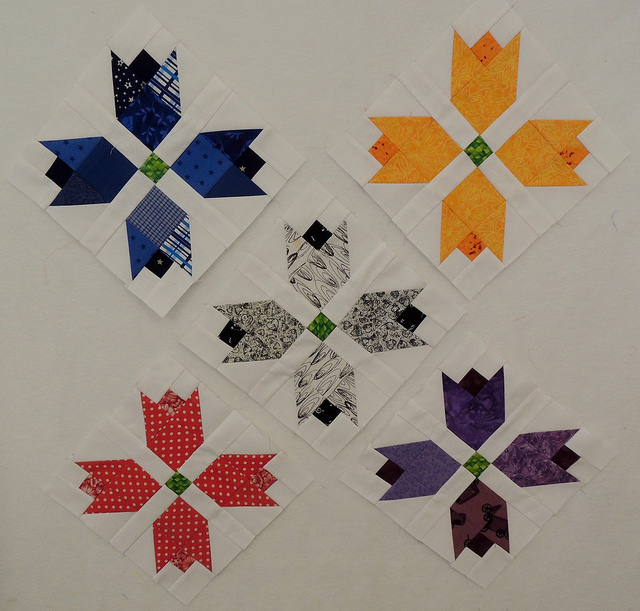
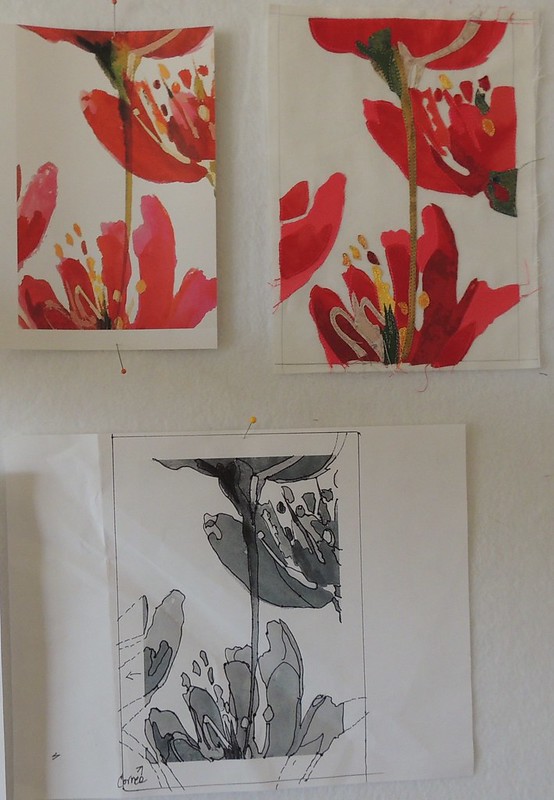
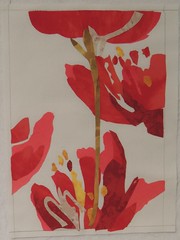
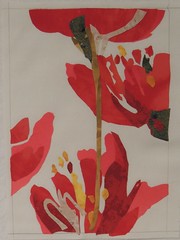
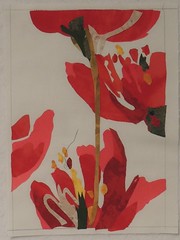
This is one of the alternate blocks and a pieced setting triangle from the quilt design. YOU fill-in-the-blocks with a set of your own 8 inch (finished size) blocks to make it your own.

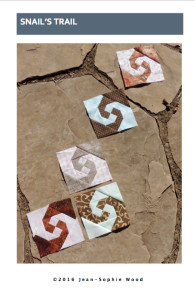
You can purchase/down-load the pattern here or by clicking the image below.

The quilt pattern is called The Three Bears, because fabric yardage and directions are included for three sizes:  

Baby Bear - add 12 blocks to make a quilt that is 54 by 68 inches
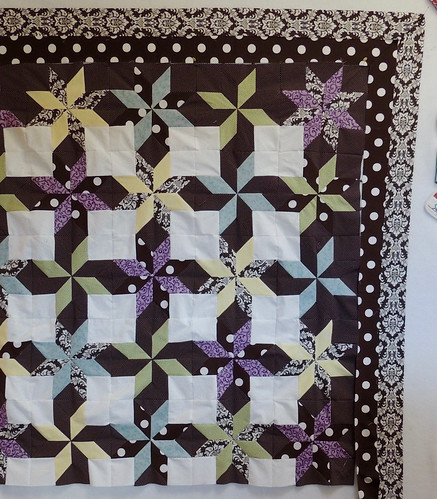
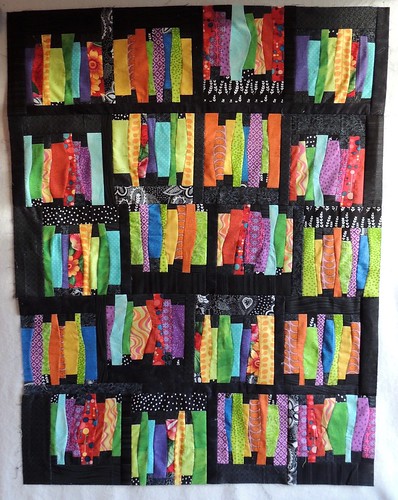
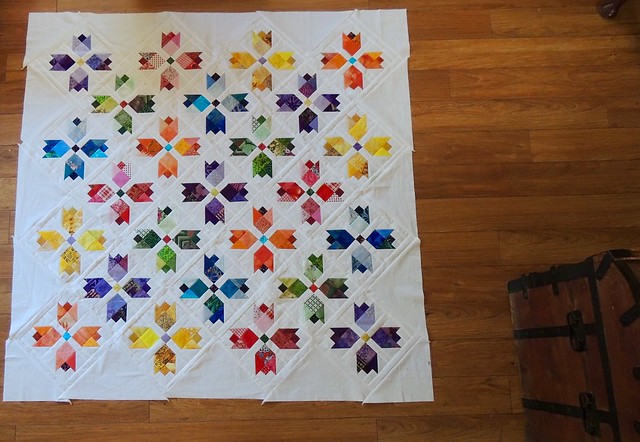
Mama Bear -add 24 blocks to make a quilt that is 68 by 96 inches (shown here)
Papa Bear - add 36 blocks for a quilt that is 96 inches square.

The pattern includes fabric yardage needed for each size, directions for making the alternate block and the pieced setting triangles and directions for putting it all together.

There are also coloring sheets for each size quilt and my tips for making half-square triangle units–the math and methods for making them 7 ways.

How would you fill-in-the-blocks and use this pattern? I can imagine that you might use:
  • 8 1/2 inch squares of a large scale fabric that you wanted to feature (and not cut up)
  • Plain squares in which you could feature quilting or embroidery
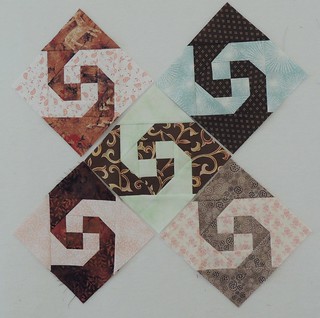
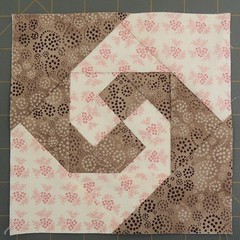
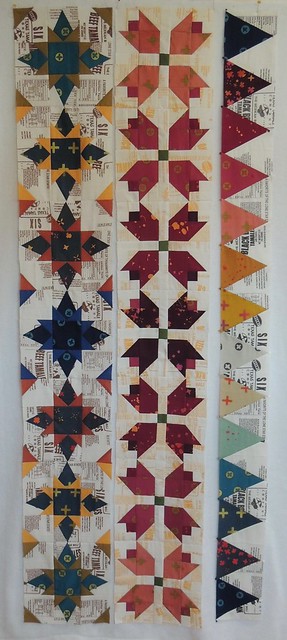
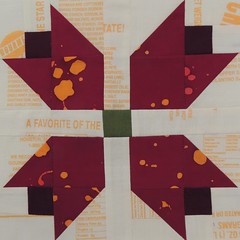
  • A set of 8 inch (finished size) blocks all the same pattern (maybe some lotto blocks you have won)
  • A set of sampler blocks–you might guess that's my plan ... and you'd be right!
  • Orphan blocks that are 8 inches (finished size) or smaller–add background strips to the smaller blocks to make them all 8 1/2 inches before you sew them into the quilt.
This is how Mama Bear might look made from coordinated batiks, adding the split heart variation in this month's Block Lotto pattern. 

Members of the Block Lotto who make and post lotto blocks will receive a coupon to get this pattern for free–details are included in this post.


Monday, January 16, 2017

Finding that rhythm ...

As I was uploading this photo, I realized it was not only the first design wall photo of the year, it is the first since I moved last October.

The first 29 Basket Blocks

I have now made 29 of the small 4 1/2-inch basket blocks and finished hand-stitching the handles in place last night, while bingeing on old episodes of Twin Peaks. Twenty-some years later, it's still strange and wonderful. 

I have an idea for design walls in this small space ... but they are not in place yet.  I may venture out into the snow to pick up the rest of the materials and hardware I need to make that happen ... but probably will not.

I thought that setting  a goal for those baskets would lead me back toward the sewing habit, but at work this week, I worked way too many hours to do anything except come home, eat and fall into bed. During the holiday today, my plan for Monday Making is to pull more scraps, match them up for basket and background and cut the pieces so they will be ready-to-go next to my sewing machine so I can continue to chip away at that 100-block goal. 

During my slow Sunday stitching at Twin Peaks, I wondered if I could re-cultivate my Sunday night TV and handwork ... and how Downton Abbey became my Sunday night habit that provided some rhythm to my week. 

Anyone else still working to re-establish the rhythms of their day/week after the holidays (or some other life change) ... or have a suggestion for must-see Sunday night TV to help me get back into that lovely habit?

Monday, June 13, 2016

Because Sometimes You Just Need a Break ...

I continue to make slow but sure progress making the 80 Lemoyne star blocks needed ... some of which are shown here  on my design wall with the strips intended for the borders.

Lemoyne Stars progress

But this weekend, I really need a break from working with Y-seams and inaccurately cut pieces ... and so I pulled out the golden oldie UFO and made the rest of the Summer Vine blocks from sets of strips–some more coordinated than others–swapped to make these blocks in 2002.

More Summer Vine blocks

Working on one thing can make you really appreciate the other–it was a joy to put together blocks for which the block "kits" are known to be the correct measurements ... and there are no Y-seams! 

I now have 95 of the Summer Vine blocks. I will making at least one more–but likely more than that–before deciding upon a layout and sewing them together. 

If you're curious, you can read more about this very old UFO with links to the pattern and block directions in this blog post.

Monday, March 14, 2016

Updates from My Design Wall

My design wall hasn't changed much ...

DesignWall

I still haven't made much progress on the borders for the mini-Clover Blossom quilt ... I am procrastinating my decision to make 80-some more tiny triangles for the border.  My Curvy Rails block for the Modern Quilts Unlimited Magazine's Challenge, Everything Old is New Again, is still there.  If you haven't yet voted for your favorite Modern interpretation of the traditional rail fence block, you can click the link to check out all the entries and vote for your favorite ... though Moira's block seems to be the Donald Trump in this social media vote.

Hand Pieced UnitsThe purple block is the redesign of Curvy Rails that I blogged about yesterday.

PBS kindly re-broadcast the finale of Downton Abbey last night, so I hand-pieced the new curvy units and watched it one last time.

I sewed them together on the machine this morning.

Wavy Gravy Test Block


I DO prefer the redesigned block (which I am calling Wavy Gravy), but I can't say if it's because:


  • I like the smaller size (8 inches square)
  • It needed a fourth fabric
  • It has much better value contrast
  • I like it better without the center circle
  • I prefer the scrappiness of the fabric choices to being limited to fabrics by one designer or one fabric manufacturer
What do you think?  

I plan to hand piece a few more of these blocks this week to see how they look together and consider it as a possible new big, long-term rainbow scraps challenge project. 

What do you plan to do this week? 

I'm joining the lists for Monday Making and  Design Wall Monday


Monday, March 07, 2016

Think Small

The blocks on my design wall and work table right now are of the small variety.

Tiny PinwheelsThese pinwheel blocks will finish at 1 1/2 inches. They are made from the bonus triangles from the violet blocks I made for the Block Lotto and my scrappy rainbow graduated sampler.

I seem to be missing one pair ... not sure if I tossed the first set of small bonus triangles before I had an idea for these itty bitty pinwheels. I woke up thinking about it, so it's what I will be making later today.

Do you toss or keep those "bonus" half-square triangles (HST) after you trim them away from other blocks. The left overs from making 6-inch violet blocks create 3/4 inch HSTs which are right on the cusp for being usable for me.

88 bonus triangle squaresI also have a plan for the 88 bonus HSTs from making the 11 batik violets for my Old MacDonald's Mystery Sampler.

Look for two new small quilt projects from me soon ... one traditional and one not so much ...

After dealing with these little bits, I pieced some scrappy letters that felt downright enormous in comparision to audition for an idea that has been percolating for a while.

It was fun to dig through my black and white scraps and use a unique fabric (or two) for each of the letters.


Alphabet SoupThese "enormous" letters are 2 1/2 inches tall.

They are waiting on my design wall for a few more of their friends ... and a design decision from me.

This letter style is my go-to font that I think of as "thick and thin. Strips in two sizes are used to improvise letters that turn out looking pretty regular (and some would might say–have said–not wonky enough). They work for me and are quick to produce ... a good thing when you're not sure you'll end up using them ...


Monday, February 01, 2016

Chocolate Snails (Trails) on my Wall


5 Snail's Trails BlocksCombine the designated color for this month's  Rainbow Scraps Challenge and the February Block Lotto choice and, in my mind, I keep thinking Chocolate covered Snails (Trails). Ugh.

They look better than they sound ...

For the Block Lotto this month, we've expanded the second color beyond the RSC accent color of pink to include pastels and low volume prints in any color.

After I went outside and took a blocks in the wild photo of my blocks for the block pattern, they went back on the wall, in an on-point orientation (I was curious).


Here are my blocks as cover girls ... and a link to the block pattern.

Snails Trail - Quilt Block Pattern

I realized when I was outside taking photos ... I don't think I've seen a snail since moving to New Mexico. Maybe they don't like the dry climate?

In addition to directions for rotary cutting and traditionally piecing the 6 inch block, the pattern includes an introduction to paper foundation piecing, a foundation pattern and step-by-step directions for using that technique for making the block.

My First Quilt It's probably because this is the first block I paper pieced, that I think it's a good place to start. This little wall hanging is my fist quilt. It was made from four 4-inch blocks, made from two cotton prints re-claimed from shirts and a bit of white-on-white suggested by another student in class. I hadn't YET committed to quilting or started a stash.

(I am sure I must have a better photo of this little quilt ... but this sad little photo is the one I found).

The quilt teacher that day also pointed out that the same foundation can be used to make a completely different block by replacing the 4-patch with a square and using a different fabric placement.

I think the "new block" variation would be a great pattern to use for scraps. Square-in-a-square-in-a-square-in-a-square?

Completed block A completely different block

I am joining the lists for Monday Making on Live Laugh Quilt and for Design Wall Monday on Patchwork Times.

Monday, December 07, 2015

Another Workshop Project

I was gifted with a guild workshop in November, along with the argument that I could pull fabrics from my stash so I couldn't say no. Life has been especially harsh (in case you wondered why I stopped blogging) and my heart wasn't really in it, but I went.

The workshop was taught by Karla Alexander.  Each student chose a project with curves from one of her books or patterns.

A bunch of us choose Electric Fence, the cover quilt from her book, Color Shuffle–clicking the book image will take you to Amazon.

I generally choose technique classes, not those based on making a quilt, so  I went into this one with the idea that I would make a smaller kid-sized version of the project–made from 20 blocks instead of 35–and concentrate on the technique and design ideas shared in the workshop.

When I was choosing fabrics from my stash, it seemed my bright choices were going beyond "electric" and I started to think of this little quilt as Neon Fence.


  Neon Fence - In Progress


Yesterday, as I was (finally) putting the blocks together, I thought about Do Androids Dream of Electric Sheep? and wondered if those electric sheep were jumping over neon fences? I'm not sure where that idea came from–I'm really not much of a fan of science fiction–but some jumping sheep may show up in the quilting design when I get there.

First, I need to decide up on borders.

But, for now, they are no longer blocks on the design wall waiting for me to DO something with them ... now it's an in-progress quilt on the design wall waiting for me to finish it up.

In the meantime, while all the fabrics were out ... some of them found their way into a December block for Blocklotto.com.  It's the last of the long rectangles, called Wonky Strips.


You can read more about guidelines and find a link to the pattern here: 


Monday, November 09, 2015

Reflecting on Workshops

I gifted myself with a 2-day workshop with Patty Hawkins for my birthday yesterday and so, today, my design wall is a portable one.


Work-in-Progess on my portable design wall

The organic-looking shapes are "me," but the rest of it is completely outside my comfort zone in terms of colors, techniques, process and ... well, just about everything else. I came home feeling completely spent and absolutely loved it.

We started by sketching and abstracting a shape from a magazine page, then constructing a paper collage from construction paper (with a bit of newsprint) ... not using scissors. Can you find the torn paper collage (value study) of my leaf-inspired shape in the gallery of collages?


Gallery of Paper Collage

Letting go and just following the process where it led me was not easy for me, but well worth the journey.  While my project is far from done, I came home with a clear idea of where I wanted to go.

As I looked around the room and the great variety of projects, I saw that some others had followed a different path, using familiar-to-them shapes in their usual color palettes–they stayed in their comfort zone and used what they knew would work ... and ended up with very successful pieces that definitely looked like "them," but I wonder if they came home feeling creatively spent and what they felt they learned from their effort.

A couple others raced through the workshop, as if it was a competition and produced multiple pieces–which may or may not have embodied the process and techniques we were there to learn ... but I have no doubt that they went home feeling like the "winner" of the day. 

We all approach learning in our own way.  As adults, it is harder to let go of what you think you know and try something knew.  I actively had to work at it as I know some of my classmates did.  Over the course of the two-day workshop, I felt like I could almost see the lightbulbs coming on over the heads of those  that had, like me, suspended disbelief and worked out of their comfort zone, following the path presented to us. 

Thank you Patty, for teaching me a new way to look at design and nudging me along an uncomfortable, but rewarding path. 


PattyHawkins

If you have a chance to take a class with Patty, don't miss it. She's a great teacher (and encourager).


Monday, October 26, 2015

A New Community Service Project

Saturday, the Northern New Mexico Quilt Guild had a community service sewing day.  They need more large bed-size quilts and organized an interesting bed-sized scrap quilt for us to make.

On the floor in the center of the room were packets of 30 background fabric squares.  In four piles spread around the room were  strips of fabric in different widths.   To create a quilt "kit", we picked up a background packet and then chose 120 of the strips–30 from each size/pile. It looked something like this:

Background packets

Picking Strips Picking Strips

It was a fun way for everyone to build their own kit.

I bordered about half my blocks during the morning. After a lunch break, we gathered our chairs for the guild meeting.  I came home after the meeting and finished making the blocks. I had 30 blocks bordered, sliced and re-assembled by the end of the day.

Here's some blocks on my design wall, showing step 1 and 2.


Community Service - Step 1 Community Service Sewing - Step 2

The quilt pattern we used (with the designers permission) is Scrappy Love by Cintia Gonzalez (of My Poppet) from Fresh Quilts magazine.


I am looking forward to squaring up and putting together my blocks and seeing ALL the quilts that came from those 4 piles of strips on Saturday.  

Joining the lists for Design Wall Monday and  Oh Scrap!


Monday, October 19, 2015

Row Quit Progress

On the Design WallThe row quilt progresses

Here it is with it's third row complete–Twinkle blocks, which are this month's block pattern on Blocklotto.com

I thought I should come clean and show you how they live on my small design wall  ... not as rows, but as vertical strips.   The design wall is narrower than the rows, but even vertically, it still works to give me an idea to see how I like the blocks and colors adjacent to one another.

In addition to making the 7 Twinkle blocks this week, I also played with all these tiny leftover triangles.


Tiny Bonus Triangles

Believe it or not, when they are this small, I usually toss them, but I think those shiny irridescent shot cottons sucked me in and I couldn't resist playing and seeing what they might become. 

I posted more details on my process (both for the row and the leftovers) on the Block Lotto today:

 Week 3 - Twinkle.

Twinkle BlockYou can find more information about the 9-inch Twinkle block, with links to the block pattern and paper foundation piecing version here:

Twinkle, Twinkle, Monochromatic Stars in October.

Monday, October 05, 2015

12 Weeks, 12 Rows, my New Sampler Project

Glimpse of my New ProjectI shared this photo of my test block for my latest quilt idea with a few of the commenters on my Saturday post with the brown tamale sacks.

(If I didn't send you a link to the photo, you may be a no-reply blogger)

I've had this idea to combine some Allison Glass Handcrafted fat quarters that I couldn't resist when they were offered on Massdrop with the tamale sacks to make a sampler quilt from this year's Block Lotto patterns with a folk art feeling.

I questioned my decision after a friend made a pair of beautiful quilts from the same Allison Glass fabrics and expressed the opinion that they only work with one another and no other fabrics.  So, before I did anything else, I first made this test block, using my Tulip Quilt Block pattern.

Larger size Tamale bag
Your mileage may differ, but I kind of fell in love with it.

The background for this one came from the chicken tamale sacks which are printed with a bright yellow ink. These are the larger sized (one dozen tamales) variety. 

I was so happy with the result, I quickly made the rest of the blocks I needed for sampler row quilt I am making.


7 Tulip Blocks for a new project

I will be blogging weekly updates over on Blocklotto.com with lots more detail, my thoughts on the project, and the design decisions I make along the way,  beginning with this post: 


Of course, I'll be sharing my progress as it appears on my design wall, here, as well.  Be prepared to see lots of tamale sack blocks on my design wall. 

My plan is to complete one row each week for the next 12 weeks.  Sounds easy, right?  Do you have any projects you wanted to finish by the end of the year?  What could you accomplish in 12 weeks?

Sunday, September 27, 2015

Progress Report and Lessons Learned (So Far)

I am still improvising solutions for working on large quilts in my small space with a smaller design wall.  This weekend, I went outside.

9 blocks

I am making a very large (100 inches square) version of the quilt. This chunk is 9 blocks (upper left corner) of the 25 blocks in the quilt. Because I decided to forgo cutting the 891 white squares in the original design and cut larger sections as each block allowed, I got a little bit of a jump start on the quilt-along schedule. Also, I am a little obsessed with it ...

Making the blocks out of numerical order made it easier for me to see the transitions of the various colored subway lines.  This corner includes blocks numbered 1-3, 6-8 and 11-13.

I mentioned before that I had saved the block patterns from the original QAL in 2010.  While I did save the block diagrams, I did not save the helpful blog posts ... that are now no longer online.  Oops.

I've approached cutting the white background into larger pieces where possible by cutting for the individual blocks as I assemble them.  I print the block diagram and mark it up to know what sizes I need to cut from the background.  I start with width of fabric (WOF) strips that are cut in widths that are equivalent to 1 square, 2 squares and 3 squares. As I am making the decisions of how to chunk the background area, I am also thinking about how the block can be sewn together and pressed, since the pieces in a single block will no longer be a simple 8-by-8 grid.

I suspect the time saved by not cutting those 891 small white squares is now being spent deciding what larger sized chunks I need for each block and puzzling the pieces together–but since I enjoy that kind of a challenge, it's all good :-)

It's going to be a monster quilt–had I made a single block before cutting the 709 colored squares, I think I would have decided to make a smaller quilt–but I am looking forward to quilting it and already thinking about the quilting design.

Because the scrappy orange line is prominent in this section, I'm joining the last orange link-up for the Rainbow Scrap Challenge. If anyone has been eying the Tokyo Subway Map Quilt pattern but not sure they want to cut all those squares, I was thinking how one could cut the squares from one color each month as part of the RSC (there are 12 colored lines in the quilt).

I am also joining these lists:

Oh Scrap!
Design Wall Monday
Creative Goodness

Sunday, September 20, 2015

Missing My Big Design Wall

I have some ideas about how/where I can put a big design wall in my little sewing room, but until that happens, I have been making do with the living room floor.

Missing my big design wall

It seemed like it would work OK, until one of my cats decided to have fun and kept passing through, messing things up and nonchalantly leaving the scene of the crime.

Fleeing the scene of the crime ... Johnny Strikes again

... but the sun is in this spot ...When caught in the act, he quickly switched gears and tried to distract me with flirting ...

Incredibly, I did get the blocks sewn together.

I haven't yet decided on borders, binding or quilting design ... but I figure I have enough time to make those decisions and finish this in time for Spring's arrive in 6 months.

Sharing my adventure with the list for Design Wall Monday.

Very Scrappy Tulip Garden quilt top

Tuesday, September 01, 2015

Design Wall Tuesday ... Tulips in September

I couldn't share this yesterday because it's the September block for the Block Lotto and had to be kept secret until today.


This block looks like a traditional block, but when I went looking in Brackman's Encyclopedia of Pieced Quilt Patterns, I couldn't find it, so I am just calling it Tulip.  I had fun playing with the different ways one could scrappify it.

You can find my block directions and fabric guidelines for the Block Lotto this month in this post:

Think Spring (!?) in September

If this block appeals to you, it's easy to jump into the Block Lotto and play along (and maybe win a pile of blocks).

I am belatedly joining the list for yesterday's Design Wall Monday.

Monday, August 24, 2015

Preparing for Play

I confess that I was looking for something else that I had tucked away before the move (which I haven't yet found) when I pulled out my in-progress Scrap Bag Challenge.

Completed bits and pieces on the design wallI put the completed units on the small design wall, which is (another confession) not yet attached to the wall in my sewing room.

I still have quite a few fabrics left in the zip-lock bag that must be used in the challenge.

Fabrics still to be used.


I described how the Scrap Bag Challenge works at the bottom of this post: Challenged by Challenges. 

Coming back to spending time quilting has made me see how much I need it as part of de-stressing.  This week, I'm going to make a conscious effort to spend at least 15 minutes working on this project playing and enjoy the tangible and intangible benefits.

Since I almost have a design wall again and something on it to share, I'm joining the lists for Design Wall Monday  and Monday Making.

Monday, June 22, 2015

Poster and Imposter on my Design Wall

I will be disassembling my design walls sometime this week in preparation for my move, but this morning,  here is what was on my wall.

Poster #1

This is my first contribution to my local guild's poster group. It basically works like this–each of the 6 people in the group chooses a poster and slices it into 6 pieces and shares one piece with each of the other quilters. The poster pieces are interpreted as quilt blocks, one poster at a time, throughout the year. Today we met and put together the first set of six pieces.

On the design wall are the original piece of the poster (left), my interpretation of the slice as a quilt block (right) and the pattern I created to make the block (bottom).

When I was putting together my block, I thought it might be interesting to take in-progress photos as each new fabric was added. I used four pinkish reds, three greens, a tan and a mottled yellow/gold hand-dyed fabric.

Poster #1Poster #1Poster #1

Unlike other slice quilts I have seen, the individuals do not quilt their slice before assembling the quilt.

Last night, I had a nightmare in which I showed up at our meeting today and found I had made a block for the wrong poster/quilt ... and I was a little anxious about it up until the moment I saw another block from the group and confirmed it was the same poster as mine.  Originally they had been randomly ordered and then, as a group we had decided to reorder them less randomly, from what we perceived would be the easiest to the most challenging. 


5/6 of the poster and the quilt blocks

As it turns out, *I* wasn't the person who made a slice of the wrong poster ... but, even with only 5 of 6 pieces, you can see that Theresa's quilt is going to be pretty cool.

Updated to add a link to WIP Wednesday on Freshly pieced, since the only other WIP around here involves organizing and packing.


Related Posts Plugin for WordPress, Blogger...