Friday, September 27, 2013

Ring Around the Lone Star - September's Lovely Finish

It seemed like a modest goal ... but still took some effort for me to complete it.  This 60-inch square quilt top now feels "done" and and ready to be quilted. Somehow the addition of those quirky feather-inspired leave shapes–that I know wouldn't have been everyone's choice–makes it more "me."

Ring Around the Lone Star

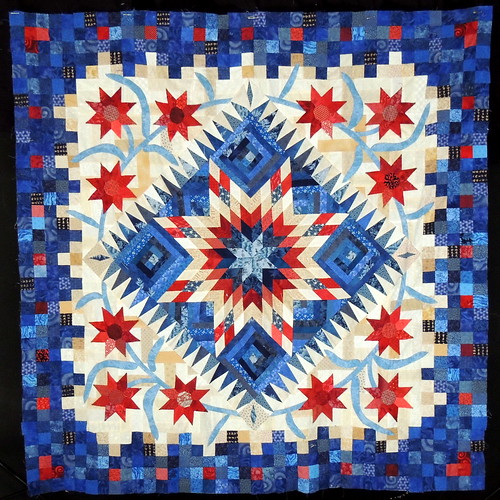
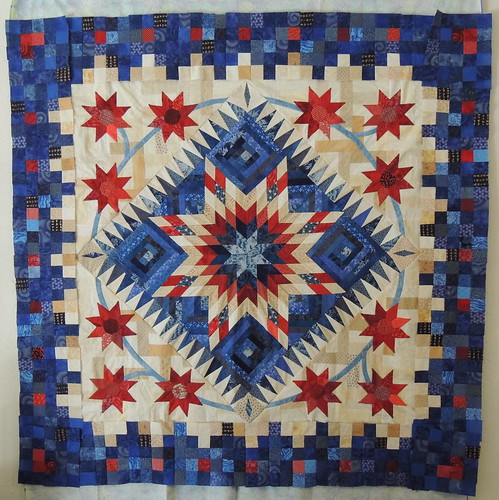
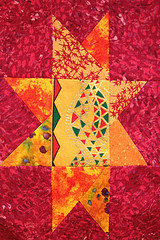
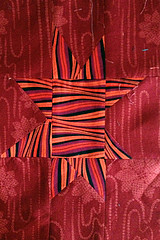
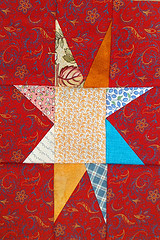
Along the way, this quilt now has a name, Ring Around the Lone Star.  It's my completed project for A Lovely Year of Finishes.  This project has helped me push myself even when I continue to have little or no inclination to quilt ...

Tuesday, September 17, 2013

Playing with Color and Stepping Outside Our Color Comfort Zone

I think we all have our go-to colors and color combinations whether it's for quilts, the clothing we wear or the way we paint and decorate our homes.

Fabric for a Blouse
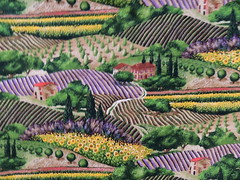
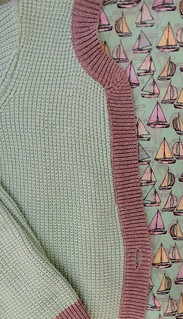
I was thinking about color and how I choose colors today, as I went on my own little color hunt in search of fabric for a blouse that would work with a chunky cotton cardigan that was an impulse buy a couple years ago.

I love the mint green with gray color combination, but I always end up wearing it over a white shirt or gray knit top because I have nothing else,  Today, on my way home from the farmer's market, I decided to see if I could find any fabric that was a color match for the mint green which could become a blouse.  As I was waiting in line at the cutting table, the ladies in front of me were so excited that it had sailboats–they had apparently just been looking for sailboat fabric for a quilt. I confessed to them that I bought it solely for the color.

For me, sometimes finding the right color is as easy as matching something that I like.

February Quilt Along Block
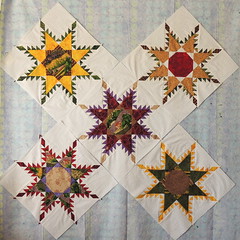
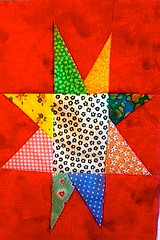
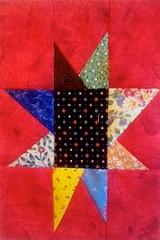
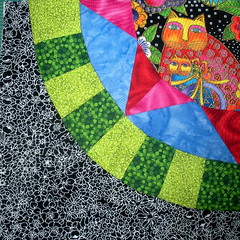
A few years ago, I was thinking that I wanted to try making a quilt from bright colors, so I decided to use brights for a set of Quilt-Along blocks that I would be making. Not knowing where to start, I chose a Laurel Burch print and decided to use it in each of my blocks.

As I blogged my progress with these blocks I received a lot of compliments on the colors/fabrics I used.  I did make a couple rules for my blocks, liking including both warm and cool fabrics and a black and white print in each, but, it was using using the color palette in the Laurel Burch fabric that gave me confidence that it would work.

The idea worked so well for me that when I was choosing colors for the big traditional feathered star blocks I've been making and sharing on the Daily Feather, again, I chose a fabric from my stash on which to base my choices.  Here's the fabric, Provence, from Michael Miller (and oldie that has been waiting in my stash for the right project) and the five blocks I've made so far.
Michael Miller Fabric, "Provence"
I think the role of the inspiration fabric is less obvious in the feathered star blocks than in my bright QAL blocks, but, I'm confident that the result will still be a good one.

As I look at the blocks on the wall, I've been thinking I need to make more blocks with purple.

Five Feathered Stars

Seeing the photos of the fabric and the blocks, side by side, I can see that while I have used the same colors, I need to also consider the overall proportions in order to achieve the feeling of Provence.

We used a similar approach, earlier this year in the Tea Towel challenge, where the colors to be used in the quilt were supposed to be determined by the colors in the tea towel.  My choice was a 1950's reproduction with a limited 4-color palette. It was a great exercise for me to limit myself ... and it was another project that, as I worked/blogged along, received a lot of comments and compliments about my color choices.

Cock-a-Doodle-Tea Towel

I think taking color inspiration from fabric, a photo or other work of art is a great way to climb out of our color comfort zone and try something new.

Speaking of new, yesterday, I was looking through the greeting cards in my desk and found some color palette inspiration for the stenciled feather on silk I made as part of my Daily Feather project.

Stenciled Flower and Color Inspiration from Picasso

The image is of a Picasso painting, Two Girls Reading, an oil on canvass that I'd seen at the University of Michigan Museum of Art. I bought the card to remember the painting and what was, to me, an unusual combination of colors.  When I saw it again yesterday, I immediately thought of the gold silk noil fabric on which I'd printed the black feather.  My original plan when I stenciled that feather was to make a pillow cover, but it continues to assert that it wants to become an wall quilt.  I have some ideas for design elements, but I've been stuck on finding the right colors to add ... until now.

Thank you, Pablo Picasso.

How do you step outside your color comfort zone?  This month, I've asked the Block Lotto community to Blog about Color.  I'm adding this post to the linky party happening over there.  Have you blogged about color?  Feel free to join us.

Thursday, September 05, 2013

My Continuing Chile Education

Padrone Chile PeppersIf you ask the vendors at the Farmer's market about the relative hot-ness of the chiles they sell, they will inevitably tell you that they're either "mild" or "medium hot" ... or they'll say something along the lines of, "you can never tell, they might be mild but sometimes you get a hot one."

I figured the only way to decide which ones were for me was to taste my way through the farmer's market during the season.

padrones and shishitos

These are Padrones.  They originated in Spain and are quite mild.  I like them prepared simply,  blistered in a hot pan with a little olive oil and sprinkled with sea salt–Bon Appetit's recipe is here.

The Japanese Shishito chiles are also quite mild and lovely.

There are a lot of varieties being roasted at the farmer's market and in parking lots all over Santa Fe.

Lots of Different Chiles

Guide to Chiles
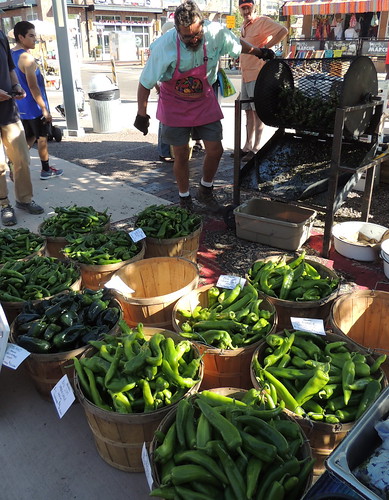
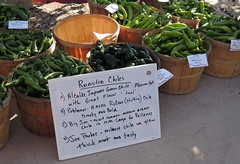
Most of the chiles at the farmer's market are identified in some way.  Sometimes a grower will confess, "I don't remember what kind of seeds we planted." Most come with some sort of signage.

Some of the names are regional, some have an appended, "improved."  The Alcalde Improved that have become a favorite of mine are derived from Espinola Improved. The name is, in part, regional and also reflects the growers selection process.

Peppers (not Chile)


These red beauties came home for their taste test this week. They're sweet peppers and not chiles at all ... but I couldn't resist them.

I plan to use them in a version of a recipe I found on Kate's blog, Black Pepper Tofu.


The peppers below aren't chiles either, but aren't the colors glorious?

Peppers at the Farmer's Market

Wednesday, September 04, 2013

September's Lovely Goal

Remember this almost finished effort from a couple months ago?

 Stalled ...

While I have been not quilting, sewing or otherwise creating, I think my subconscious has been thinking about a couple of these lovely works-in-progress ... and now I am ready to come back to this one and complete the design.  It's my goal for a lovely finish in September.  

If it happens quickly, I may even finish up last month's project ... as I have also worked out some border decisions in my head for this one during my creative funk. 

Flying Geese assembled

I guess even when I'm not actively sewing my brain doesn't stop solving the creative challenges in quilt design–Stay tuned to see what I've come up with to resolve these quilt designs ;-) 

Monday, September 02, 2013

Parked on my Design Wall

In the last few weeks, I seem to have lost my will to sew ... and the projects parked on my design wall reflect that.  But since there are a few new blocks (and a new block pattern), I've decided to share.


Design Wall - 2 September

More Stone Fabrics
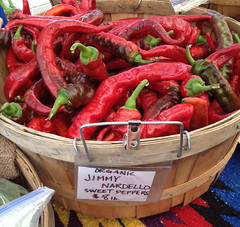
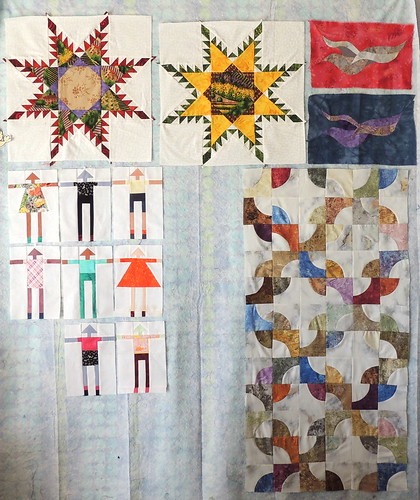
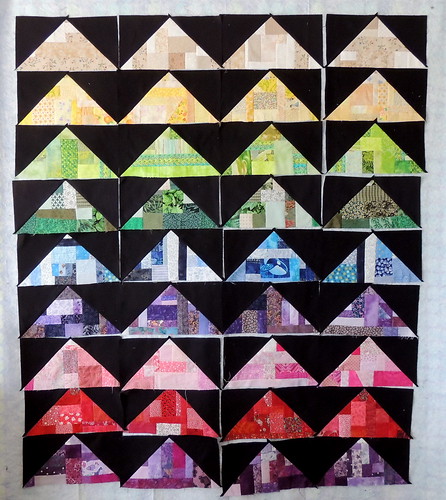
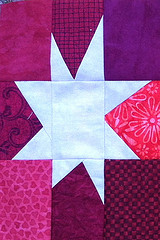
Fabric is cut to make more of the traditional feathered star blocks ... but I have made only minimal progress.  I joked with a friendly a while ago that I probably should re-label The Daily Feather blog as The Occasional Feather, unless I get back on track soon.

The pieced curve bird blocks are still waiting for the design idea in my head to be translated to paper.

The recently ordered charms to be used with the drunkard's path panel have arrived and  so the only thing holding me back from making progress is ... myself.


Boomer Block Pattern Cover
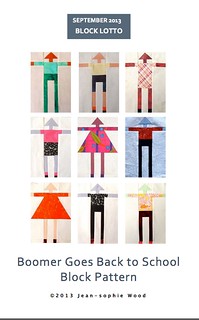
The tall variations of the traditional Oklahoma Boomer blocks are for the September Block Lotto.

I had a lot of fun dressing the Boomers in back-to-school clothes.

You can download the pattern from my Block Patterns page and find the guidelines we're using for the block lotto here:

September is Boom Goes-Back-to-School Month

Will I find my creative mojo in September?  As much as I don't feel like sewing, I am missing it ... so I'm hopeful.  What do you do when you just don't feel like quilting and want to restart the create urge?

Friday, August 16, 2013

My Quilter's Origin Story

This weekend, I've asked quilter's in the Block Lotto community to share how they learned to quilt and became quilters.

I did not grow up in a family with a quilting tradition–my mother sewed garments and saved all the scraps from the clothes she made for me and my siblings and always talked about quilting. While she did make a cathedral window quilt for me as a wedding gift–sewn completely by machine–using many of those scraps, it was the beginning and end of her quilting experience.

So, how did I become a quilter?

My First BlockMy First Quilt Book
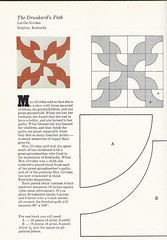
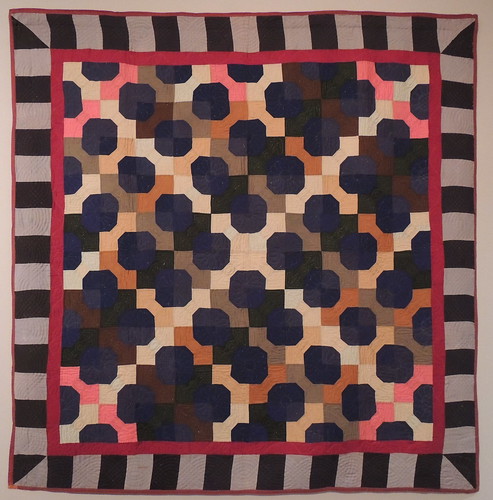
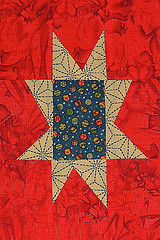
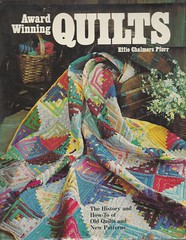
I can't remember exactly what sparked the idea of making a quilt when I was a teenager, but I do remember the attempt. I used this book and chose to make a Drunkard's path quilt.  The book, Award Winning Quilts, by Effie Chalmers Pforr, was published in 1974 and includes patterns for winners in a quilt block competition.

One of the requirements of the contest was that the block had to be completely stitched by hand!  All the pieced block patterns include templates and the book describe how to create templates from sandpaper.

I remember that my first attempt at quilting began with this book and block pattern. I started with one block–made in a combination of blue and orange solids.  Mine was not stitched by hand–I knew how to use a sewing machine and used one.  But I never got past that first block.   It became a lovely, graphic pillow cover ... and I didn't think about quilting again for a couple of decades ... although, like my mother, I sometimes bought fabrics for a one-day quilt.

While living in a small community in the California Wine country, my interest in quilting was sparked again and a chance meeting with a friend-of-a-friend, who taught quilting and became my quilting friend. I don't have most of my early quilts because they were made for gifts for my family, but I do have my first quilt, made in a paper foundation piecing class taught by my friend.

My First Quilt
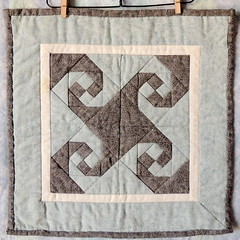
When I took this class, I had no quilting fabrics and wasn't quite ready to invest in any–I showed up at class with two cotton shirts. A fellow classmate gave me the white-on-white that I used for the inner border on this little 12-inch quilt.

Being a geek, as soon as I started quilting, I went online, looking for quilting information and found online communities of quilters discussing quilting and swapping fabrics and quilt blocks. I think I signed up for two swaps on my first day. The 4-inch wide strips and 10-inch squares that I swapped became the basis for my scrappy stash.

Stone Path
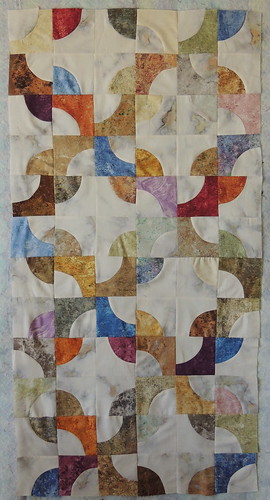
As I flipped through the blocks in the book again, lately, I realized how much those with curved elements appealed to me from the beginning. I thought it was time to think about that Drunkard's Path pattern again.

This time, I didn't make templates and carefully cut the fabrics with scissors ... I used a die to cut the pieces from a charm pack of Stonehenge fabrics and some mottled batik, with the idea of creating a stone path.


Drunkard's Path blocks

A package of 36 charms plus background became seventy-two 3 1/2-inch square Drunkard's path units. The little notches in the die made it easy to line things up when I sewed them together.

64 blocks, traditional arrangement
I played on the design wall, arranging, rearranging and playing with proportions before sewing them together into the 21-by-42 inch panel above.

I have some ideas about what comes next in this quilt design ... stay tuned.

If you would like to share a link to your quilting origin story, join in the linky party below.  (I'm sharing this list with the Block Lotto Weekend update, so you only need to add your link in one place.)

Tuesday, August 06, 2013

An Appliqué Adventure

051 -Large Appliqué Feather 
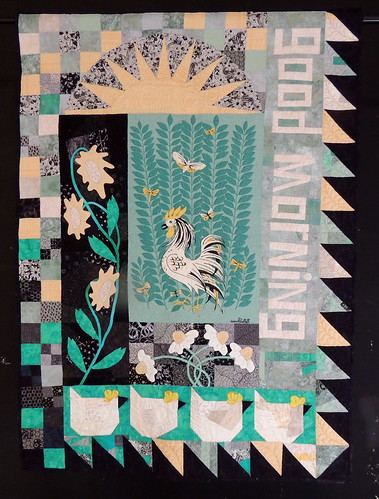
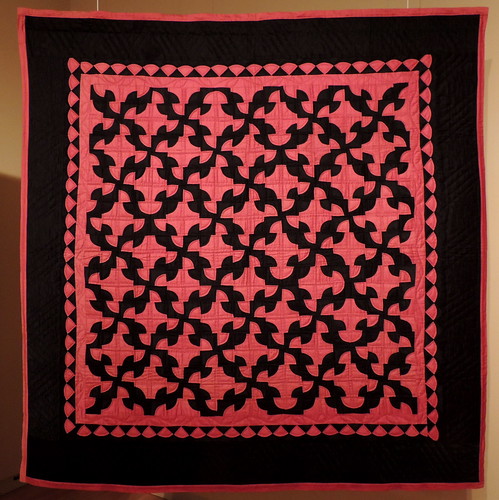
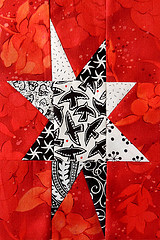
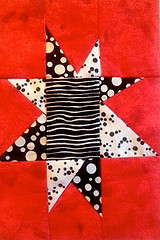
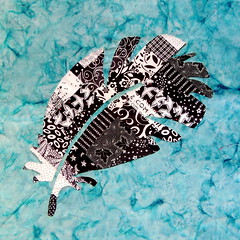
Here's the result of my Sunday night (and Monday night) slow stitching.

It is #50 of my 365-project and will likely become a cover for a throw pillow.

The large size of the appliqué and the many seams in the crumb-pieced black and white made fabric, gave me the idea of using a new-to-me technique for securing/marking the appliqué: back-basting.


More Crumb-piecing
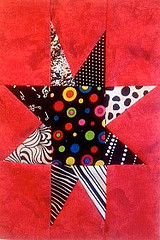
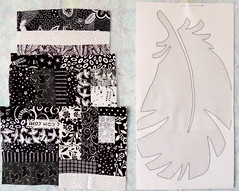
The leaf silhouette is the same I used to produce the tiny pink feather pincushion which was my first project in the series of 365 feather-related efforts.  I enlarged it to 8-by-16 inches and then used it as a reference when putting together the small scraps from my black and white scrap bin.


Appliqué Feather in ProgressEarlier this year, a friend explained back-basting to me in a way that I finally got it ... but didn't actually try it until this week. Although the feather shape was lightly marked with a chalk pencil on the front and not the back, I used the back basting technique to stitch along the marked line to secure the two pieces of fabric together (with red thread).

Rather than attempt to turn under the edges of the black and white crumb-pieced fabric, with all those seams and the extra fabric in those seams, I used reverse appliqué and needle-turned the teal batik background and stitched it down to the black and white fabric underneath.


Appliqué Feather in ProgressI removed the basting and cut away the background fabric a few inches at a time, revealing the black and white fabric underneath, a little at a time. after all the applique was done, I turned the piece over and cut away the excess black and white fabric from the corners.

I loved how the back-basting technique held the fabrics in place–especially that skinny little feather spine–and, although it added to the time to prepare the piece for appliqué, I know I'll be using it again ... and I'll be using more made fabric in appliqué, too.  As an experiment in trying something new, this project was a win-win for me.

I'm linking this post to the lists for Esther's WOW (on Tuesday in the US) and Angie's Appliqué Tuesday ...  on Wednesday and WIP Wednesday on Freshly Pieced.

(I confess that one of the reasons I think that appliqué appeals to me right now, is that I'm brushing off my skills and finding the courage to begin Esther's fabulous Love Enwined BOM).

Sunday, August 04, 2013

A New project on the Design Wall

More Crumb-piecingI guess I was on a roll ... because I couldn't resist spending some time this afternoon continuing the scrap bin clean-out.

I sorted out the black and white scraps and made more fabric. The piece on the design wall is approximately 10 by 16 inches, as is the enlarged feather drawing I plan to use for some appliqué. beginning tonight as my Sunday evening slow stitch project.

Earlier today, the curb-pieced flying geese, now sewn together, came off the design wall. It's resting while I make a border decision. I had a little brainstorm today ... I'm excited.

Flying Geese assembled

(I know it doesn't look so different, but it now has sashing between the strips of geese :-)

A Foodie's Favorite Time of Year

Bag Full of Goodness from the Farmers Market
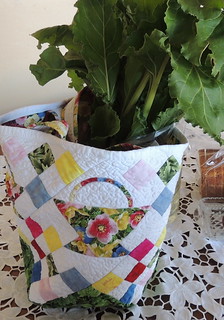
It's that time of year, when any trip to the local Farmers Market means many tasty meals and new things to try.

I was disappointed that the goat cheese ladies didn't have their feta this week, but happy to find a basket of beautiful heirloom tomatoes on a table in the corner inside. I came home with three of the beauties, picked up some quinoa-millet bread at the gluten-free bakery on the way, and knew I'd be making Panzanella for lunch today.

Heirloom Tomatoes and Fresh Baked BreadPanzanella is an Italian bread salad made from mostly tomatoes and bread.


Today, I tried this recipe for Heirloom Tomato Panzanella from the blog, What's Gaby Cooking?  The bread became garlic herbed croutons, I added some yellow cherry tomatoes to the heirlooms and made a fresh vinaigrette, with lots of basil.

Panzanella

Yum.  

Johnny checking out the Beets from the Farmer's Market Bag
I wasn't the only one excited about all the beautiful veggies and fresh herbs that came home with me from the Farmers Market ... Johnny thought the green tops of the organic beets were irresistible.

It's also that time of year when chile roasters are being set up all over town.  I bought chiles, both fresh and freshly roasted, too, and told myself I was going to taste my way through all the varieties available this year as part of my continuing chile education.

Saturday, August 03, 2013

Plain Geometry Amish Quilts Exhibit

Friday evening, I went to see a small exhibition of Amish Quilts at the International Folk Art Museum.

Although I could argue with some of the information provided as educational facts by the curator, I enjoyed the quilts very much.

I thought this 1950's quilt, identified as "Windows,"  from Indiana was quite modern looking.

Windows

I especially liked the asymmetric placement of the colored bars and the detail of how the design was continued into the outer border. 

I think I liked this wool, monochrome log cabin made in Lancaster County, PA, c. 1885,  mostly because I have never seen anything like it. 

Log Cabin

The quilter in me wonders about just how boring making all those blocks from one fabric would be ... but I like the effect. It is also meticulously hand quilted along every one of those seams. 

I rarely add plain borders to my quilts, but I loved the effect and the proportions of this one, on a Trip Around the World quilt made in 1935 in Mifflin County, Pennsylvania. 

Trip Around the World

As you might expect, there is some lovely quilting in that wide border, too. 

Another border detail that made me smile was on this Drunkard's Path quilt, made in Holmes County, Ohio, c. 1928. 


Drunkard's Path

The appliquéd shapes are the quarter-circles left after the drunkard's path pattern was cut from the fabric.  What a great way to use all those small scraps.

Although I never found the hexagons in the quilt below, labelled "Bowties and Hexagons," made in Pennsylvania, c. 1932 from wool and cotton, I loved the way the quilter played with color and value in this quilt ... and the secondary pattern of 8-sided OCTAGONS was pretty cool, too. 

Bowties and Hexagons

I couldn't figure out how to embed a Flickr photoset as a slide show into this post, but you can click over to Plain Geometry Amish Quilts Exhibit, a set on Flickr, to see detail photos of these five quilts, as well as my photos of the rest of the exhibit.  Note that the names of the quilts are as they were identified by the curator.  You might disagree with a few of them (I know I did ;-)

If you are in the area, the exhibit continues through September 2.

As this is how I spent my Friday night–not exactly stitching, but definitely being inspired to stitch ... I'm joining Friday Night with Friends. Maybe some of my friends will be inspired, too. 

Friday, August 02, 2013

August Goal for A Lovely Finish

I've been going back and forth (and back and forth) in my mind when thinking about what project I'd like to focus upon for a Lovely Finish in August.  I recently came across a very old workshop project (a flower wall-hanging) that was calling my name, but ultimately the siren's song from my design wall insisted I choose to do something with these over-sized, crumb-pieced flying geese blocks that I have been making as my Daily Feather project for the past week and a half.

All the Crumb-pieced Flying Geese

I have been STARTING lots of possible quilts as part of my effort to make 365 "feathers" and I think it will be good to see more of them become finished and put into use.

Red Crumb Square
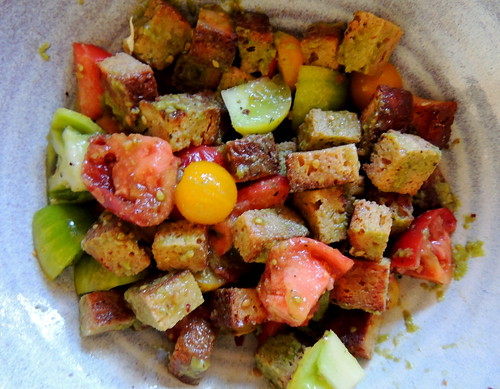
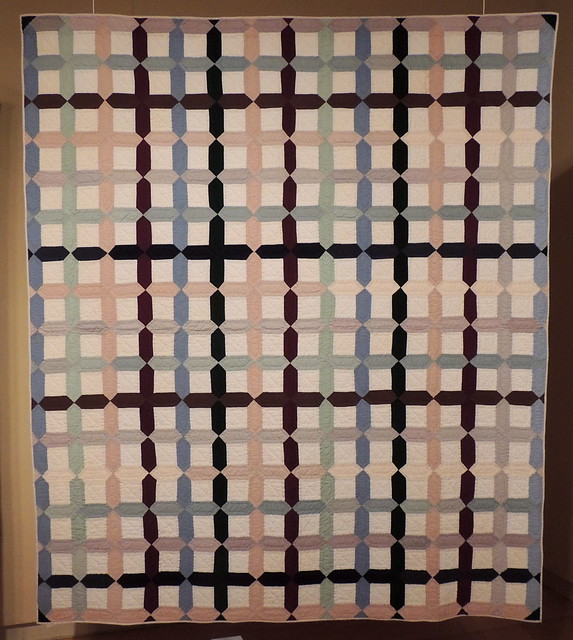
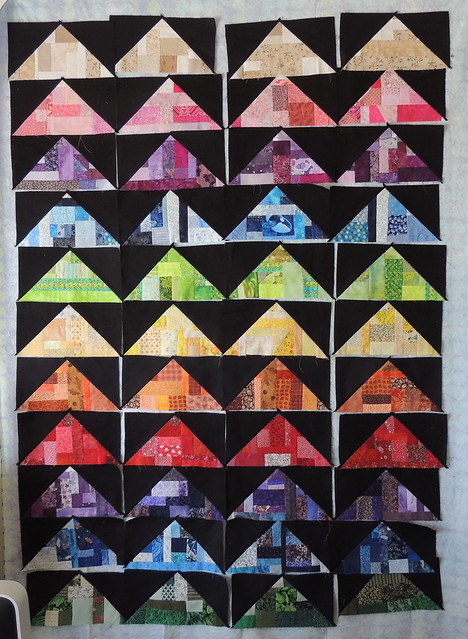
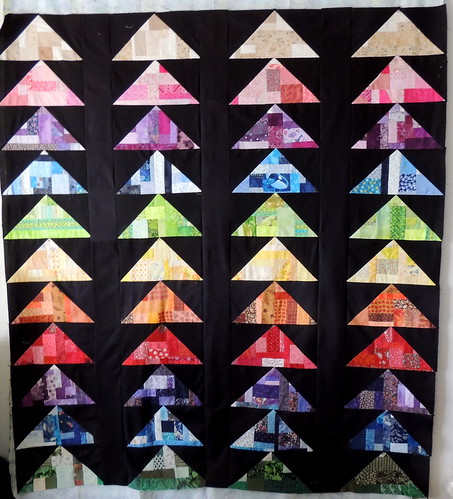
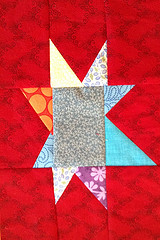
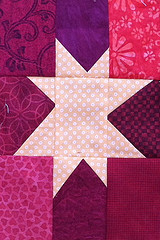
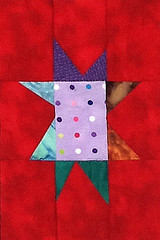
The flying geese were mad using the 4-at-once, no-waste method. You can find directions for that in my Flying Geese Tip Sheet on the Tips, Tutorials and Projects page.

I started by making a 13 1/4 inch square from all the often-too-small scraps from one of my sorted-by-color bins. I added four 6 7/8 inch black squares to make four flying geese that will finish at 6 by 12 inches.

I love working with scraps and almost always start there when making blocks for the Block Lotto or my own projects, but it was becoming harder and harder to find scraps that were large enough.  After making all these geese, I can really see what's left ... I may have to make a quilt from all the "uglies" next :-)

In Black & White
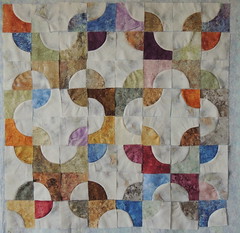
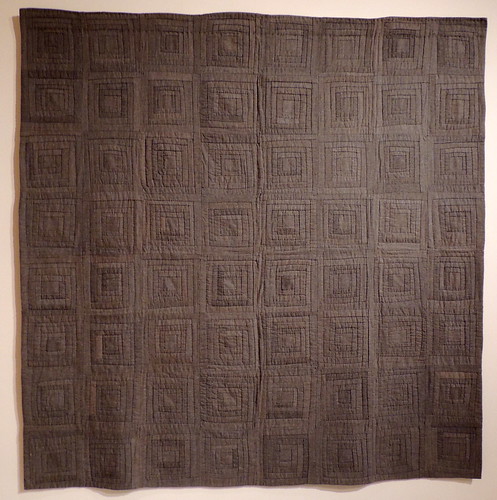
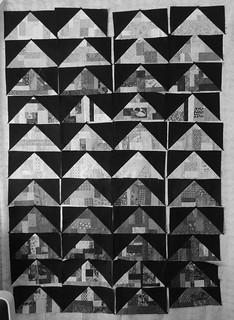
Even though these blocks seem to be all about color, as I have been arranging and rearranging them all the design wall, I thought it would be interesting to look at them in terms of value. This is the same photo as above, converted to black and white.
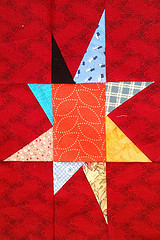
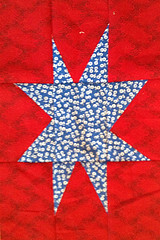
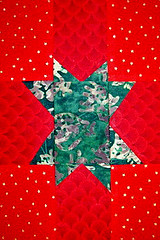
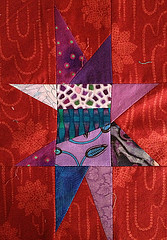
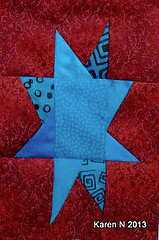
I'm not sure if this view will inform my layout decisions, but it's interesting.

I'm joining the goal setting party for #aLYoF and also the Weekend Update on the Block Lotto.

There's an Amish quilt exhibition at the Folk Art Museum that I want to check out this weekend–maybe I'll be inspired and a decision about what to do with these blocks will be made. (clearly wishful thinking)

Thursday, August 01, 2013

Design Walls and the End of the Month-Beginning of the Month Rush

Just about the only time the Block Lotto feels like work is during the few days at the end of the month-beginning of the month, when lots of time-critical things need to happen:

  • Preparing the list for the drawing and getting the list and directions to whomever is choosing the winners ... or choosing the winners myself when no one volunteers
  • Cropping and resizing all the block photos from the sneak peekers so they can be used in the virtual quilt
  • Following up with the winners
  • Preparing the mailing information and sending it out to everyone so that the winners can start receiving their blocks
  • Posting the information for the new block
  • Creating the block pattern directions (unless we are using a tried-and-true pattern on the web)
  • Archiving the list of blocks made ... then updating the at-a-glance reference page with the new info
All but one of the things on the list are completed.  Yay!  Then I can sit back and enjoy seeing everyone choices in the blocks they make this month.  I love the way this month's virtual quilt came out–we're making a 6 by 9 inch rectangular variation of Bonnie Hunter's Maverick Star block.

GInny-Star1Ginny-Star4Angie-Star1Kim-Star6Karen-Star1
Karen-Star2Julie-Star1Karen-Star3Kim-Star1Michelle-Star
Pat-Star3Kim-Star2Margaret-Star3Kim-Star3Ginny-Star2
Sophie-Star1Margaret-Star1Ginny-Star3Julie-Star2Margaret-Star4
Margaret-Star2Pat-Star1Julie-Star3Pat-Star2Karen-Star4
Andi-StarKim-Star4Pat-Star4Kim-Star5Sophie-Star3
You can find full-size versions of these virtual block photos in my Flickr photo set Tall Liberated Stars.
Things are also getting interesting on my real design wall.  The number of giant-sized flying geese made from small scraps has grown to 36.  It's almost time to play--arranging and re-arranging them and putting them all together.

36 Large Geese on the Design Wall

The bonus is that I have been systematically cleaning all the usually-too-small scraps from my scrap bins. Win-win!  And I have some colorful distractions whilst wrapping up the monthly rush for the Block Lotto :-) 
Related Posts Plugin for WordPress, Blogger...