Saturday, May 31, 2014

Just Because ...

Even though I posted my green blocks yesterday, this morning, while I was waiting for the Block Lotto deadline for posting blocks to arrive so I could organize the drawing, I couldn't resist pulling out ALL the Briar Patch blocks I've made so far, and putting them on the wall, just because.

34 Briar Patch Blocks

These blocks represent 34 of the 80 paper foundations in the pattern. The layout is nothing like this, but this is the way I "see" them ... so who knows what will happen when I have made all the blocks.

Here's the cover of Judy Niemeyer's pattern so you can see how it's supposed to turn out.

Edited to add that the link above will take you to the pattern–I'm sorry if that wasn't clear.

It probably was the rainbow colors she used that first made me think that it would be good for using up scraps.

I have been making these blocks each month, following the course I set when I did a workshop with Judy many years ago.  Today, I probably would have made slightly different choices and reversed the placement of the "light" and "dark" black and white prints.  Of course, there are (almost) no wrong answers in quilting ... I think it's one of the things I like about it.


Friday, May 30, 2014

End of May ... Green Scrappy Blocks and Projects Begun and Finished


Scrappy Green Briar Patch BlocksLittle things make me happy ... like realizing earlier this week that there was one more Saturday in May and so I had time to make and share some scrappy green Briar Path blocks–the last of the projects I'm working on as part of the Rainbow Scrap Challenge. You can see all the Briar Patch blocks I've made so far here.

At the beginning of the month, I thought I'd work on more green projects ... but it didn't turn out that way.  I did start some other projects and mostly finished them.  Here's my recap for Barbara's NewFO challenge.

2 projects and a 3rd, made from the cut-away bitsIn May, I made the I-Spy Stars quilt and the little pinwheels top, inspired by using the bonus triangles. The pinwheel quilt isn't quilted. I was recently gifted with some tiny buttons that are part of my plan for it. The sewing machine cover was started in April, but finished in May.

My name tag and Sophie Junction signpost piece were begun in May as something to stitch while watching TV.


My New Guild Name Badge

Sophie Junction Cross Roads

Proto-Kitty's Face
I also played around with an idea for a Kitty Softie and made this prototype ballet kitty softie.

In June, I plan to make more kitty softies and many (many!) scrappy yellow blocks for four rainbow scraps projects.

I'd like to finish putting together the top for the Feather Bed Quilt and start quilting it.

And I really want to kick off a new project for the 12 weeks of summer that will make use of those very old neutral and cream swap blocks as a scrappy background.

Blocks made from Half-Square TrianglesI rarely commit project lists to blog pages because I fear life or another interesting project will distract and I'll end up getting none of it done.  Curiously lists and project plans DO work for me for other things ... maybe I resist anything that turns what's fun into a commitment, a deadline ... work.

Are you a list maker?  Do you create project plans or schedules for your quilts? Does it still feel like play?

1000th Post Giveaway Winners and Playing Catch-up

I thought I would have a  new finish to share today, but last Friday,  I strained my back moving a heavier-than-expected box that was delivered when I was away.  It put me out of commission for a few days and has slowed me down for the past week.


But I did manage to choose three winners for my 1000th post giveaway and contact them.  

(I found I couldn't pick just one, so I generated three numbers.)

I completely forgot to share the results here until this morning.  

And the winners are: 


I will be pulling fabrics and making your prizes soon.  Also vying for my attention in the near future are the usual end-of-the-month/beginning-of-the-month rush of activities for the Block Lotto and finishing up the last quilt for the Cotton Robin ... I keep meaning to double check the deadline for the Cotton Robin quilts, but never get around to it–a sure sign of what denial looks like on me ;-) 

As the Block Lotto sneak peekers know, I sent out the most tardy, most sketchy block pattern ever for the June block.  This one could use a tutorial (or two or three) about some of the techniques involved and June is only two days away ...

Finally joining the local guild SEEMED like a no-brainer, good idea, but I realized this morning that this guild has no speakers, just business meetings with monthly deadlines for things that they want from me, followed by Show & Tell.  Now that my Proto-Kitty is almost done–I have one more small tweak in mind–I'll be making a few more for the guild's gift shop/booth and some ribbon toppers.  At least I am meeting some local quilters.  And at the next meeting, we're making placemats/napkins–all for a good cause, but ... I'd love to see an occasional speaker or two and have a chance to learn something new in a workshop.

... And I really want to get back to my Feather Bed quilt! I thought that it might be my goal for a Lovely Finish in June–this quilt is for me and it would really put a smile on my face to finish  it and put it on my bed soon ... but I am going to have to play catch-up pretty quickly to make it happen.

Wednesday, May 28, 2014

Inspiration ... And Where It Takes Us

This month on the Block Lotto, I suggested we blog about inspiration. It was, perhaps, a silly question, because I think most quilters are inspired by, well, almost everything. For me, it is the process by which inspiration morphs into creation that I find especially interesting ... and I especially appreciate blogger-quilters that share that process.

Last week, Julie offered a giveaway on The Intrepid Thread. For a chance in the drawing she asked everyone to tell her what new quilt pattern from Quilt Market they had seen and wanted to make most ... I thought it was an interesting idea, but realized that while I may be inspired by the quilts I see, the inspiration does NOT turn into an urge to make the same quilt for me.  I realized that I look at beautiful quilts and see block designs and other shapes, color-way ideas, quilting design and other elements.  Those bits and pieces of ideas do find their way into block and color ideas for the Block Lotto and aspects in my quilts, though I'm not sure anyone but me would necessarily connect my inspiration with the source.

The blue and cream Diagonal Bars blocks for this month's Block Lotto were inspired by a red and white quilt from the Infinite Variety quilt show a few years ago.  A charity quilt seen during my guild's show and tell inspired an idea for a future lotto block, though we will, inevitably, make it in different colors.

Show and Tell of Marie's Quilts (charity quilts for kids)

Sometimes I start with a straight forward idea and start asking, "what if." That's how it went when, inspired by Beth's cute Cat, I decided to make one of my own.  What if I changed the square body shop?  What if I made the body with a flat bottom so it would sit upright?  What if I added a tail–would it look like a 5th leg?– and some Siamese-inspired details?

 Proto-Kitty
Beth's Copy Cat (inspired by a knitted one) is on the left and my Proto-kitty is on the right. They are still definitely related, but because I couldn't resist those what if questions, the proportions and other details are a bit different.

Spring Challenge - April's Lovely FinishSometimes a current project inspires an idea for something new. When I was working on my Spring Challenge pillow, I was (pleasantly) surprised at how easy it was to insert the circle (bloom) into the pieced, made-fabric background.

I have an idea for a summer project which will have a different kind of inset circles.  This pillow project inspired to think about using a pieced background ... which led me to remember a set of blocks from an exchange that took place long, long ago.

It was a great block swap, in which each person's block was made from half-square triangles (HST), made in the specified color-way (combined with cream) for each of the other swappers. I asked for neutrals and here's what I received.

Blocks made from Half-Square Triangles

I put these blocks away because, at the time, I didn't think there was enough variation in those "neutrals" to make for an interesting quilt. I'm not sure I still think so, but I think they will also work well as a scrappy pieced background. As I pulled them out and put them on the wall today, I also thought that if you're looking for ideas for HSTeria blocks, thee are some good ideas here.

I plan to turn these twenty 12-inch blocks into a dozen 20-inch or larger square backgrounds. Some blocks will be deconstructed into parts; I will likely make more HST units to add into the mix.  As with the kitty, I will begin with one prototype block and see what happens ... and whether this new idea for old blocks succeeds or fails, I'll likely share my process here.

I'm joining the Linked lists for the topic of the month on the Block Lotto, Freshly Pieced's WIP Wednesday and Vicki's HSTeria QAL.


Wednesday, May 21, 2014

Doh!

When I started thinking of how I would create a cat softie, inspired by Beth's, I noticed that the body was almost pillow like and I thought using a pillow form would be a good place to start.

I remembered a tip I saw on Erin's blog about using an inexpensive bed pillow to create two smaller pillow forms for throw pillows.  So, over the weekend I picked up a 20 x 27 inch pillow for $2.50 at Wal*Mart.  I found her post, but even when I re-read it, I managed to misunderstand ... and actually thought I could stitch twice through the middle of the pillow (I used a walking foot) and then cut it apart between the two rows of stitches to form two pillow forms.

I got about 1/3 of the way across the pillow before the needle broke in my sewing machine.  I sent email to Erin asking if she had any tips and she very diplomatically replied, "Did you take the stuffing out first?"

Doh!

Last night, I picked out my stitching and opened up the pillow.  The stuff inside is exactly the same as the bags of poly fill you can buy ... at less than 1/4 the price. Once I had unstuffed the pillow, I realized that I didn't have to use the icky fabric that the stuffing came in and that my new cat innards could be any shape.

Building a Kitty from the Inside Out
Here's the shape I created from cotton muslin for my test kitty. It's about a foot tall and 8 inches wide, with a boxy bottom (in hopes that the softie will sit up nicely).

It's not the most visually interesting work-in-progress in the studio right now, but it's the one I can share for WIP Wednesday ... and since I cannot stop laughing at how I could misunderstand so completely, I thought some others might be amused, as well as pick up a great tip and remember to read those tips carefully :-)

Yesterday, I picked up the Cotton Robin quilt that I will be quilting and finishing.  It's on my design wall now while I decide how it will be quilted.  I also have my "separated at birth" center that I made as part of the Cotton Robin.  It is similar to the one I sent out into the world to be added to and finished by others–I really want to finish it before my quilt comes home so I can enjoy seeing them side-by-side when it arrives.  I did something like that a couple years ago (though I didn't finish my quilt until long after the cotton robin quilt came home).  Here are those two quilts:

The (separated at birth) Twins

This year's quilts will be very different, but I hope they retain a little of the twin feeling, like these.

Tuesday, May 20, 2014

Hello My Name Is Sophie ... And this is my 1000th Blog Post

My New Guild Name BadgeHello, my name is Sophie and this is my 1000th blogpost at Sophie Junction.

For an occasional blogger like me, it feels pretty impressive. Considering I started blogging here in October, 2005, it's probably less impressive, but still shows some sort of perseverance, I suppose, and is worth mentioning and, maybe even, celebrating a little.

Of course, since 2005, I've blogged in other places–some old and new blogs on Blogspot, some group blogs, and on the BlockLotto.com and so I know the real number of posts by me in blogland  could easily be double that number ...

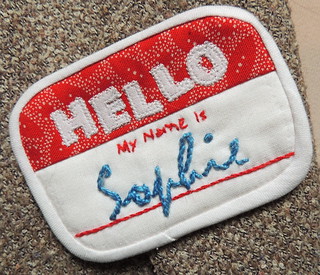
Yesterday, I made the name badge above for guild meetings, it measures 2 3/4 by 3 1/2 inches–close to the size of the stick on labels on which it was based. Although I purposely placed the letters in HELLO askew to make it clear that it was made from fabric and thread, at least one person was surprised when I said something about adding that binding.

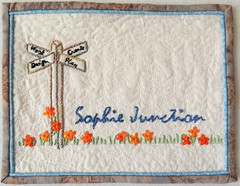
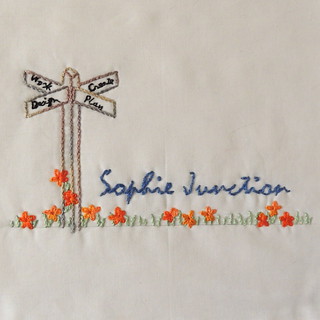
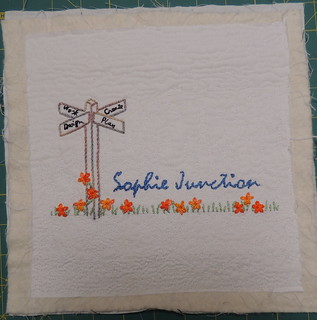
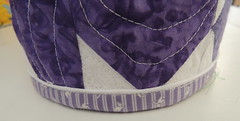
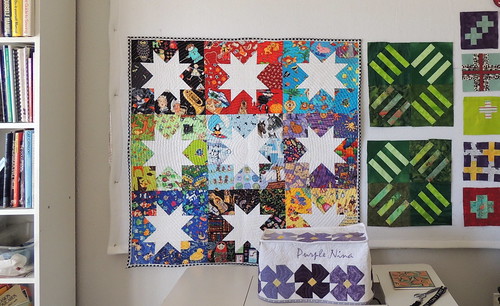
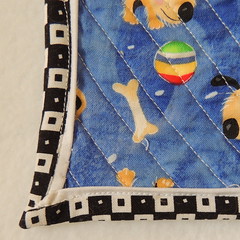
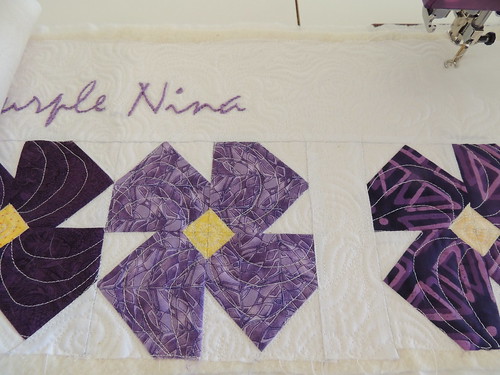
Sunday night, I finished stitching down the piped binding on the 6 by 8 inch Sophie Junction stitchery.

Sophie Junction Cross Roads

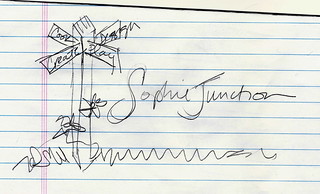
It has replaced the old street sign at the top of this blog ... though I have some ideas about tweaking the design a little more.  After 1000 blog posts, the design probably deserves a little attention.

Detail - Piped Binding
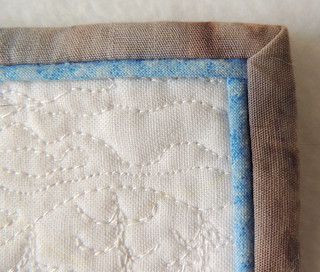
While I haven't given up working on my technique with that faux-piped binding technique, this little piece has REAL piping ... which is still much more in my comfort zone.

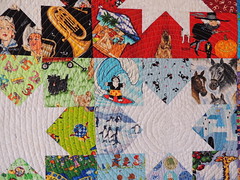
You can also get a close look at some of the free-motion quilting here.  My intent was to create quilty texture, though if you look close you can see that I was thinking about the pine covered mountains, low clouds, scruffy grasses and occasional flowers that I can see from my studio.


Small Tote
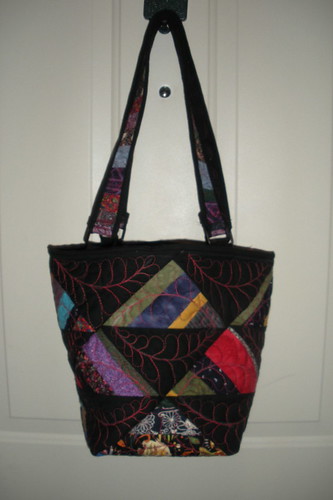
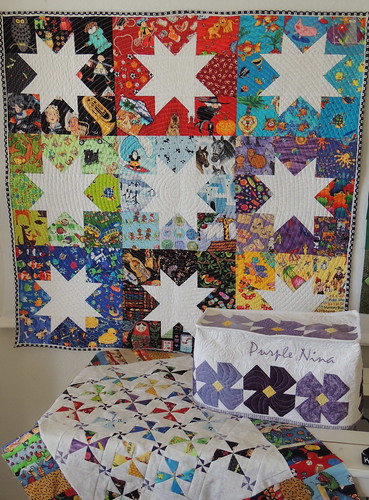
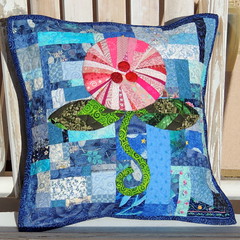
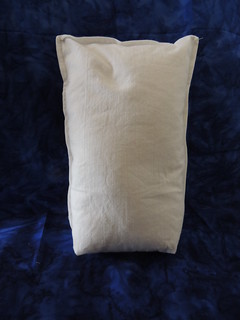
A giveaway seems to  be in order.  Since something shiny and new is not in my budget these days, I thought I might offer a collection of fabrics from my stash in a color-way of your choosing in a quilted tote with along with a little something made by me for you.

I was thinking of a plain, functional tote like this one, though this will be made for you and so I'll want your input.

I's also like to include a little something, a pin a pincushion,  a sewing kit, a small pillow cover, a mug rug, a little doll-sized quilt, or even a skinkin' name badge of your very own ...  or some other small thing that I've made or that you'd like me to make for you that you'd like to have.

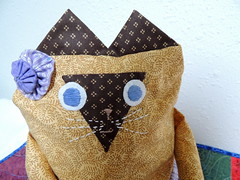
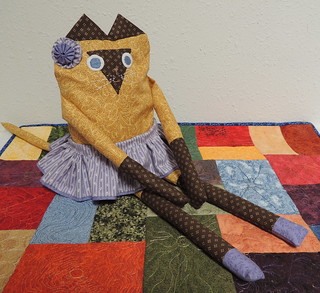
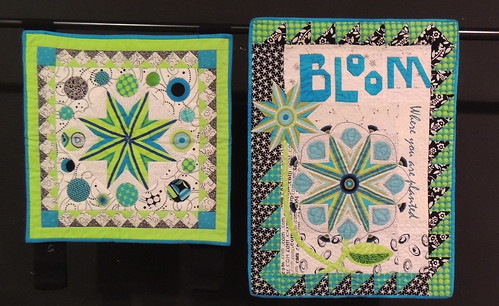
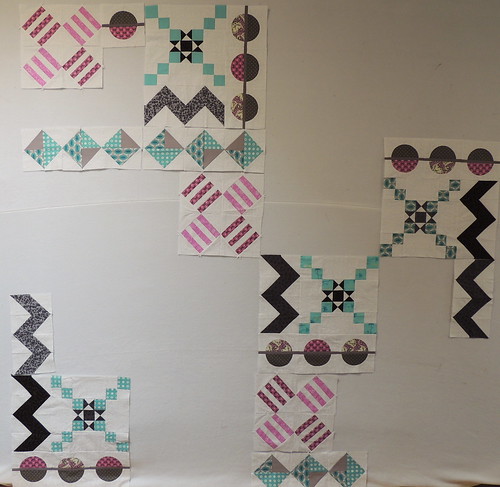
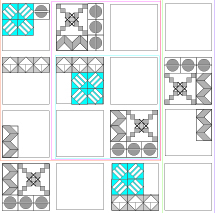
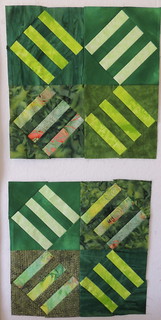
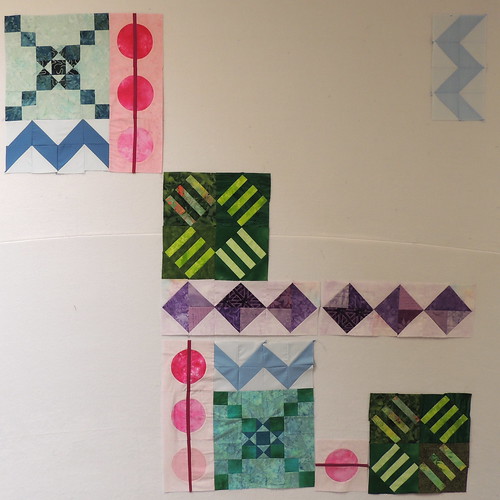
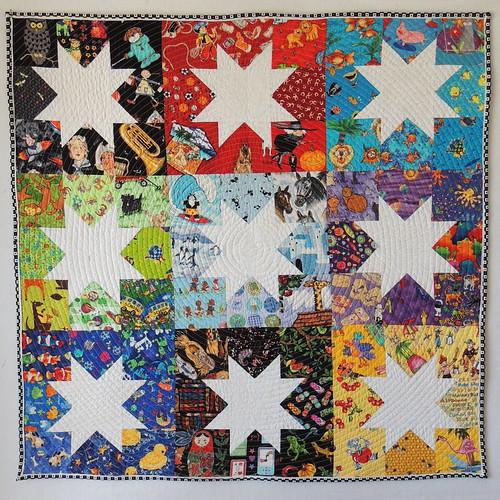
Here are some of those little things I've made for myself and others that might give you some ideas about what you'd like to find in your tote if you won.


To enter, leave a comment telling me what color fabrics you'd like from my stash and what little made-by-me surprise would put a smile on your face and would be useful to you.  I'll pick a winner when I wake up next Monday (5/26) morning.

I considered joining the massive SMS giveaway train last week, but decided that this giveaway is a thank you to those that already follow along with my mis-adventures in quilting and life, not a carrot to attract new followers.  Perhaps I have lasted through those seven and a half years and 1000 blog posts because I do this for fun, not personal or commercial gain ... and I do believe that if you're not having fun, you're not doing it right. (I even have that quote engraved on the back of my iPad.)

Monday, May 19, 2014

May's Mod-Mod QAL Progress

The update for the Mod-Mod QAL was published on Block Lotto last week, here:

It's a Mod-Mod May Update

You can download all my block patterns for the blocks we've made so far on my Free Quilt Block Patterns Page, as well as all of last year's blocks and the ever-popular Violet block.

I shared the blocks for my Color-Block Mod-Mod throw-size on Saturday. I'm making that one as part of the Rainbow Scraps Challenge, with each month's blocks being made in the designated color.

Here's the queen-size version that I am making, with the blocks arranged in what will be their relative position in the quilt.

Mod-Mod QAL Blocks Jan-through-May

A more organized quilter would probably have already made the quilt she's sharing with the world, but I'm finding it fun to be part of the QAL myself, even if I have to share my own missteps and moments of second guessing myself along the way ... 

Each month, you know how many blocks you need to make to make a quilt in one of six sizes (from small 42 inch square sampler to a king-sized 105 inch square quilt) and show you the layout for those quilts.

It's a little silly, but I like to pull out my blocks and put them in position on the design wall to see how the fabrics are playing together so far.

I changed up the orientation of the Bias Bars blocks in this quilt ... but I'm not sure that I won't decide to put it  back the way I originally envisioned it.   Right now, I like it both ways.

You can see what other quilters have on their design wall on Judy's Design Wall Monday post on the Patchwork Times.

Sunday, May 18, 2014

Slow Stitch Sunday at Sophie Junction

On Sunday nights, you can almost always find me curled up in the den, watching TV, with some sort of hand work or paper and pencil in hand.  Sometimes I make lists or doodle ideas; sometimes I pick up some knitting; sometimes I hand piece quilt blocks.  Lately, simple stitchery has appealed.

Quilting DetailA couple weeks ago, when I finished stitching Purple Nina on the sewing machine cover I shared yesterday, I picked up some lined paper sitting on the table and doodled another idea that's been floating around in my head for a while.

Here's how I went from (very) rough sketch to cleaned up drawing to embroidery to quilted piece.

Rough Sketch of an Idea

Cleaned up Drawing/Pattern

Stitching Complete

With Background Quilted

Today I'll trim it and add a skinny (real) piped binding, so it will be ready to have that binding stitched down tonight.  It's only about 9 inches square, so it won't take long and I'll be looking for what's next  . . .  

This morning I'm thinking that something like Beth's Cat softie would make a great contribution to the guild's gift shop for their quilt show later this year so I may be stitching a few of these cute kitty faces later tonight.


I am joining Kathy's group of Slow Sunday Stitchers and then checking out what everyone else is slowing working on today. 

Saturday, May 17, 2014

The Scrap-Happy Saturday After a Friday Night Sew In

I woke up this morning with an idea to photograph these three projects together before the I-spy quilt has been donated.

2 projects and a 3rd, made from the cut-away bits

If the I-Spy Stars quilt and the Violet sewing machine cover could have a baby quilt ... it would likely look like the pinwheels quilt made from the bonus triangles of those projects.

I finished the sewing machine cover last night during the Friday Night Sew-In.  It came out exactly as I envisioned it and fit perfectly, too–win, win!

Why she's called Purple 'Nina Sewing Machine Cover

It's made from eleven 5-inch violet blocks (made last month for the Rainbow Scraps Challenge), 3 on each side, 1 on each end and 3 on top.  It is constructed from two pieces, a top and a long piece that wraps around the machine. The photo below is taken at an odd angle so you can see how I decided to add a wedge to the violet blocks on the top to make it wider on the right side, to echo the shape of the machine.

Top-down view of Sewing Machine Cover

I sewed the pieces together with the seams on the outside and then bound them in white.  At the bottom edge, I gave the faux-piped binding another try ... since there are no corners, I figured it would come together pretty easily and it did. Here are detail photos of the binding and the quilting around the embroidery.

Faux-piped Binding Quilting Detail

Purple 'Nina's cover came together better/faster than expected, so kept sewing ... and this morning, my small design wall looked like this.

Design Wall Saturday Morning

The small blocks on the right side are more of the Tula Pink City Sampler blocks I made for the Chicken River Modern Quilt Guild's opportunity quilt. (They really are like candy). My sewing machine table doesn't usually sit there, I wheeled it over temporarily for the photo op at the top of the post.

Green Diagonal Bars Blocks
I pulled out some green scraps and made the eight Diagonal Bars blocks for my Mod-Mod-Made from Rainbow Scraps-Throw.

You can find the latest update for the Mod-Mod Quilt-Along here:

It's a Mod-Mod May Update

Lately, I've been distracted by the I-spy charity quilt and the mini-pinwheels quilt that was a by-product of it and haven't picked up my green scraps until last night.  It felt good to get back to the Rainbow Scraps Challenge, if only in a small way ... so far.

Since I was in photo taking mode this morning, I pulled out the blocks made for the Mod-Mod throw so far and put them on the design wall, in their relative position for the finished quilt.

I am still not sure how it will turn out when Angela is choosing the colors (as part of the RSC) and the position of the monthly blocks is already determined in the design,  but so far I don't hate it ... and I am developing a plan of what to do with it,  if, at the end of the year, I do ;-)

Rainbow Scraps blocks for Mod-Mod-QAL

Friday, May 16, 2014

A Finish and a Plan for a Friday Night Sew-In

The I-Spy Stars Kids Quilt is quilted and bound and ready to take to the guild meeting next week.

I-Spy Stars Kids Quilt

It was fun to use I-spy fabrics as "background" ... I definitely will be exploring this idea more in the future.

Detail from I-Spy quilt My second effort at spiral quilting worked out pretty well.

As before I started with free-motion quilting a spiral in the center until it was about 7 inches wide, then I switched to a walking foot and continued around (and around and around). I was definitely more relaxed and confident the second time around and I think it shows.

I used the side of my walking foot as a guide, leaving approximately 1/2-inch between the rounds.

Binding Detail I have concluded that for the skinny bindings I almost always choose to make, the faux-piped binding technique isn't a good choice for me–I had too much trouble with the corners.  For me, making real piping is easier, more exact and my corners work.

I haven't given up on faux piping just yet though ...

I am joining the link parties for this finish:

Richard & Tanya's Link a Finish Friday
Fabric Addict's Can I Get a Whoop Whoop?
Amanda Jean's Finish It Up Friday
Thank Goodness it's Finished Friday (TGIFF)

This quilt is also my Lovely Finish for May–I'll add the link when the Finishing party is posted.

Yesterday, I began quilting the sewing machine cover for my purple 'Nina made from 5-inch violet blocks. As I sat down at my machine, I remembered that I had once sketched an idea for quilting these blocks ... so I had to move over to my desk and go hunting for the post with that image. The Violet block was the August 2011 lotto block.

Violet Block - Quilting Design IdeaKim asked how I'd quilt it and this is the sketch I posted.

It took a while, I found the original post, on the old Block Lotto blog, here:

A Quilting Idea for Kim

It wasn't exactly what I had planned ... but once I found it, I decided to follow my own advice.  Something I said in that article is still true:
I usually opt for something curvy and organic looking when the block is leaves or flowers

I quilted the violet blocks as in my old, rough, sketch, outlined the embroidery (which was easier than I thought it might be), then started filling in the background with arcs and spirals and curves, which, in my mind, represented leaves, blooms and buds.

Quilting the Sewing Machine Cover

My plan for tonight's Friday Night Sew in is to finish quilting and assemble the sewing machine cover.

Wednesday, May 14, 2014

The Second Time Around

I've been quilting the I-Spy Stars kids quilt.

Spiral Quilting

I decided to try quilting another giant spiral.

This is my second attempt–my first was the silly strings sample/table topper I made in January.  While I quilted it, around and around, I started thinking about how it's worth the effort to try something new at least twice (unless you completely hate the initial experience) and maybe three times.

Some years ago, when I was developing training classes and then leading them, I often said that the first time is stressful, because you are finding out if the content and how you present it is appropriate, the second time is less stressful, because you've tweaked the class based on your first experience and are now able to notice the more subtle stuff.  By the time I taught a new class the third time, I could relax and enjoy the experience.

It's not so different with trying something new in quilting. This time around, I remembered my biggest discovery from my first experience, that it makes a big difference which way you travel and that you want to go CLOCKWISE so that as you spiral out, the bulk of the quilt is on the left side of the needle.

Later today, I plan to try something else for the second time–the faux piping binding technique.  It's one of those things that seems to have travelled through my local guild and become popular.  I tried it last fall when I re-bound my 2002 Block Lotto Sampler quilt and wasn't entirely happy with the way it looked in the corners so decided using actual piping worked better for me.  But now that I've seen some beautiful examples from members of the guild, I've decided to try this one a second time, too.

Do you ever give a technique a second chance before you decide it's not for you?  Are you ever swayed by trends that travel through your quilting circles?

I'm joining the parties for WIP Wednesday on Freshly Pieced and Let's Bee Social on Sew Fresh Quilts..

Sunday, May 11, 2014

Oh, the Endless Possibilities

If you have made Anna Marie Horner's Feather Bed Quilt, thought about making it, or flipped through the (free!) pattern, then you know that making the feather blocks is only the beginning ... then you have to decide how to arrange them.

48 Feathers on the Design Wall

Should they be perfectly aligned, like soldiers, standing at attention (above), or randomly flipped and rotated (below)?

Feather Blocks, Rearranged

It's another brutally windy day in Santa Fe, so I'll likely stay inside and arrange and re-arrange some more this afternoon.

For a closer look, I've been posting the individual feathers on my 365 Feathers blog.

I'm joining the list of quilters sharing their Design Walls on Judy's Patchwork times.
Related Posts Plugin for WordPress, Blogger...