Thursday, October 27, 2016
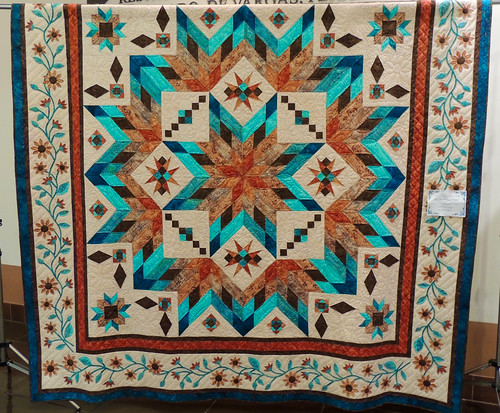
The One That Got Away ...
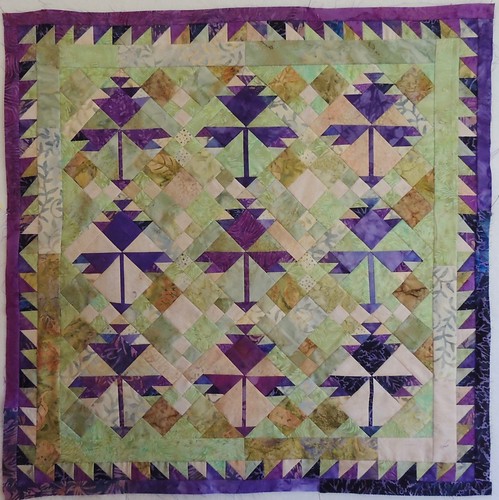
I often buy raffle tickets for quilts, mostly to support the quilters and guilds that make them, but ... I rarely want to win as much as I wanted to win this one. This is another of the quilts at the Northern New Mexico Quilters Guild's show in which I had a small part. I helped piece the center–I blogged about it here, coincidentally just after another move ...


Sunday, October 23, 2016
Picking Up Where I left Off
When you temporarily stop blogging–for whatever the reason–it's sometimes hard to know how to pick up again. Some authors offer an apology and/or explanation ... But I'll just say that things were very, very bad and now they are better.
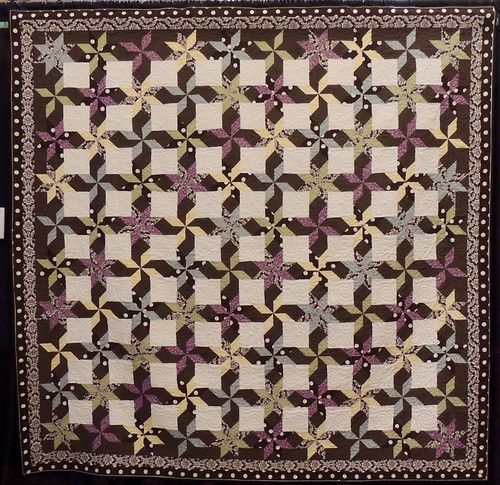
And for a little eye-candy, how about this quilt, which also happens to be the last thing I blogged about before this blog went dark.
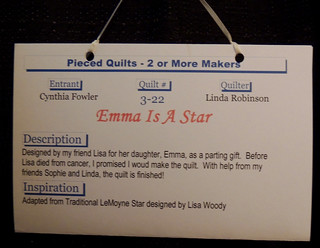
Although I am no longer a member of the guild (which holds too many of it's activities during the work day which doesn't work for me), it was fun to see three quilts there in which I had a part. This is one of them.
After piecing the top of this quilt, I don't think I will ever shy away from Y-seams again :-)
Incredible as it may seem ... I have plans to make something similar for me and maybe putting together a pattern with tips for making friends with Y-seams.
And for a little eye-candy, how about this quilt, which also happens to be the last thing I blogged about before this blog went dark.
This photo was taken at the Northern New Mexico Quilt Guild's Quilt Fiesta, which was a lovely show in a new-and-improved venue at the Convention Center.

Although I am no longer a member of the guild (which holds too many of it's activities during the work day which doesn't work for me), it was fun to see three quilts there in which I had a part. This is one of them.
After piecing the top of this quilt, I don't think I will ever shy away from Y-seams again :-)
Incredible as it may seem ... I have plans to make something similar for me and maybe putting together a pattern with tips for making friends with Y-seams.
Monday, June 13, 2016
Because Sometimes You Just Need a Break ...
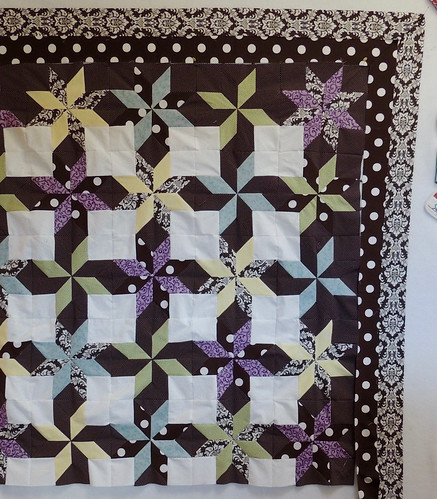
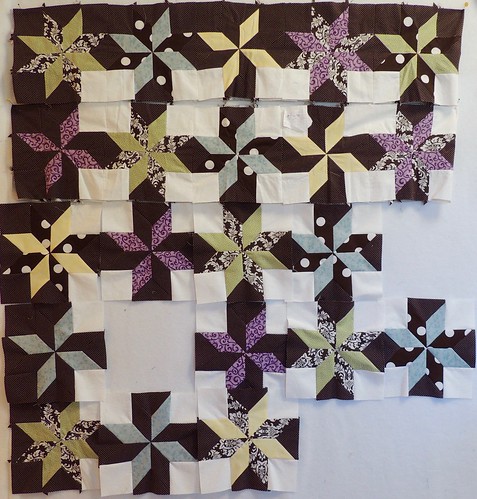
I continue to make slow but sure progress making the 80 Lemoyne star blocks needed ... some of which are shown here on my design wall with the strips intended for the borders.
But this weekend, I really need a break from working with Y-seams and inaccurately cut pieces ... and so I pulled out the golden oldie UFO and made the rest of the Summer Vine blocks from sets of strips–some more coordinated than others–swapped to make these blocks in 2002.
But this weekend, I really need a break from working with Y-seams and inaccurately cut pieces ... and so I pulled out the golden oldie UFO and made the rest of the Summer Vine blocks from sets of strips–some more coordinated than others–swapped to make these blocks in 2002.
Working on one thing can make you really appreciate the other–it was a joy to put together blocks for which the block "kits" are known to be the correct measurements ... and there are no Y-seams!
I now have 95 of the Summer Vine blocks. I will making at least one more–but likely more than that–before deciding upon a layout and sewing them together.
If you're curious, you can read more about this very old UFO with links to the pattern and block directions in this blog post.
Saturday, June 11, 2016
It's a Little Bit Ironic ...
 A funny thing happened after I decided to align the Block Lotto blocks and their fabric guidelines with the Rainbow Scraps Challenge ... I stopped regularly checking in and linking with the Scraphapppy Saturday posts. It has nothing to do with one or the other ... just me and my life struggles.
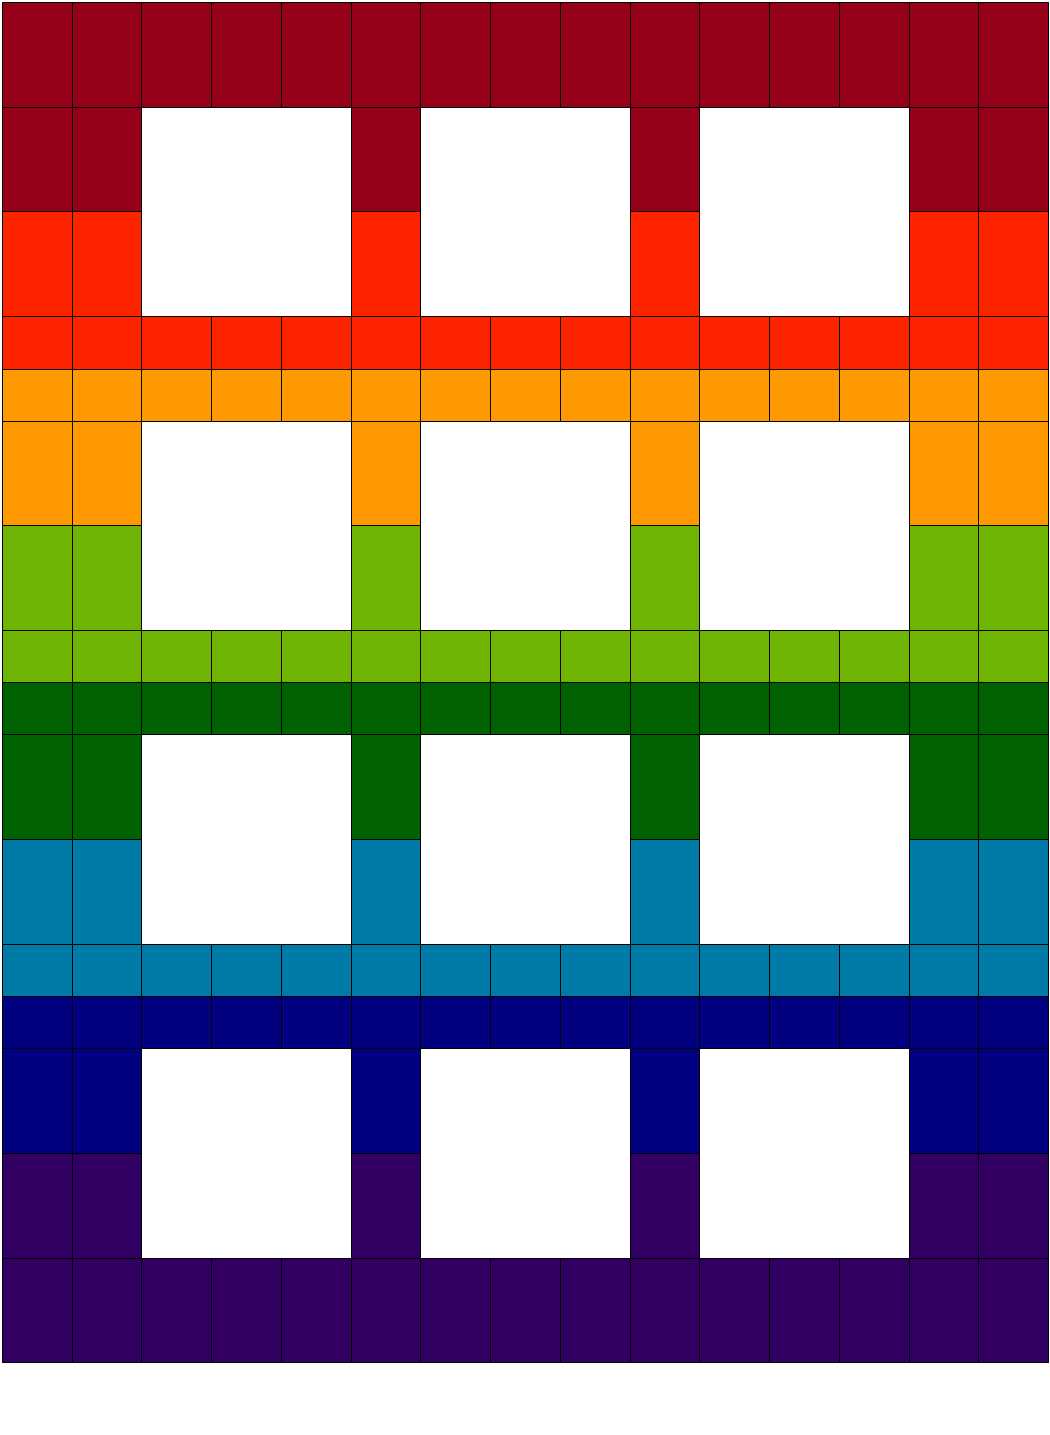
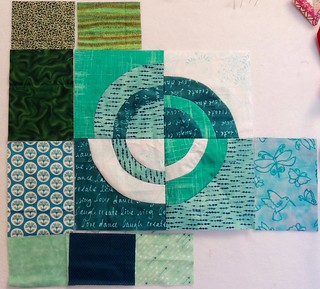
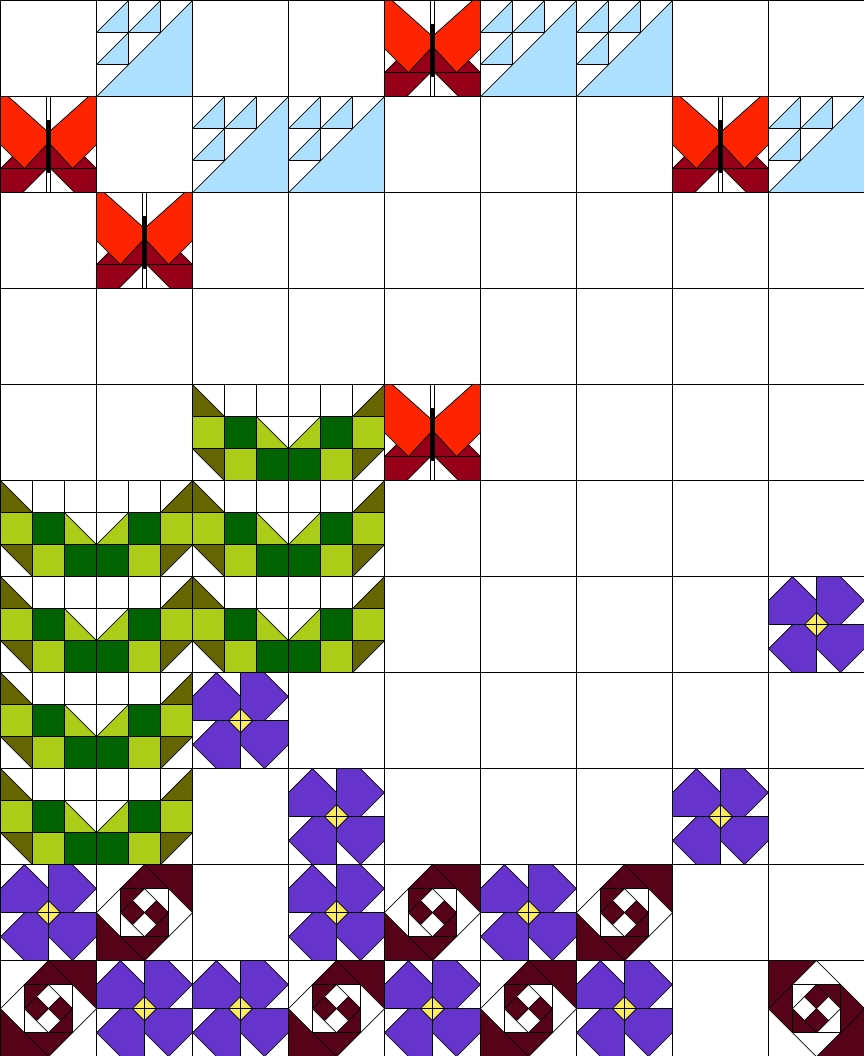
I'm trying to get back in the habit, so I thought to share my progress with my scrappy rainbow sampler, which will be made from this year's Block Lotto block patterns with a setting of lots of scrappy rectangles.
This is June's Improv Bullseye block, surrounded by some of the green and aqua/turquoise/teal rectangles that will surround it in the quilt.
Each of the blank squares in the drawing is filled with 4 of the monthly block. I have made all the blocks so far this year ... but need to play catch-up on cutting the setting rectangles.
I am itching to pull out all the cut rectangles and blocks and throw them on my design wall to get a better idea of how this quilt will look ... but at the moment, the Lemoyne star blocks I blogged about earlier this week are parked there, in their very specific order and this dyslexic quilter is a little afraid to take them down until they are firmly sewn together ...
I know a few quilters are also quilting along and making this sampler. You can find the basics for this quilt and the Old MacDonald's Mystery Sampler (#OMMS) here:
2016 QAL
Tuesday, June 07, 2016
Practice, Practice, Practice ...
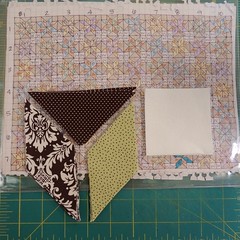 If you saw this photo pop up on your feed and reacted by thinking that it doesn't look quite like a Sophie project ... you'd be right.
 But this project–to finish a quilt that a mother started for her daughter, but couldn't finish–is what I'm working on these days.
All the pieces for the 100 Lemoyne star blocks have been cut, as have the borders.
The placement of the fabrics within the blocks and the layout of the blocks in the quilt has been specified very carefully in a colored pencil drawing on graph paper.
Twenty-some of the blocks had been made and the top two rows assembled. I have probably made one third of the additional blocks needed. Here's a look at the upper left quarter of the quilt-in-progress on the design wall.
I have come to think of this quilt as an opportunity for practice and problem-solving.
I never really thought about how the Lemoyne star consists of nothing but Y-seams–I expect to be pretty good at them by the time this is done. The problem solving comes from the challenge of working with pre-cut pieces that weren't so accurately cut, but since you can't make a too-small piece larger and there are no measurements, templates or extra fabrics ... I am making do and changing up my process a bit so that fabrics are aligned from the Y of those Y-seams, so the shortage/extra ends up around the outside of the block.
It isn't lost on me that each month I ask the Block Lotto community to make blocks of MY design using fabrics and colors of MY choice ... and in this project, I am forced to follow someone else's design choices–it feels a little like a sort of karmic payback. Though, I have to admit that this brown + pastels color way is starting to grow on me ...
Wednesday, June 01, 2016
Counting Blocks - May's (Sad) Effort
This is my continuing monthly count of blocks made for for Prairie Moon Quilts' 350 Block Challenge.
Here's the very short list of the 14 blocks made in May. Added to the 198 blocks made so far this year, my new running total is 212 blocks.
Here's the very short list of the 14 blocks made in May. Added to the 198 blocks made so far this year, my new running total is 212 blocks.
| 4 more scrappy green leaf blocks (arranged in pinwheel fashion) for my graduated sampler. | 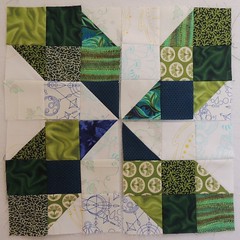 |
| 9 Improv Bullseye blocks–5 for the June Block Lotto, 4 for my rainbow scraps graduated sampler. You can find details about this month's Bock Lotto, a link to the pattern and a coupon good during the first 10 days of the month in this post on blocklotto.com: Improv Blocks in June I also completed the second border on a Cotton Robin quilt which I will count as one more block ... we are all now working on quilting/finishing the quilts, so I will be able to share my part on this secret-until-they-are done round robin. I really had fun adding rounds to two quilts and am looking forward to quilting and binding the third one ... and, of course, I can't wait to see what everyone added to mine. | 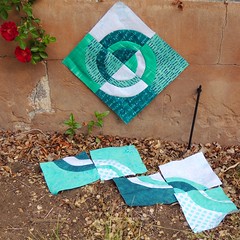 |
Friday, May 13, 2016
Leaf Blocks and a Leafy (FINISHED!) Project
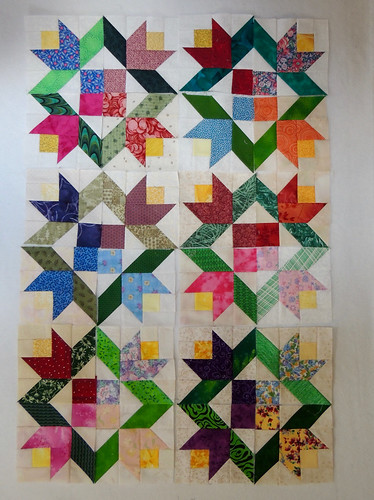
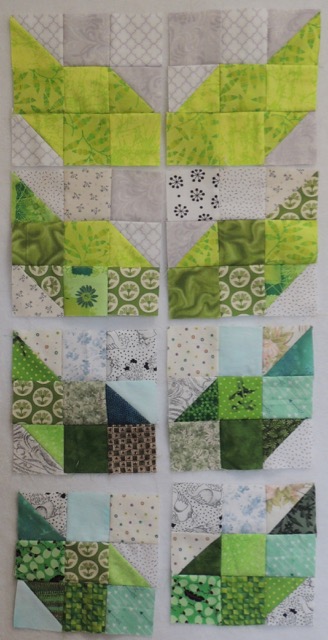
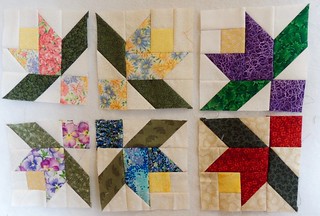
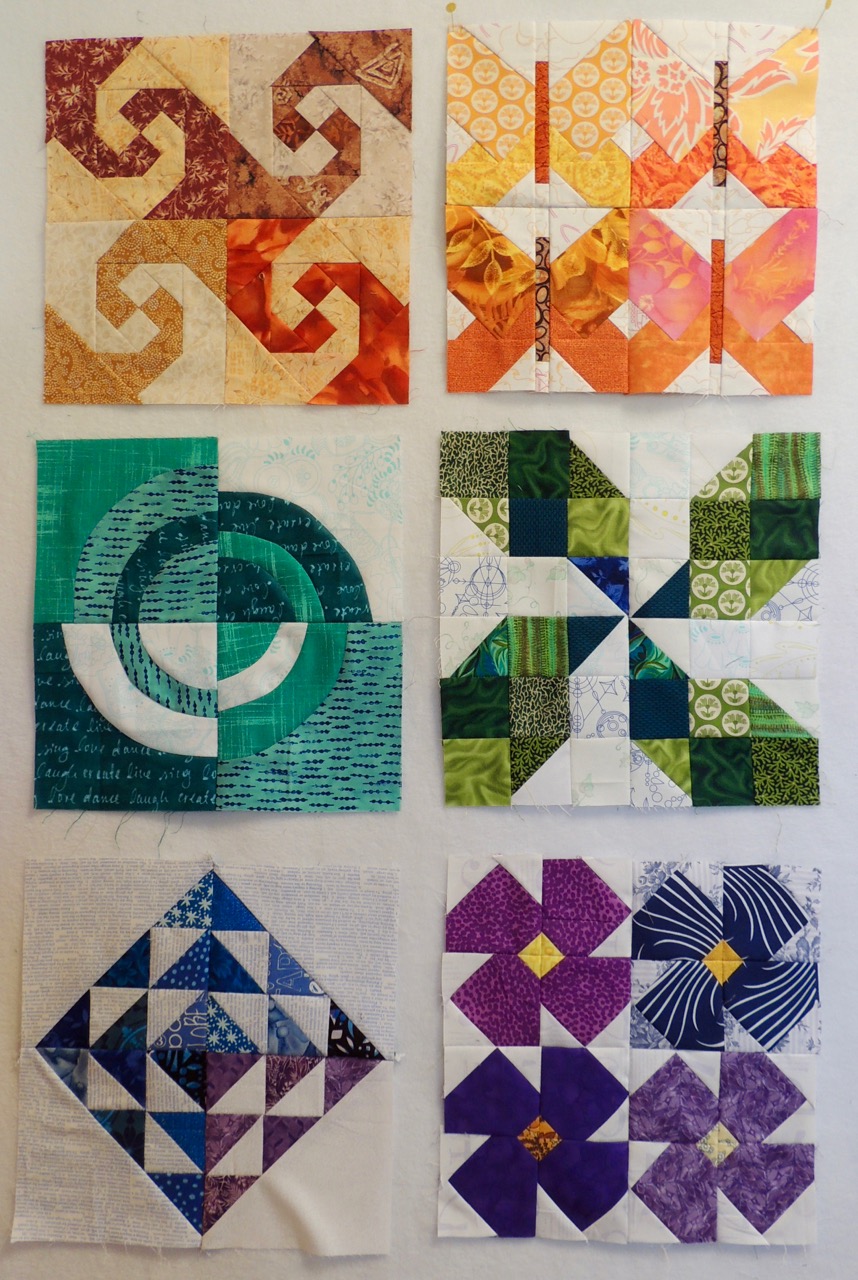
These are the 4 pairs of blocks that I made for this month's Block Lotto.
The guidelines for these scrappy green blocks require at least 4 fabrics–2 green and 2 lights (background). In the photo, my blocks are least scrappy at the top and most scrappy at the bottom.
We are making them in mirror-image pairs.
If you are curious, you can find the details (and link and coupon for the block pattern) here:
Green Leaves of May
I am referring to them as LEAF block pairs, but, of course, you might make them in a non-leaf color and/or arrange them in a non-leafy geometric way.
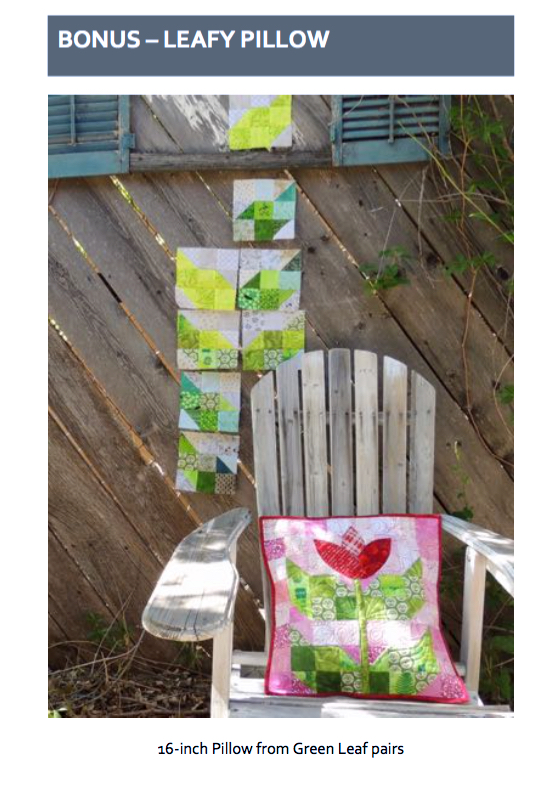
Here are three possibilities, each made from 4 leaf blocks–for my graduated rainbow sampler, I haven't yet decided which arrangement of four blocks I will use.
The first two blocks–which I think of as an X and an O (or, at other times, a butterfly and an emerald) are made from 2 pairs of leaf blocks. The third arrangement, a scrappy sort of pinwheel, is made using four of the same block.
 The other possibility is to go with the idea of scrappy green leaves and use the blocks as a basis for creating a plant. If you look at the updated layout for Old MacDonald's Mystery Sampler, you might see that it is my intended use for these blocks in the quilt.
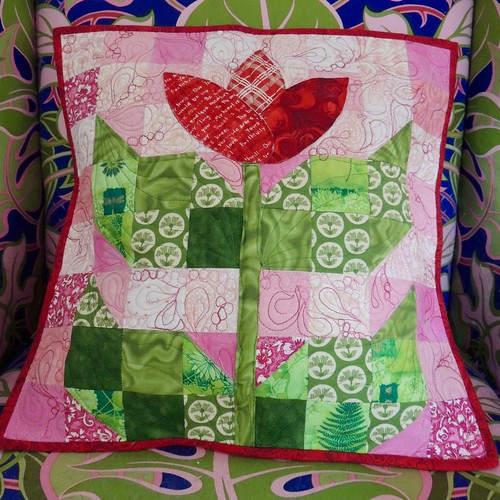
I couldn't resist playing with the idea of creating a blooming plant in a small way, so ... I made a pillow cover.
I love small projects like this 16-inch pillow because it's a great way to work on an idea in a small way, try a new technique, or practice/warm-up before you tackle something larger or perhaps dearer to you. In my case, it had been too long since I'd done any free-motion quilting and needed the practice/warm-up and also wanted to try mixing two motifs in a random way as a filler design.
I also played a little with the limits of combining a scrappy background (including some darker pinks) with the scrappy leaves without losing contrast between them.
The petals which form the flower are prepared used interfacing with fusible on one side only, fused in placed and then secured with quilting. The stem is a 3-D element that is inserted and, if desired, also held in place with quilting.
The pillow has a simple, unquilted, lapped back.
I included the directions for making the pillow as as a bonus in the block pattern for Green Leaf Pairs - Quilt Block Pattern.
Sunday, May 01, 2016
Counting Blocks - April 2016
Here's the list of the 19 blocks made in March. Added to the 179 blocks made during the first quarter of 2016, my new running total for 198 blocks.
Friday, April 15, 2016
How Many Ways ...
How many ways have you used freezer paper in quilting?
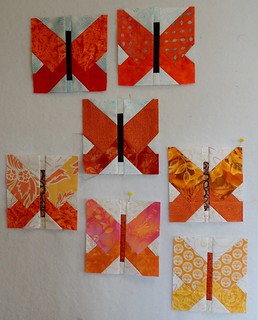
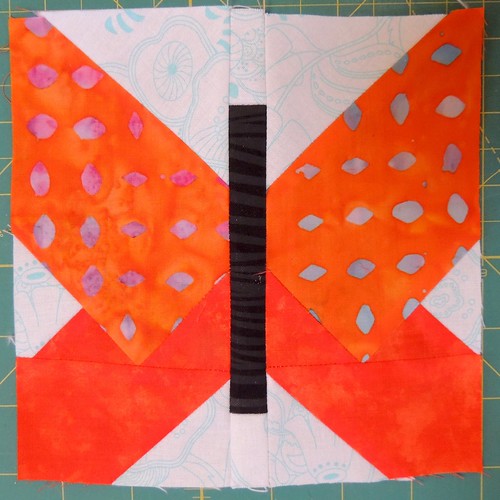
When I was thinking about a way to make this month's paper-foundation-piecing block pattern for the Block Lotto in a non-paper-piecing way, my first thought was, "freezer paper." I'll tell you what I did and how it worked for me, but first, some eye candy–my butterfly blocks for the Block Lotto (top three) and for my rainbow scraps sampler (bottom four).
One of these butterfly blocks is NOT like the others ... because it wasn't paper pieced.
Because the left and right sides of the butterfly are mirror images of each other, I only cut apart one side and the center.
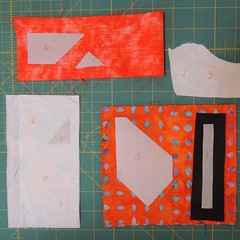
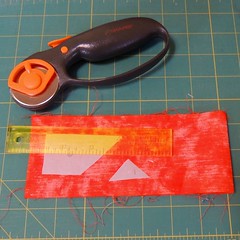
I then ironed my freezer paper templates to the wrong side of the appropriate fabrics. The fabrics that make up the two sides of the butterfly are folded right-sides-together. Using a ruler and a rotary cutter, I added 1/4-inch to each edge and cut all the pieces I need ... until I realize that one of the pieces I cut from background should have been orange. Oops.
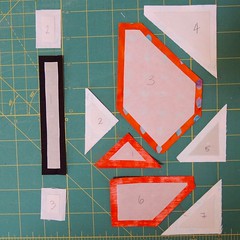 I sewed the pieces together in the numbered order–the same order as you would add the fabrics to the foundation, if you were paper-piecing the block.
Your mileage may differ, but I still managed to goof and sew the first two small triangles together the wrong way on one side. I chalked it up to my spatial dyslexia.
Because I didn't trim the extended seam lines of the points, aligning some of the pieces was a little tricky and some caution was needed there, but the block went together quite quickly.
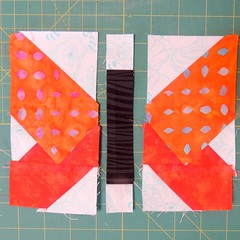 After each side and the center was sewn, it went together just as it's foundation pieced version.
The first block was probably more of an effort for me than just paper piecing the block and felt a little less precise than a paper pieced block, but when I was done, I liked the result, I liked having no paper to remove and I found myself thinking about making the blocks for my Old MacDonald's Mystery Sampler using this technique.
And ... I have now used freezer paper in yet another way for quilting ;-)
When I was thinking about a way to make this month's paper-foundation-piecing block pattern for the Block Lotto in a non-paper-piecing way, my first thought was, "freezer paper." I'll tell you what I did and how it worked for me, but first, some eye candy–my butterfly blocks for the Block Lotto (top three) and for my rainbow scraps sampler (bottom four).
One of these butterfly blocks is NOT like the others ... because it wasn't paper pieced.
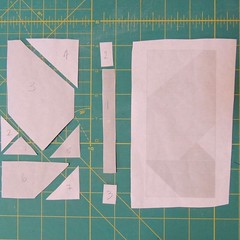
I started by printing the foundation pattern on an 8 1/2 by 11-inch piece of freezer paper (which I had earlier cut and weighted to make it flat enough to make my printer happy.
Then I carefully cut the pattern apart on the lines.
Because the left and right sides of the butterfly are mirror images of each other, I only cut apart one side and the center.
I then ironed my freezer paper templates to the wrong side of the appropriate fabrics. The fabrics that make up the two sides of the butterfly are folded right-sides-together. Using a ruler and a rotary cutter, I added 1/4-inch to each edge and cut all the pieces I need ... until I realize that one of the pieces I cut from background should have been orange. Oops.
 I sewed the pieces together in the numbered order–the same order as you would add the fabrics to the foundation, if you were paper-piecing the block.
Your mileage may differ, but I still managed to goof and sew the first two small triangles together the wrong way on one side. I chalked it up to my spatial dyslexia.
Because I didn't trim the extended seam lines of the points, aligning some of the pieces was a little tricky and some caution was needed there, but the block went together quite quickly.
 After each side and the center was sewn, it went together just as it's foundation pieced version.
 The first block was probably more of an effort for me than just paper piecing the block and felt a little less precise than a paper pieced block, but when I was done, I liked the result, I liked having no paper to remove and I found myself thinking about making the blocks for my Old MacDonald's Mystery Sampler using this technique.
And ... I have now used freezer paper in yet another way for quilting ;-)
Saturday, April 02, 2016
It's a Start ...
If you made it all the way to the bottom of the list of blocks I posted yesterday, then you have already seen my first scrappy orange blocks for this month. This is the "blocks in the wild" photo I took for the block pattern cover.
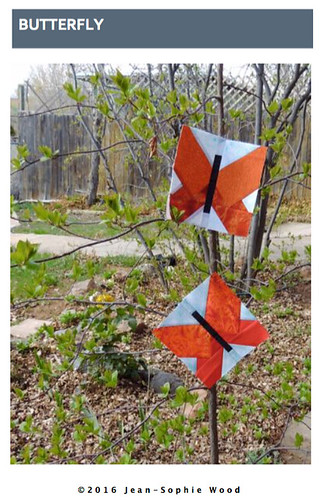
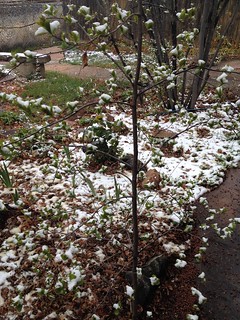
The morning after I took this photo, the backyard looked like this ... and the snow was still coming down.
"You thought it was Spring? April Fools!" says Mother Nature.
These are paper-pieced blocks and in the pattern, I included notes about how I approach cutting/trimming the fabrics for foundation pieced blocks to end up with a block that is on-grain and doesn't have any stretchy bias edges.
Next week, I plan to make more scrappy butterfly blocks for the April Block Lotto and get started on the blocks for my two samplers.
In the meantime, for those that are making one of the sampler quilts I designed of this year's Lotto block patterns, I put together a post with some information to keep in mind when choosing background colors for your Butterfly blocks and some alternative block ideas for those that are making one of the samplers but don't like paper-piecing and won't make this block for their sampler. That's the great thing about quilting–there are always alternatives. You can find it on Blocklotto.com here:
Sampler Saturday - Blocks and Options for Butterfly Blocks
Details for this month's Block Lotto–including the coupon code for the pattern–are here:
Orange You Ready to Try Paper Piecing in April?
It's just a start ... but I am joining the party for the first orange Scraphappy Saturday ... and looking forward to seeing what everyone else is making from their orange scraps.
Friday, April 01, 2016
The Many Blocks of March
This is my continuing monthly count of blocks made for for Prairie Moon Quilts' 350 Block Challenge. Here's the list of the 130 blocks made in March. Added to the 49 blocks made in January and February, the new running total for 2016 is 179.
| I made six Violet blocks for the Block Lotto. You can find the free pattern here. | 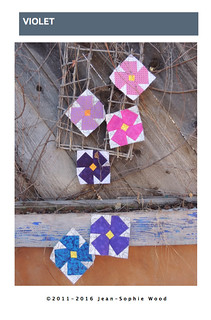 |
| Four more for my rainbow sampler | 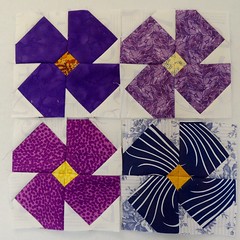 |
| And eleven more for my Old MacDonalds Mystery Sampler (AKA OMMS) | 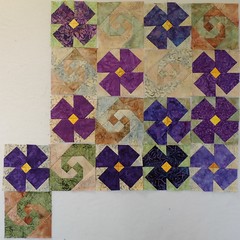 |
| I couldn't resist playing with all the bonus half-square triangle units that resulted from the violets, so I made 18 tiny pinwheels ... | 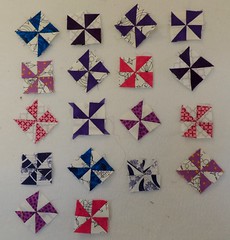 |
| Then used 17 of the pinwheels as one of the "fabrics" to make these eight improv pieced floating squares blocks–chunks really–which became Floating Pinwheels. | 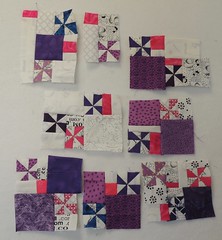 |
| I used the rest of the tiny bonus triangle squares in these nine Clover Blossom blocks | 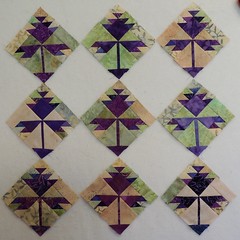 |
| I added these four scrappy blocks (and a whole bunch more HST units, made for the border) to complete the little quilt top | 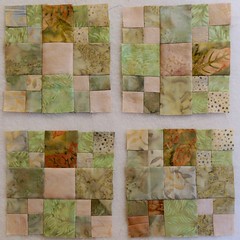 |
| I made this block for the "Everything Old is New Again" challenge | 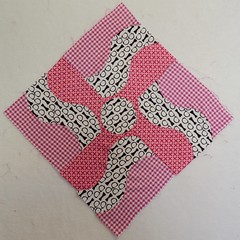 |
| Then played with the design a little and hand-pieced these four Wavy Gravy blocks | 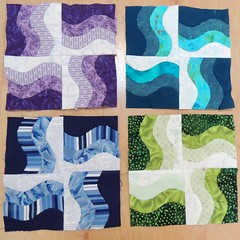 |
| I pieced a bunch of letter blocks, including these nine (for a secret project) | 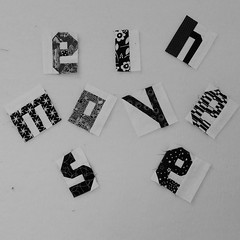 |
| And this complete subliminal alphabet (25 blocks), sewed it together and added borders–it's also ready to quilt. | 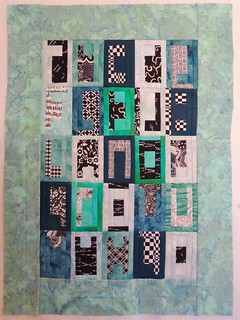 |
| While adding borders to some almost ready-to-quilt projects, a very old UFO caught my eye and I added 29 new Summer Vine blocks to the pile of 35 blocks made in 2002, for a total so far of 64 blocks. | 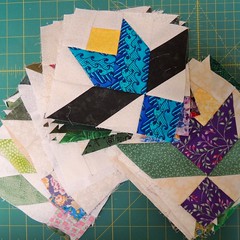 |
| And although I am a little behind on keeping ahead of the Block Lotto, I made two of these foundation pieced Butterfly blocks. The block pattern for this paper pieced block (with tips for creating paper-pieced blocks with on-grain edges (to avoid those stretchy biases) is here: Butterfly | 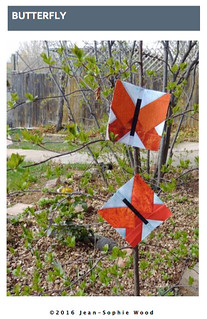 |
Wednesday, March 23, 2016
New Blocks from Old Fabrics
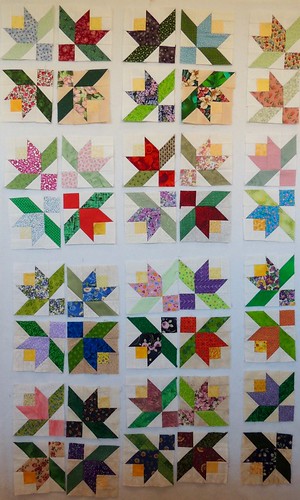 Can someone please explain why I suddenly feel like finishing this very old project? It's become my latest obsession.
Here are 40 of the 54 blocks I've accumulated since uncovering the package of 35 blocks and many many strips from a fabric swap in 2002, some still hermetically sealed in their press-n-seal wrappings.
Since sharing this very old scrap project over the weekend, I have since found a link to the designer's quilt pattern - showing two possible layouts:
Summer Vine and Ebb and Flow
I also found the original block directions from Simply Quilts on the internet Wayback Machine, here:
Two-Sided Quilts
My design wall shows another layout possibility and the one that I am considering, which will include a combination of thick and thin sashing between the blocks - please excuse the oops blocks in the second row ... how come we never see these things until after the photo is taken and posted for the whole world-wide net to see?
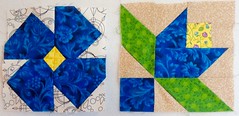
If I ever wondered about just how old some of the fabrics in my scrap bins are ... how about this side-by-side image.
On the left is one of the Violet blocks I made a few weeks ago, using a blue-violet print from my scrap bin for this month's Block Lotto–at least I paired it with a very modern Allison Glass background. On the right is a block that I made in 2002 from the same fabric, which was likely purchased for this fabric swap.
As soon as I prepare the sneak peek for the Block Lotto that will be going out tomorrow–so be sure to post your violet blocks if you haven't already–I will inevitably be returning to this very old UFO that now urgently wants to be finished ... maybe it's not me being compulsive, but the quilt that is pushing me to finish the darn thing ;-)
I am linking with Linky Tuesday and Mid-week Makers with this WIP Wednesday post.
Sunday, March 20, 2016
A Scrappy Sunday Afternoon
A funny thing happened when I went looking for an orphan project to offer up for the Quilt Orphan Adoption event ...
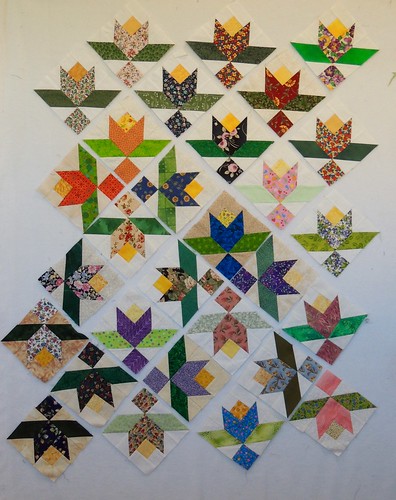 I pulled out the project I had in mind and put the completed blocks on the design wall.
The fabrics in some of these blocks came from a long-ago fabric swap where we exchanged 8 10 inch-strips and 2 squares of fabric, sized and chosen to make two of these blocks. The pattern came from Eileen Sullivan when she was a guest on Simply Quilts. The quilt was called Summer Vine.
(I tried to find a link, but was unsuccessful)
In addition to these blocks, I had a printed copy of the fabric swap guidelines and–fortunately for me–the block directions from the old Simply Quilts website. There were also many strip sets for more blocks, still in the envelopes they had arrived in.
My plan was to count up the number of blocks that could be made from those strips ... but what happened is when I started to do so, I think I discovered why I probably stopped making the blocks - incomplete swap packages and questionable fabrics.
Then I second guessed myself and thought maybe I had misread the swap guidelines ... so I sat down and tried to make blocks from the swaps with missing strips. Way back then, I didn't have scraps or much of a stash. Today, it wasn't such a big deal to dig into my bin of cream and tan scraps and find something close in value to make up the difference. After making those two blocks ... I made four more.
Too many of the fabrics either seemed too old and uninteresting or the quality just isn't very good, so I decided not to pass them on to a potential adoptive quilter. But since I have quite a few blocks made and all those unwrapped strips sets–and they're not all "bad," I am going to cut the strips to make block kits and assemble the rest of the blocks as a leader/ender project. I still haven't counted the number of potential blocks ... or decided what I'll do with them when I'm done making blocks.
I am joining the party for Oh Scrap! with these very old, very scrappy blocks.
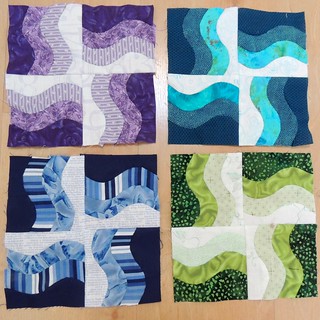 I also haven't decided what will become of the scrappy Wavy Gravy blocks I have been hand-piecing. Now there are four.
For me the most fun has been finding fabrics in my scraps to use in this block. I thought I would stop at four blocks and make a pillow cover (and that still might happen), but yesterday, I put together 2 more groups of four fabrics (in pinks and grays) ... and will likely prepare some more pieces for some slow Sunday stitching.
I'm joining the party for Monday Making.
 I pulled out the project I had in mind and put the completed blocks on the design wall.
The fabrics in some of these blocks came from a long-ago fabric swap where we exchanged 8 10 inch-strips and 2 squares of fabric, sized and chosen to make two of these blocks. The pattern came from Eileen Sullivan when she was a guest on Simply Quilts. The quilt was called Summer Vine.
(I tried to find a link, but was unsuccessful)
In addition to these blocks, I had a printed copy of the fabric swap guidelines and–fortunately for me–the block directions from the old Simply Quilts website. There were also many strip sets for more blocks, still in the envelopes they had arrived in.
My plan was to count up the number of blocks that could be made from those strips ... but what happened is when I started to do so, I think I discovered why I probably stopped making the blocks - incomplete swap packages and questionable fabrics.
Then I second guessed myself and thought maybe I had misread the swap guidelines ... so I sat down and tried to make blocks from the swaps with missing strips. Way back then, I didn't have scraps or much of a stash. Today, it wasn't such a big deal to dig into my bin of cream and tan scraps and find something close in value to make up the difference. After making those two blocks ... I made four more.
Too many of the fabrics either seemed too old and uninteresting or the quality just isn't very good, so I decided not to pass them on to a potential adoptive quilter. But since I have quite a few blocks made and all those unwrapped strips sets–and they're not all "bad," I am going to cut the strips to make block kits and assemble the rest of the blocks as a leader/ender project. I still haven't counted the number of potential blocks ... or decided what I'll do with them when I'm done making blocks.
I am joining the party for Oh Scrap! with these very old, very scrappy blocks.
 I also haven't decided what will become of the scrappy Wavy Gravy blocks I have been hand-piecing. Now there are four.
For me the most fun has been finding fabrics in my scraps to use in this block. I thought I would stop at four blocks and make a pillow cover (and that still might happen), but yesterday, I put together 2 more groups of four fabrics (in pinks and grays) ... and will likely prepare some more pieces for some slow Sunday stitching.
I'm joining the party for Monday Making.
Saturday, March 19, 2016
This Blog Post Brought to You by the Letter B
National Quilting Day isn't celebrated in Santa Fe, so my solo plan for the day is to spend the day in my sewing space and move some recent projects forward by tackling some of the B-tasks:
Adding BORDERS
Preparing BACKINGS and BINDINGS
and maybe even BASTING a quilt sandwich or two.
The borders on my little (24 inches square) Clover Blossom are complete and it's ready for it's backing and some scrappy purple binding to be made ready –that's my Scraphappy Saturday contribution this week.

This one will get a dark teal binding.
Next up is one of the workshop projects from last fall and binding for the scrap bag challenge. I think that's everything that's been "hanging out" in my sewing room. Then maybe I'll organize the shelves and put away all the fabric that's out because I thought it might be used in one of these unfinished projects ... but first, I'm going to employ another B-word and take a BREAK for lunch.
Adding BORDERS
Preparing BACKINGS and BINDINGS
and maybe even BASTING a quilt sandwich or two.
The borders on my little (24 inches square) Clover Blossom are complete and it's ready for it's backing and some scrappy purple binding to be made ready –that's my Scraphappy Saturday contribution this week.
The Subliminal Alphabet quilt has been assembled, backing cut and binding fabric identified ... so I've made some progress there, too.

This one will get a dark teal binding.
Next up is one of the workshop projects from last fall and binding for the scrap bag challenge. I think that's everything that's been "hanging out" in my sewing room. Then maybe I'll organize the shelves and put away all the fabric that's out because I thought it might be used in one of these unfinished projects ... but first, I'm going to employ another B-word and take a BREAK for lunch.
Subscribe to:
Comments (Atom)

