Showing posts with label Appliqué. Show all posts

Friday, May 13, 2016

Leaf Blocks and a Leafy (FINISHED!) Project


Sometimes, it feels like some of my blog posts are me, saying the same old things over and over again ... and I fear that this may be one of those posts. Only the images/projects are new–if you have followed me a while, what I have to say about them may feel very familiar to you, too.

These are the 4 pairs of blocks that I made for this month's Block Lotto.

The guidelines for these scrappy green blocks require at least 4 fabrics–2 green and 2 lights (background).  In the photo, my blocks are least scrappy at the top and most scrappy at the bottom.

We are making them in mirror-image pairs.

If you are curious, you can find the details (and link and coupon for the block pattern) here:

Green Leaves of May


I am referring to them as LEAF block pairs, but, of course, you might make them in a non-leaf color and/or arrange them in a non-leafy geometric way.

Here are three possibilities, each made from 4 leaf blocks–for my graduated rainbow sampler, I haven't yet decided which arrangement of four blocks I will use.


The first two blocks–which I think of as an X and an O (or, at other times, a butterfly and an emerald) are made from 2 pairs of leaf blocks.  The third arrangement, a scrappy sort of pinwheel, is made using four of the same block.

The other possibility is to go with the idea of scrappy green leaves and use the blocks as a basis for creating a plant.  If you look at the updated layout for Old MacDonald's Mystery Sampler, you might see that it is my intended use for these blocks in the quilt.

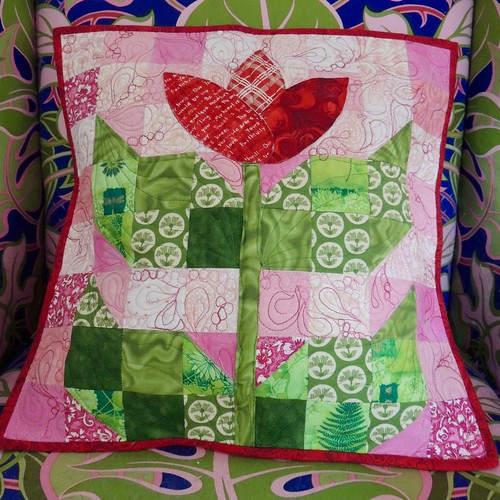
I couldn't resist playing with the idea of creating a blooming plant in a small way, so ... I made a pillow cover.


Pillow Inside


I love small projects like this 16-inch pillow because it's a great way to work on an idea in a small way, try a new technique, or practice/warm-up before you tackle something larger or perhaps dearer to you.  In my case, it had been too long since I'd done any free-motion quilting and needed the practice/warm-up and also wanted to try mixing two motifs in a random way as a filler design.

I also played a little with the limits of combining a scrappy background (including some darker pinks) with the scrappy leaves without losing contrast between them.

The petals which form the flower are prepared used interfacing with fusible on one side only, fused in placed and then secured with quilting. The stem is a 3-D element that is inserted and, if desired, also held in place with quilting.

The pillow has a simple, unquilted, lapped back.

I included the directions for making the pillow as as a bonus in the block pattern for Green Leaf Pairs - Quilt Block Pattern.


Sunday, August 30, 2015

More Slow Stitching in the Pumpkin Patch

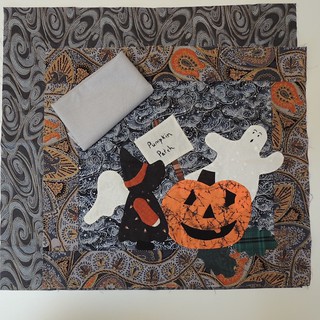
Auditioning FabricsI have finished the appliqué on all the parts included with this orphan and have pulled a couple of fabrics from my stash for the moon in the original pattern and an additional border to make the pillow cover that I plan to make from this a little larger.

I will be pin-basting a couple quilts this afternoon–a task which is my least favorite in quilt making–with the reward of some relaxing slow Sunday evening stitching to add the silvery moon and call this done.

Sunday, August 23, 2015

A Little Hand Applique on a Sunday Afternoon

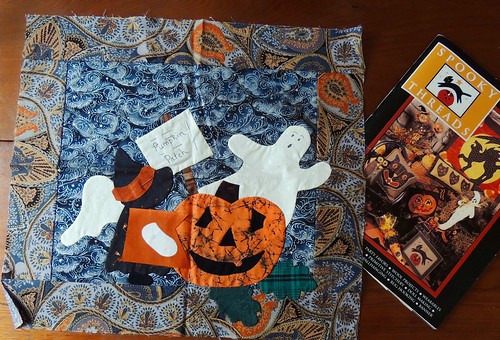
Yesterday was the guild's Red Hen Auction.  One of the lots I won contained a nearly finished Halloween appliqué and book.

Pumpkin Patch Appliqué

I don't make many seasonal projects or Sunbonnet Sue blocks,  so I thought this would be good for me ... plus the price was right, since no one else wanted it and I cannot resist an unwanted orphan.

The pattern for the orphan is not in the book that accompanied it, but I found it on Sentimental Stitches, as part of an Angelic Sunbonnet Sue series. Here's her version.

The designer blogged about the series here and you can find the pattern for the wall hanging here.  Isn't the internet a wonderful resource? A quick search for Sunbonnet Sue + Pumpkin patch and I found it at the top of the search results.

To finish it as it was designed, looks like I only need to add a hand and a star and finish the appliqué ... then decide what to do with it.  Pillow cover, maybe?

It's my plan for some Slow Stitching Sunday later today.

Wednesday, June 10, 2015

Sunny Summer Sunflowers

In June, I am sharing my photos and thoughts on quilts from the Fiber Arts Festival that took place in Albuquerque May 23-25.

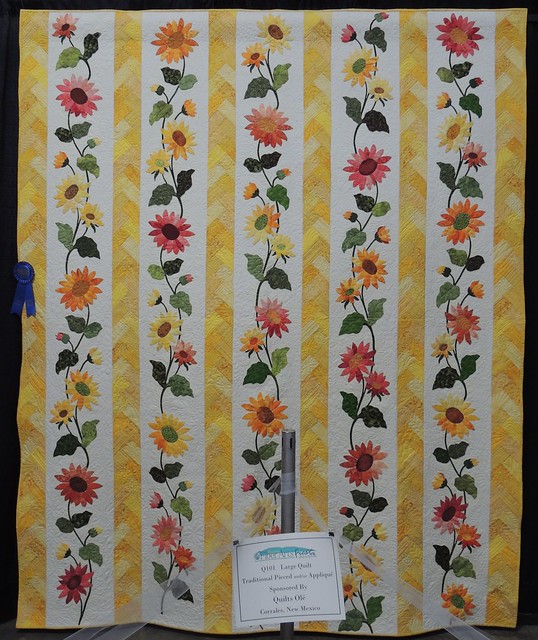
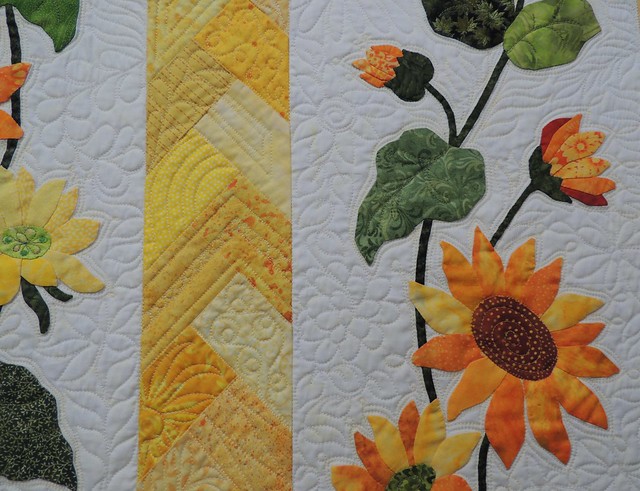
Today's quilt is Sunflowers by Lori Box, quilted by Lynn Horpedahl. 

Sunflowers by Lori Box

It was the first place winner in the category for Large Traditional Pieced and/or Appliquéd quilts.  I love it because of the combination of beautiful needle-turned appliqué, scrappy piecing and interesting quilting design. 

Sunflowers by Lori Box - Detail

The quilter's statement says that it was adapted from a pattern by Be a Mansanarez.

Wednesday, June 03, 2015

Jane Comes to Fiber Fiesta

Each day this month, I am sharing my photos and observations from the Fiber Arts Fiesta which took place in Albuquerque, May 21-25, 2015.

Finding at least one Dear Jane quilt at any given quilt show seems to be a sure thing and it always makes me smile when I encounter one.  I'm not sure if it's proof of the enduring appeal of piecing and appliquéing the 225 patterns from the 1863 Jane Stickle quilt–which you know appeals to a sampler-lover like me–or the fact that as long as I keep seeing them, this quilt has not gone out of fashion and there is still time for me to make one of my own without appearing too woefully out of step with the quilting community.

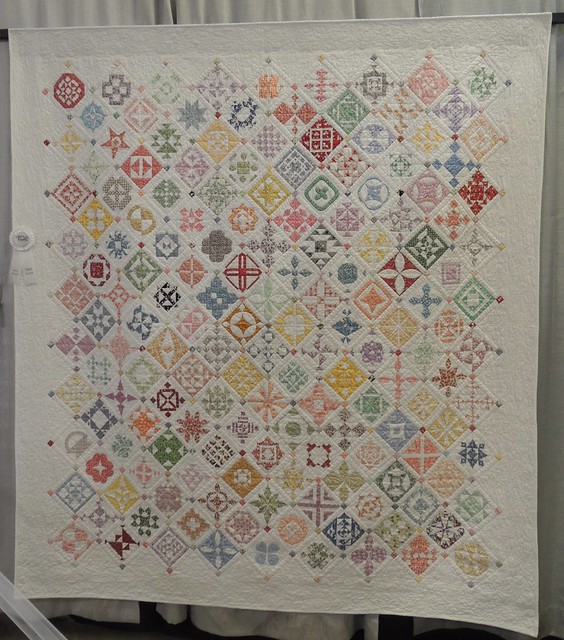
At Fiber Fiesta, I found two "Janes." First, Dear Jane Meet Aunt Grace, by Jan Lehman-Shaw.

Dear Jane Meet Aunt Grace by Jan Lehman-Shaw

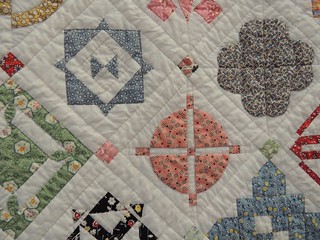
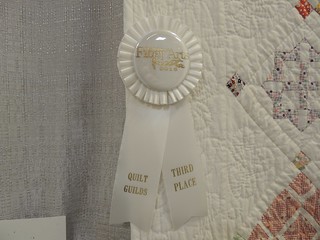
This is an adaptation of the Jane Stickle quilt made from 1930's reproduction fabrics.  It's hand appliquéd, machine pieced and hand-quilted.  It was the third place quilt in the category for large traditional quilts. 

Dear Jane Meet Aunt Grace by Jan Lehman-Shaw - DetailDear Jane Meet Aunt Grace by Jan Lehman-Shaw - Ribbon

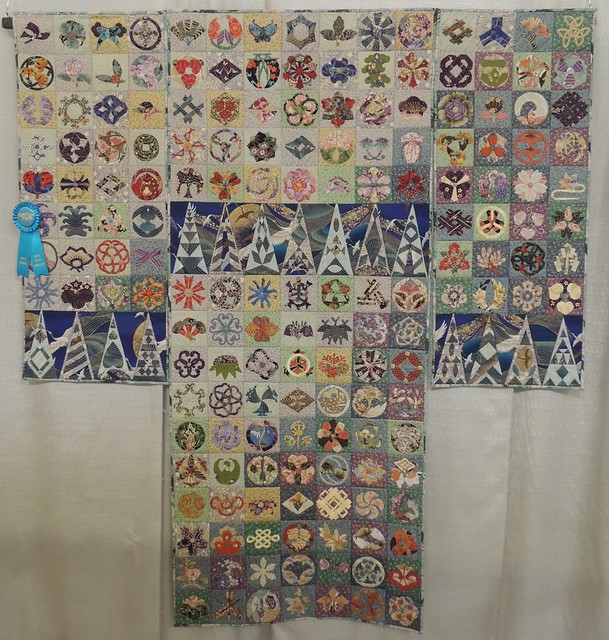
The other "Jane" at the show was in the large innovative quilts category. It is Dear Jane-San, made by Sue Mohr.  This quilt is actually a tryptic of three quilts, side by side.  At first glance, it seemed to be a Baby Jane made from Asian Fabrics in an interesting layout . . .

Dear Jane-san by Sue Mohr

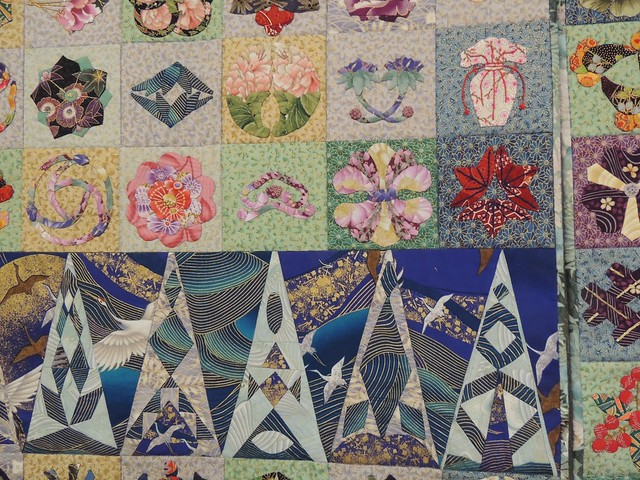
. . .  but, as I started looking at the individual blocks, I realized that the appliqué blocks weren't Dear Jane blocks at all, but Japanese crests. This quilt won the award for Best Hand Appliqué.  I agree, the appliqué is fabulous!

Dear Jane-san by Sue Mohr - Detail

Sunday, April 26, 2015

Pumpkin Seeds?

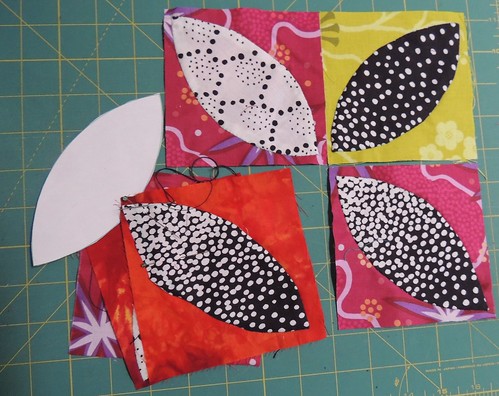
This block design seems to go by many names: pumpkin seed, melon, orange peel.  What do you call them?

First Steps

I think I first learned it as orange peel and in Barbara Brackman's book, Encyclopedia of Pieced Quilt Patterns, the pieced version has been called Orange Peel, Melon Patch and Flower Petals ... but it looks so much like a pumpkin seed, that's my favorite name for this shape.  I am making mine by using needle-turned appliqué.

Each time I see them on a blog (or in a quilt), I want to make some ... the scrap bag challenge presented an opportunity.  I am using any of the scrap in the ziplock I received that are at least 4 1/2 inches wide for the backgrounds–I was a little surprised to find that there are only a couple.  I'll be making a few more later, as my Slow Sunday (night) Stitching project.

Sunday, March 15, 2015

Catching up with (slow) handwork projects

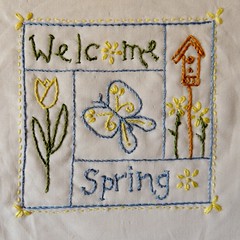
Completed embroideryThe sweet Welcome Spring embroidery that I started a week ago is complete.  (Gail Pan's free pattern is available here.) I've been thinking about some improvisational pieced borders ... but haven't yet made any forward progress on making/adding them.

This finish is timely... it is definitely beginning to feel like spring around here.

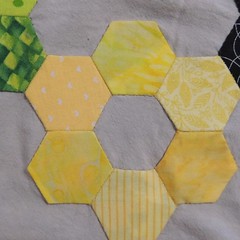
I have made some progress with the hex rings and have now moved onto the next step–appliquéing them to a background.

I have been working on these projects slowly, by hand, in the evenings while I watch (probably too much) television.


Appliquéd in placeThe process is relaxing, meditative and gives you lots of time to let your mind wander and think about things like how I will quilt this little piece.

Last night, it was an opportunity to get my creative mind to calm down after a day of sewing with the Northern New Mexico Quilt Guild–come later today to read about that adventure :-)

Last night while I was stitching away, I had a new idea for the quilting design–it was an a ha moment and now I feel ready to jump into quilting this ... as soon as I finish the slow stitching needed to finish the appliqué.  So that's what I'll be doing for Slow Stitch Sunday.

Do some aspects of quilting wind you up or help you unwind?

Friday, March 06, 2015

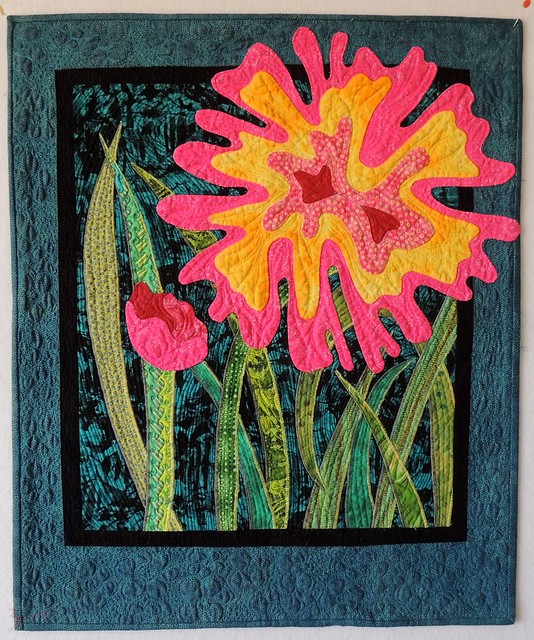
Alium, Abstracted

Alium

The design for my Alium was created in an Abstracting from Nature workshop with Jane Sassaman probably a decade ago–yes some of my UFOs are SO old that I have begun to think of them as Golden Oldie UFOs. In addition to the great exercises that led to creating our own original designs, we learned a few appliqué techniques ... I tried them, but didn't feel they were "me" and it's probably why the finished quilt top remained unfinished for so long. While I was quilting it, I remembered how much I enjoyed the sketching exercises–note to self: must do more of that.

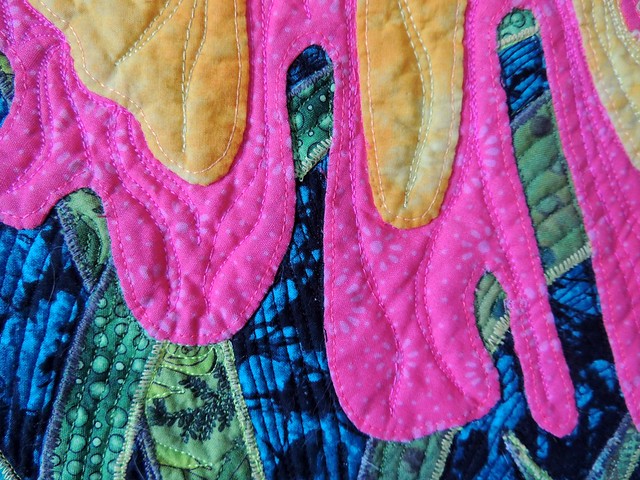
Before binding the quilt, I washed it as a sanity check to make sure the intense quilting in the background and border wouldn't distort the shape of the quilt.  My failure at executing the appliqué approach used on the flower and the bud was evident by the many frayed edges exposed ... and so I went back and needle-turned all those edges by hand.

Here are a close-up of the appliqué techniques and free-motion quilting.

Quilting Detail

It's approximately 21 by 26-inches.  The small size made it the perfect project to work on while I was thinking about what to do with a couple other projects. Now that it's finished, I have no excuses to get busy on some other (planned) projects ;-)

There are so many places to celebrate finishes in blog land.  I'm joining these parties with his post:

Angie's WIPs Be Gone
Richard and Tanya's Link a Finish Friday
Can I Get a Whoop Whoop? on Confessions of a Fabric Addict
Nina-Marie's Design Wall Friday
Fabric Frenzy Friday
QuiltShopGal's Creative Goodness Linky Party


Friday, September 27, 2013

Ring Around the Lone Star - September's Lovely Finish

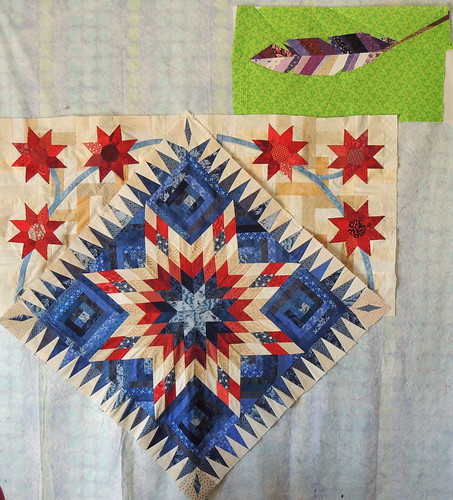
It seemed like a modest goal ... but still took some effort for me to complete it.  This 60-inch square quilt top now feels "done" and and ready to be quilted. Somehow the addition of those quirky feather-inspired leave shapes–that I know wouldn't have been everyone's choice–makes it more "me."

Ring Around the Lone Star

Along the way, this quilt now has a name, Ring Around the Lone Star.  It's my completed project for A Lovely Year of Finishes.  This project has helped me push myself even when I continue to have little or no inclination to quilt ...

Tuesday, August 06, 2013

An Appliqué Adventure

051 -Large Appliqué Feather Here's the result of my Sunday night (and Monday night) slow stitching.

It is #50 of my 365-project and will likely become a cover for a throw pillow.

The large size of the appliqué and the many seams in the crumb-pieced black and white made fabric, gave me the idea of using a new-to-me technique for securing/marking the appliqué: back-basting.


More Crumb-piecingThe leaf silhouette is the same I used to produce the tiny pink feather pincushion which was my first project in the series of 365 feather-related efforts.  I enlarged it to 8-by-16 inches and then used it as a reference when putting together the small scraps from my black and white scrap bin.


Appliqué Feather in ProgressEarlier this year, a friend explained back-basting to me in a way that I finally got it ... but didn't actually try it until this week. Although the feather shape was lightly marked with a chalk pencil on the front and not the back, I used the back basting technique to stitch along the marked line to secure the two pieces of fabric together (with red thread).

Rather than attempt to turn under the edges of the black and white crumb-pieced fabric, with all those seams and the extra fabric in those seams, I used reverse appliqué and needle-turned the teal batik background and stitched it down to the black and white fabric underneath.


Appliqué Feather in ProgressI removed the basting and cut away the background fabric a few inches at a time, revealing the black and white fabric underneath, a little at a time. after all the applique was done, I turned the piece over and cut away the excess black and white fabric from the corners.

I loved how the back-basting technique held the fabrics in place–especially that skinny little feather spine–and, although it added to the time to prepare the piece for appliqué, I know I'll be using it again ... and I'll be using more made fabric in appliqué, too.  As an experiment in trying something new, this project was a win-win for me.

I'm linking this post to the lists for Esther's WOW (on Tuesday in the US) and Angie's Appliqué Tuesday ...  on Wednesday and WIP Wednesday on Freshly Pieced.

(I confess that one of the reasons I think that appliqué appeals to me right now, is that I'm brushing off my skills and finding the courage to begin Esther's fabulous Love Enwined BOM).

Monday, June 10, 2013

Something Old, Something New and Coming Soon, Something Blue

Here's what's on my design wall today.

Design Wall - June 10

The familiar lone star waits on the wall for me to finish the appliqué on the setting triangles and begin to put it together.  After some assembly and the border is completed,  there will be more appliqué–and blue leaves will added to the stems.

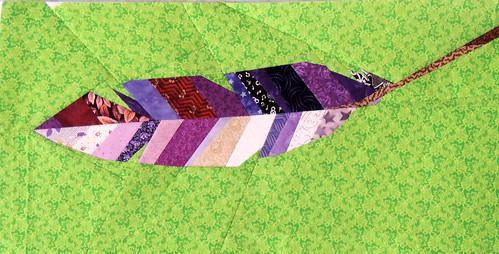
The feather at the top of my wall is half of the Feathers block from the Forest QAL.

Feather

If you are comfortable with paper foundation piecing (PFP), there have been some amazing blocks in this QAL–mostly I have just followed and admired, but last week, I had the idea of making one of the feathers much larger. The block pattern (which has two feathers) is 12 inches square.  My feather is approximately 12 by 24 inches.

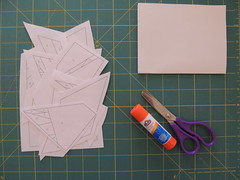
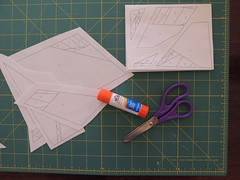
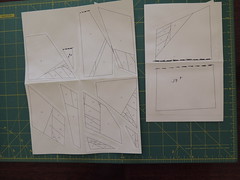
I may have made more work for myself when I decide to enlarge the pattern and keep it printable on 8 1/2 by 11 sheets of leave-in sheets. After printing the block pattern, I cut out the sections needed for this feather and then puzzled them together inside a 4 1/4 by 5 1/2 inch rectangle (which, when enlarged 200% would fit on my foundation sheets). A couple sections were longer than 5 1/2 inches and had to be split and then put back together again.  If you're curious, it looked like this (click to enlarge photos).

playing with paper, scissors and glue laying out the pieces paper foundations laid out to enlarge onto 8.5 x 11 sheets

It's been a while since I played with paper, scissors, glue and puzzles–while, at times, I wondered if I was just making it harder for myself (because I didn't want to have to remove the paper foundations), it still felt like play.

Sunday, June 09, 2013

Sunday Evening Appliqu-a-thon

Placing "Daisies" on BackgroundI used my lightbox and a large sheet of newsprint with some simple lines and boxes to keep the placement of the red English paper pieced daisy shapes consistent ... or, I hope, consistent enough.

This morning, I pinned the last three daisies in place with plans for what I am thinking of as an appliqu-a-thon, with hopes I can finish it up and move on to the next step for this WIP. It's turning out to be a very appropriate project for Slow Stitch Sunday ... because, for me, it's going much slower than usual.

It feels a little crazy that it's only the 9th of the month and I'm already concerned that it might not be finish-able by the end of the month, especially given some other plans and commitments and beginning to feel a little pressure about it.  An evening of meditative stitching will definitely help me relax and continue to enjoy.


Thursday, June 06, 2013

Stems, Blooms and (later) Leaves

Slow progress still counts as progress, right?  Here's a peek at the first of the English paper-pieced Little Daisies appliquéd to the background of the setting squares for the lone star quilt that I decided upon as my June goal for a Lovely Year of Finishes.

Waiting for leaves

I think the stems begin to reinforce the idea of the star shapes as flowers and the leaves to come will make them seem even more flower-like. 

I started with squares that will later be sliced in half diagonally and sewn to the center to put it on point. First I added the stems on the machine and now I'm hand appliquéing the EPP stars in place.

Stems added Appliquéd first corner

The paper–or in my case, card stock–does help maintain the straight edges and points of the flowers ... but also seems to slow me down as it's harder to manipulate the fabric because of the stiffness. These photos show where I am now.  One corner (three flowers) done, three more (nine flowers) to go. And then I'll be taking a really hard look at the un-flat nature of the center and adding these to it to put it on point.

Blue leaves will be added after the setting triangles are in place and the outer border is added and the option for the leaves to cross into the border.  While I work on these, I have been thinking about design options for the pieced border that comes next.

If you like the 8-petalled daisies, you can download the templates (for a 6 inch block) from my Block Patterns page. The pattern was intended for hand-piecing–I used the center and petals to cut shapes for English paper piecing (EPP).

Friday, May 24, 2013

Problem Solving in Quilting

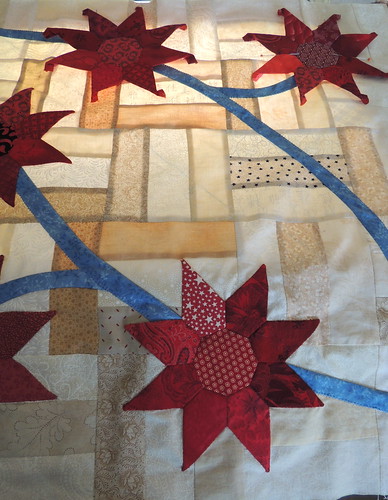
One of the things that I absolutely love about quilting is that there are usually multiple ways to accomplish a design ... and no one right answer.  Last night, I pulled out an old unfinished project with a few challenges–we won't call them problems ... yet.  One of the challenges that had held me back was my vision of some abstract flower shapes, made from diamonds that would be appliquéd to a pieced background. Appliquéing all those edges straight and keeping the points pointy intimidated me.

Pieces and Parts of an Old UFO

LittleDaisyBlockIn the way that one project can inform another, I wondered if I could use English paper piecing as an appliqué preparation technique and keep all those edges straight, points, pointed and flowers looking all the same.

I wanted to maintain the same basic diamond shape–the diamonds are used in another part of the quilt.  I remembered this Little Daisy block that I had made earlier this year and thought it would work.  I used the petal and center octagon templates for this block, which were intended for hand-piecing, to create paper shapes for EPP for my test.

If you are interested, you can download the Little Daisy templates from my Freebies page.

Here's my EPP test in progress, beside the original plan. As you can see, I'm also thinking the petals would look better scrappy and that the blue petals at the base (inspired by the traditional Carolina Lily block) don't work in the new shape.  The stems and leaves will be blue on this red-blue-cream quilt.

A New Approach

I'm joining the linky party for Angie and Billie's Hexie Friday  ... and hoping that those with experience with appliqué of EPP shapes will offer me some tips and/or advice about my idea.

I'm also joining the Weekend Update on the Block Lotto.  (It's worth the click over, just to see what Linda's making from some colorful lotto blocks she won.)

Teapot and cozy - close upIf you came by as part of Hexie Friday to check on my progress on the tea coozy made from Regina's Star Flowers,  I finished it earlier this week (yay!) and you can read more about it here:

Star Flower Tea Cozy - Done (but Far from Perfect)

Monday, March 04, 2013

More Bits and Pieces

Good MorningGood morning.

My Sunday night appliqué went well.

I dotted the I in good morning with my quarter-sized circle appliqué and made another potential folk-style flower block for the tea towel challenge.


Cone Flowers

This morning, my design wall has all the bits and pieces I've made and may include in the quilt ... in no particular order.

Design Wall March 4

I'm joining the linky party on  Judy's Design Wall Monday–a good place to go for quilting eye candy on Monday mornings–and Esther's WOW link list–for WIPs on Wednesday.

Sophie's TIps for Rose Blocks
Over the weekend, besides playing with these blocks, arranging and re-arranging them on the wall, I pulled the information and images from a couple of my blog posts here and on the Block Lotto about making the wonky roses, like those in my quilt, A Whole Lotta Love, and put them in a print-friendly format.  Those that are interested can download it here:

Sophie's Tips for Free-Pieced Rose Blocks

I'll also add a link to download it on my Freebies page.

Sunday, March 03, 2013

Preparing for Slow Stitch Sunday


Ready to stitch in placeI have plans for more hand appliqué tonight.  But, before my Slow Stitching Sunday can begin, I've been doing some preparation.

I love needle turn appliqué and that's my normal way to go.  But there are exceptions and I thought I'd confess and share.

Last weekend, I blogged about my do-over, when I really didn't like how my attempt at needle-turning some sunflower-ish shapes made from a thick, coarsly woven vintage table cloth turned out.  The alternate technique was successful, so I decided to use it for some more appliqué flowers on my tea towel challenge piece.

I learned the technique in a workshop with Jane Sassaman.  I never had a reason until now.  You use lightweight fusible (one side only) and a glue stick to produce appliqué components with smooth edges, suitable for machine or hand appliqué.
  1. Trace the appliqué shapes, reversed onto the fusible.
  2. Cut out the shapes on the line.
  3. Fuse the shapes to the wrong side of the fabrics.

  4. Trace Applique Shapes onto Fusible Cut them out on the line Fuse to revers of fabric

  5. Cut out the shapes from the fabric leaving enough to turn under–for me, that's usually between 3/16 and 3/8 inch.
  6. Carefully fold it over the edge of the fusible smoothly, gluing it to the fusible on the back.

  7. Trim leaving enough fabric to turn under Use glue stick to smoothly turn under edges
Now, I'm ready to go . . .  as soon as I make some skinny bias stems for those cone flowers . . .

Another alternative appliqué preparation tip I learned from a friend was using coins for preparing circles.

A quarter as an Appliqué toolDid you know that you can use a US quarter to create a one inch appliqué circle?
  1. Use the quarter as a template and cut a circle, adding some allowance to turn under.
  2. With needle and thread, make a running stitch around the circle.


  3. Quarter as template cut fabric Running stitch around the outside

  4. Pull the thread tight, with the quarter inside.Press it with a hot iron.  Steam and/or spray sizing are appropriate to use here.
  5. Let the fabric and coin cool, then remove the thread and coin, being careful to maintain the shape.
  6. Pin in place, ready to stitch.

  7. Pull threads to gather fabric around quarter  Remove thread and quarter, maintaining shape 1 inch round appliqué - ready to go

A dime is 3/4-inchIf you need to make a smaller circle, dimes have a 3/4 inch diameter.  And if you need more sizes, a trip to the washer aisle in your local hardware store will offer you metal templates in many sizes.  After being shown this technique, I stocked up on multiples in a range of sizes.

I started playing with coins before mylar circle templates were available for quilters Because they are very thin, the circles you prepare from them are more precise, but the nice thing about using coins or washers is when you need to make A LOT of same-sized circles, you can prepare them assembly line style, using many quarters, dimes or washers of a specific size.

Pinned in place to dot the iOf course, today, all I needed was one, to dot an "i" on a word block, but it's still fun to use a quilting tool that only costs a quarter :-)
Related Posts Plugin for WordPress, Blogger...