Showing posts with label EPP. Show all posts

Monday, June 08, 2015

Hexies at Home

I started this little quilt last winter with the intention of submitting it for Kate's Another Little Quilt Swap.

Back in March, I blogged about the new metallic thread I planned to use ... I tried and failed miserably and because I had waited until the last possible moment before the swap deadline to try (and fail), I missed out.  I ripped out the failing stitching and put it away ... until yesterday.

Maybe it was all those interesting hexies at Fiber Arts Fiesta that inspired me. Yesterday afternoon, I made a new start on quilting with some more conventional cotton thread.

Quilting begins

The hexie cogs are English paper pieced and hand appliquéd.  Now that I have no plans for the finished quilt, it has become an opportunity to play/practice free motion quilting and try something new.  It measures approximately 18 by 23 inches. 

It's what's on my design wall today. 

Hexies

Hexagons are appearing on all kinds of quilts in unexpected ways. Here are a few examples from Fiber Arts Fiesta.

The first place winner for Small Innovative Pieced and/or Appliquéd quilts is Revisiting Grandmother's Flower Garden by Donice Wagner.

Revisiting Grandma's Flower Garden by Donice Wagner

The hexies and other shapes that make up these flowers are three dimensional.  And look ... more tiny buttons among the embellishments ... and it's hand-quilted.

Revisiting Grandma's Flower Garden by Donice Wagner - DetailRevisiting Grandma's Flower Garden by Donice Wagner - Detail

Another quilt with hexagons was another of the modern quilts in the special exhibit Best Of QuiltCon - Geometric Rainbow by Nicole Daksiewicz

Geometric Rainbow by Nicole Daksiewicz

The hexagons in this quilt–one in each color of Kaufman's Kona Cotton–appear to be attached only by the quilting lines that travel through them. 

Geometric Rainbow by Nicole Daksiewicz - Detail

This is another of the modern quilts from QuiltCon that I was glad to see in person and it was interesting to see how it was made.

I applaud the innovation of both these quilts, but wonder how well the hexies on either quilt would survive a wash cycle and how they will look 100 years from now?

In the Medium Art Quilt category, there were more hexies, made from the quilter's hand-dyed fabrics and combined with vintage lace and mono-printed fabric. This is Carol Johnson's quilt, In Full Bloom. 

In Full Bloom by Colleen Konetzni

I love the mix of traditional pieced blocks, cool patterned fabrics and those dyed bits of lace.

In Full Bloom by Colleen Konetzni - Detail

Wednesday, March 18, 2015

Scattered Progress

I've been working on a brand new project, a very old project, and a couple of projects you've seen before.

I resurrected another of my moldy golden oldie UFOs–a string star quilt top–pieced a back, and pulled out the stencils I planned to use for part of the quilting design.

Marking a Golden Oldie String quilt

I don't usually mark quilts and I think my fear of trying this is what has kept it unfinished for so long.  I decided that it's time to face this particular fear ... and do it anyway. If you have a favorite tip for working with quilting stencils and/or marking a quilt, I'd love to hear it. 

Softly Crinkled after washingSpeaking of fears ... it turned out that my fear about the dyes in the backing fabric for the kids charity quilt was unfounded.

It came through the wash fine and is now softly crinkled and ready to be trimmed and bound.  I am planning to use a red tone-on-tone print for the binding.


Planning to try a new threadAll the English paper piecing and hand appliqué on my little hex project is complete and it's ready to be quilted.  I decided to try this new metallic thread from Artistic in gunmetal.


First block for a scrappy QOV quilt
I think the best excuse for starting a new project (when you have a plethora of unfinished ones like me) is to make a quilt for a good cause.  I caught up with the guilds QOV mini-group and started a quilt that will be made from blocks like this one.

Lately, I have been feeling scattered and have allowed myself to flit from one project to another ... I am hoping it will end up resulting in a bunch of different kinds.

At least it makes for an interesting WIP Wednesday update ;-)


Sunday, March 15, 2015

Catching up with (slow) handwork projects

Completed embroideryThe sweet Welcome Spring embroidery that I started a week ago is complete.  (Gail Pan's free pattern is available here.) I've been thinking about some improvisational pieced borders ... but haven't yet made any forward progress on making/adding them.

This finish is timely... it is definitely beginning to feel like spring around here.

I have made some progress with the hex rings and have now moved onto the next step–appliquéing them to a background.

I have been working on these projects slowly, by hand, in the evenings while I watch (probably too much) television.


Appliquéd in placeThe process is relaxing, meditative and gives you lots of time to let your mind wander and think about things like how I will quilt this little piece.

Last night, it was an opportunity to get my creative mind to calm down after a day of sewing with the Northern New Mexico Quilt Guild–come later today to read about that adventure :-)

Last night while I was stitching away, I had a new idea for the quilting design–it was an a ha moment and now I feel ready to jump into quilting this ... as soon as I finish the slow stitching needed to finish the appliqué.  So that's what I'll be doing for Slow Stitch Sunday.

Do some aspects of quilting wind you up or help you unwind?

Sunday, March 08, 2015

Two New Handwork Projects

I started two new little projects this weekend and all the blame credit goes to the two bloggers who inspired me.

Earlier this week, Gail Pan shared a sweet stitchery pattern, Welcome Spring, that I found irresistable. Click over to see the blue pillow and red wallhanging she made from the design and download the free pattern.  It's a quick bit of stitching, I expect to finish this tonight.

A New Little Stitchery Project

My plan is to feature it in a small pillow with some Springy blue and yellow print fabrics.

New ToolsA couple days ago on her blog, Angie mentioned picking up a Fiskar's hexagon punch at half price ... and I thought that was such a good idea, I bought two.

I quickly opened the smaller one and repurposed some junk mail.

My yellow scrap bin was sitting on the worktable–yes, I am finally getting around to making some rainbow scrap challenge blocks–so I grabbed some small scraps and made a sample for an idea for a new small quilt idea.

I will be slow stitching away later today on these and am joining Kathy's Slow Sunday Stitching list with this post.

Re-purposing Junk Mail   The beginning of a new project

Sunday, June 09, 2013

Sunday Evening Appliqu-a-thon

Placing "Daisies" on BackgroundI used my lightbox and a large sheet of newsprint with some simple lines and boxes to keep the placement of the red English paper pieced daisy shapes consistent ... or, I hope, consistent enough.

This morning, I pinned the last three daisies in place with plans for what I am thinking of as an appliqu-a-thon, with hopes I can finish it up and move on to the next step for this WIP. It's turning out to be a very appropriate project for Slow Stitch Sunday ... because, for me, it's going much slower than usual.

It feels a little crazy that it's only the 9th of the month and I'm already concerned that it might not be finish-able by the end of the month, especially given some other plans and commitments and beginning to feel a little pressure about it.  An evening of meditative stitching will definitely help me relax and continue to enjoy.


Thursday, June 06, 2013

Stems, Blooms and (later) Leaves

Slow progress still counts as progress, right?  Here's a peek at the first of the English paper-pieced Little Daisies appliquéd to the background of the setting squares for the lone star quilt that I decided upon as my June goal for a Lovely Year of Finishes.

Waiting for leaves

I think the stems begin to reinforce the idea of the star shapes as flowers and the leaves to come will make them seem even more flower-like. 

I started with squares that will later be sliced in half diagonally and sewn to the center to put it on point. First I added the stems on the machine and now I'm hand appliquéing the EPP stars in place.

Stems added Appliquéd first corner

The paper–or in my case, card stock–does help maintain the straight edges and points of the flowers ... but also seems to slow me down as it's harder to manipulate the fabric because of the stiffness. These photos show where I am now.  One corner (three flowers) done, three more (nine flowers) to go. And then I'll be taking a really hard look at the un-flat nature of the center and adding these to it to put it on point.

Blue leaves will be added after the setting triangles are in place and the outer border is added and the option for the leaves to cross into the border.  While I work on these, I have been thinking about design options for the pieced border that comes next.

If you like the 8-petalled daisies, you can download the templates (for a 6 inch block) from my Block Patterns page. The pattern was intended for hand-piecing–I used the center and petals to cut shapes for English paper piecing (EPP).

Sunday, June 02, 2013

Getting Ready for some Appliqué

Here's a photo of my progress with the scrappy red little daisies that put together using English paper piecing and the sewing basket that I use to carry small projects from studio to den and back again.


Sewing Basket

I bought it at a quilt show in Michigan. I thought the basket was beautiful and I liked the useful little dowel that holds spools of thread and keeps them from rolling off tables (and out of the paws of curious cats).  The envelopes contain the paper pieces for the daisies; my sewing kit holds needles, thimble, thread, and a small pair of scissors ... though they usually end up in the bottom of the basket, just as they are now.

I'd been thinking about making some sort of liner/organizer and, earlier this week, I saw Benta's tutorial post on making a Crafty Caddy.  Mine is smaller.  I started with a 10 inch square to make it 4 inches square and 3 inches tall. As she suggested, I added a inside pocket.  I decided to bind the top edge instead of having a seamed edge and, because I was having so much fun playing with scraps, I also made a small pin cushion with a strap on the back to slide onto the dowel with the spools.

Little Caddy   Slide-on Pincushion

My cats have been known to pull pins out of pincushions and so keep them in closed tins.  This little pincushion will be used to park a needle or a pin or two while I'm stitching.

To fit in the basket nicely, the corners were folded flat–they are still functional as pockets for my small scissors, a seam ripper, etc. This afternoon, I'm placing the vines that will support these star-like flowers; my plan for Slow Stitch Sunday, is to begin the appliqué tonight.  I'm ready.

Ready to work

Sunday, May 26, 2013

Taking things apart ... so I can put them back together again

Here's my completed test version of the Little Daisy, adapted to English Paper Piecing and appliqué.

Friends suggested how I could use these templates to make something that looked more like the original plan ... or how I could use EPP to prepare those original flower-ish diamond shapes for appliqué, which were both excellent ideas.  But, in the end, I decided to take the original shapes apart and reuse the red diamonds to make more of these. I think the octagon centers make them a little more flower-like while maintaining the diamond petals.

Pieces and Parts of an Old UFO

I'm not sure yet, but I think the left-over blue diamonds could become leaves for my new red daisies ... or blue star cornerstones for the border.

This afternoon, I'm feeling scattered and find myself jumping between some spring-cleaning chores and a couple projects, unable to settle into any one thing and make some real progress.  I figure that deciding to move forward on this idea for Slow Stitch Sunday will give me something focused and meditative with which to end my day.

Friday, May 24, 2013

Problem Solving in Quilting

One of the things that I absolutely love about quilting is that there are usually multiple ways to accomplish a design ... and no one right answer.  Last night, I pulled out an old unfinished project with a few challenges–we won't call them problems ... yet.  One of the challenges that had held me back was my vision of some abstract flower shapes, made from diamonds that would be appliquéd to a pieced background. Appliquéing all those edges straight and keeping the points pointy intimidated me.

Pieces and Parts of an Old UFO

LittleDaisyBlockIn the way that one project can inform another, I wondered if I could use English paper piecing as an appliqué preparation technique and keep all those edges straight, points, pointed and flowers looking all the same.

I wanted to maintain the same basic diamond shape–the diamonds are used in another part of the quilt.  I remembered this Little Daisy block that I had made earlier this year and thought it would work.  I used the petal and center octagon templates for this block, which were intended for hand-piecing, to create paper shapes for EPP for my test.

If you are interested, you can download the Little Daisy templates from my Freebies page.

Here's my EPP test in progress, beside the original plan. As you can see, I'm also thinking the petals would look better scrappy and that the blue petals at the base (inspired by the traditional Carolina Lily block) don't work in the new shape.  The stems and leaves will be blue on this red-blue-cream quilt.

A New Approach

I'm joining the linky party for Angie and Billie's Hexie Friday  ... and hoping that those with experience with appliqué of EPP shapes will offer me some tips and/or advice about my idea.

I'm also joining the Weekend Update on the Block Lotto.  (It's worth the click over, just to see what Linda's making from some colorful lotto blocks she won.)

Teapot and cozy - close upIf you came by as part of Hexie Friday to check on my progress on the tea coozy made from Regina's Star Flowers,  I finished it earlier this week (yay!) and you can read more about it here:

Star Flower Tea Cozy - Done (but Far from Perfect)

Monday, May 20, 2013

Star Flower Tea Cozy - Done (but far from Perfect)

Teapot and cozy - close up My first English Paper Piecing project is finished--a tea cozy made using Regina's Starflower templates.

As I was was stitching down the binding around the bottom, It struck me how much the shape looks like nothing so much as a quilty ski hat (I even slid it onto my head last night ... and no, I did not take a photo)   The shape was actually inspired by this little tea pot and it's upright bamboo handle.

I'm not especially happy with the free motion quilting in the blue background–I probably should have stopped and waiting until I was better rested, but I was motivated to finish it last night.  I'm hoping that after it has been washed and dried, the crinkles will hide some of those imperfections.  Here it is, covering the tea pot, from both sides

  Tea Cozy - one side  Tea Cozy - the other side

Teapot and Star Flower Cozy
And one last look of the pot that inspired the project.   

The next time I feel like making a little pot of tea and heading up to the den for some TV and hand-stitching, I'm ready. 

I made one more flower.  I'm thinking of using some of the dark blue scraps with the flower for a mug rug.  

Sunday, May 19, 2013

Hand Work for Slow Stitch Sunday

Stitching down the #quilt binding with a #cat on my lap for #alyof May finishI mentioned on the Weekend Update blog post on the Block Lotto site that I was dangerously close to finishing a couple of things.  Now, I'm even closer :-)

I thought I'd be stitching down the binding of the checkerboard picnic quilt tonight, but with the moral support of the cats–first Johnny Be Good, pictured here, then Grace Hopper, then both of them at once on my lap–I finished last night.

I've added the rest of the diamond shapes needed to fill in the background for my English Paper Piecing project and have begun machine quilting the piece.   If I can finish today, my new plan for Slow Stitch Sunday will be to spend the evening binding the seams for a clean finish.

The timing is good–the weather has cooled off enough, that a hot pot of tea appeals this afternoon.

Quilting the Star Flower Tea Cozy

And then I need to decide on my next handwork project ... more EPP? Hand quilting? Maybe some needle-turn appliqué? Pick up some knitting? As usual, the possibilities are endless ...

Thursday, May 16, 2013

Moving Furniture and English Paper Piecing

Ceiling RepairI didn't discover the leak in the upstairs bathroom last month until water came spilling through the downstairs ceiling and onto a piece of antique furniture, creating a lot of damage in its path.

This morning, I was up early and moving all the furniture in the dining/living area to the far end of the room before the repair people arrived to scrape and tape and screw and plaster and paint my "pregnant" ceiling back to normal.

When a test of the matching paint didn't match, the decision was made to repaint the entire ceiling.  Tomorrow morning, I'll be up early again and moving as much of the furniture as I can past the construction mess,  through the kitchen and into the studio to make it as quick and easy for the painter to finish.

While they worked today, I sat in the corner, watched and learned, and made some progress stitching blue diamonds on the star flower tea cozy project.

Almost Ready

Eight more diamonds and I'll be ready to quilt it and turn it into a tea cozy.

I"m sharing my progress on Hexie Friday.

Monday, May 13, 2013

Fill In the Blanks ___________

Filling In the BackgroundSunday night is almost always TV night chez Sophie. Last night I started putting my starflowers into a scrappy dark blue background made of hexagon and diamond shapes.

Instead of adding partial star flowers, I decided to use more blue and diamond shapes instead.

I will continue adding scrappy blue diamonds until the pieces cover the paper pattern I created for a cozy for my tea pot.

Here's where I stopped last night–with quite a few blank spots to fill.

Tea Cozy Progress

These small pieces–each is smaller than 14 inches square–make it easy to use any available space as a design wall.  Even so, last night, I found myself thinking it would be nice to have a small pin board in the den next to where I sit and stitch to put these small pieces on the wall while I was thinking about the orientation of the star flowers and which blues to add where.  I think working on a design wall spoils you ... or, at least, it has me.

Speaking of design walls (or the lack there of), I'm joining the linky list on Judy's Design Wall Monday.

I'm also joining the monthly linky for EPP, Sarah's Help for Hexie-aholics.

Friday, May 10, 2013

And Then There Were Three ...

They're Multiplying!
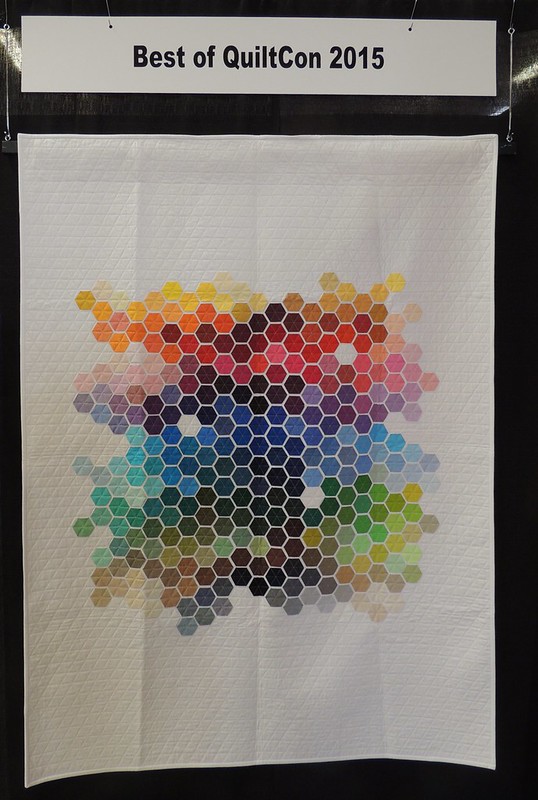
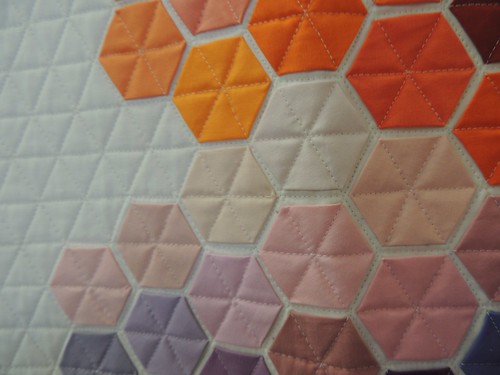
OK.  I admit it.  I am beginning to understand the addictive quality of English Paper Piecing and all those hexie projects I see in blogland.

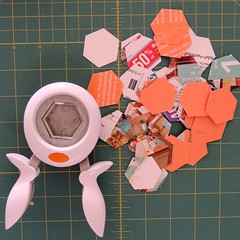
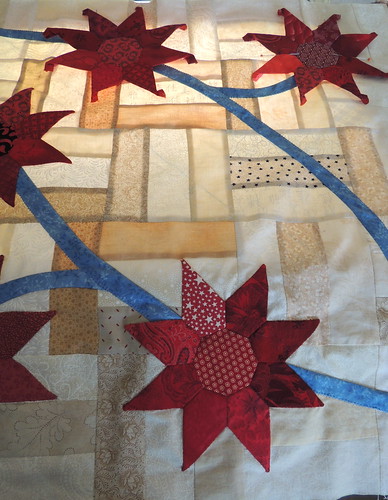
By the time I had finished stitching the third star flower, I was already thinking about how I was going to go through my scrap bins and cut up all the smaller pieces of fabric into petals and hexie shapes to make a much larger project ... I have wanted to find a project to use up the too-small-for-most-project scraps in there. Maybe this is it.

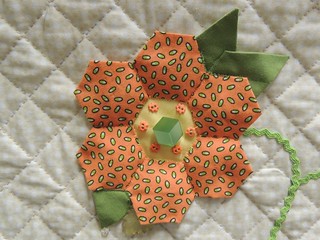
When I uploaded the photo of the first flower to Flickr yesterday, within minutes, Amy was asking for a peek at the back.  

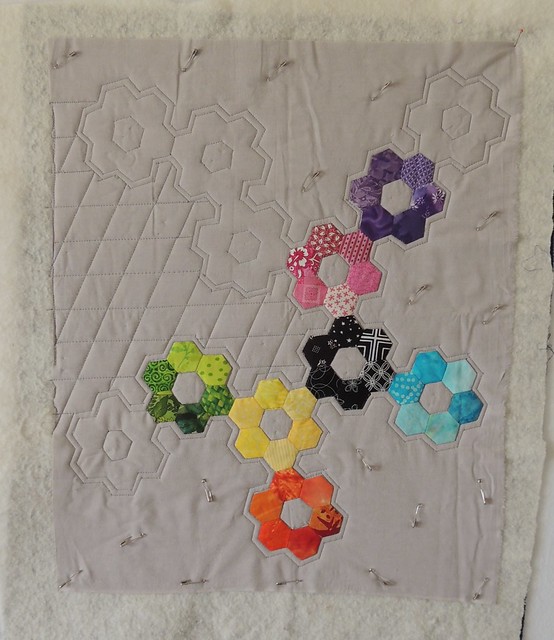
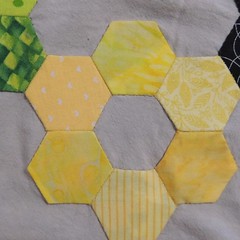
I'm sure there are neater ways to do it, but here's a look at the insides of my blocks.   Please remember this is my FIRST adventure in English Paper Piecing and don't judge my sloppy first efforts too harshly ... I'm sure I'll get better/neater with practice ;-)  
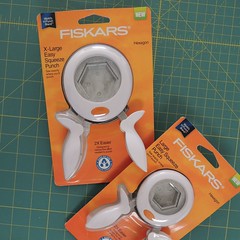
Templates and FabricI printed Regina's template sheets on card stock and used a rotary cutter and ruler to cut them out. I punched a pair of holes near the center. Using one of the paper templates as a guide and an add-a-quarter ruler, I stacked the fabrics and rotary cut them with a 1/4 inch allowance around the template.

As you might guess, I cut and prepared everything for only one star flower at a time–it's just the way my design mind works, focusing on the elements of one flower/block/section at a time. But, I think this isn't the way I've seen most hexie/EPP projects progress and I need to figure out if I can shift to a way of cutting everything (or at least hundreds) of units, preparing them and having them ready to assemble. It's that kind of preparatory step that often slows/stops progress for me.  I'm focusing on that personal challenge this month and I think the blogiverse sent me this prize of an EPP project as a way to overcome it ... or at least make some strides in that direction.

Pinned Hexie with Fabric Attached
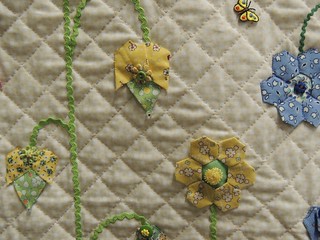
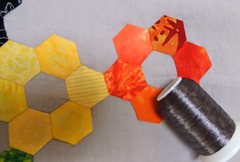
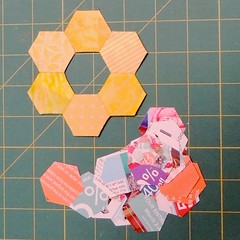
Here is what my hexie center looked like after I attached the fabric. I deviated from Regina's directions a bit, but using the heavier card stock and not stitching through the paper.

I simply tacked the fabric at the corners and skipped to the next corner.

You can see how I pinned the fabric in place by going through my two punched holes.  It distorts the shape less and the pin is just going through fabric, not paper/card stock.

And here is the finished star flower, from the  back.

Star Flower - Front and Back

In theory it seems that once the surrounding pieces are sewn in place, I should be able to clip the basting/tacking stitches, remove the paper templates, and reuse them. 

This weekend on the Block Lotto's Weekend Update, I asked quilters to share their process.  I have found when I share mine here, I learn so much from the comments and discussions that follow.  Since I am just beginning my adventure in EPP, I know I have a lot to learn and would love to read your comments, suggestions and tips.   And if you'd like to share a blog post about YOUR process, please jump over to the Block Lotto and join me at the Linky party.

I'm also joining Billie Bee's Hexie Friday.

Thursday, May 09, 2013

Something New - English Paper Piecing

First Star FlowerLast night, I decided to give my prize from BillieBee's Blog a spin.

I printed out the English Paper Piecing templates for Regina Grewe's Star Flower quilt pattern and decided to make just one ... to see how it would go.

My technique varied a bit from the directions–I printed the templates on card stock and didn't sew through the paper when I basted the fabrics onto the shapes. I punched a pair of holes near the center to make it easy to pin them to the fabric

Here's a direct link to the English page where Regina sells the Star Flower pattern and an acrylic template to use to rotary cut fabrics for the petals: Regina's Star Flower

I have a small project in mind which I'll share after I prove to myself that I can actually make enough of the Star Flowers.  It's an interesting bit of serendipity that after I declare my intention to learn to love the necessary preparations for the quilting journey that the blogiverse hands me an opportunity to practice, with a technique that seems to be all about the preparation.

Thanks again, to Bille in Texas and Regina in Germany.


Related Posts Plugin for WordPress, Blogger...