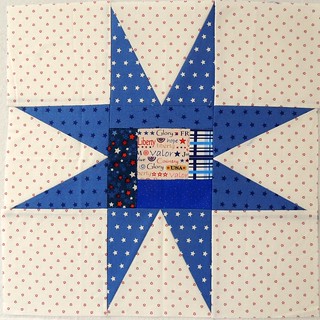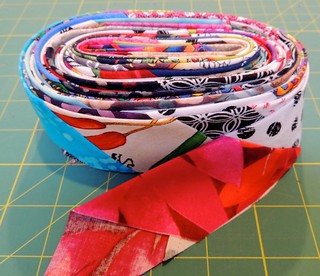
Showing posts with label string quilting. Show all posts

Friday, April 03, 2015

More Strings - My Goal for a Lovely Finish in April

When I finally finished the moldy golden oldie String Star quilt–now known as Then & Now–it felt so good that I decided to pull another string quilt top out of the UFO trunk and make finishing it my goal for a lovely finish in April.

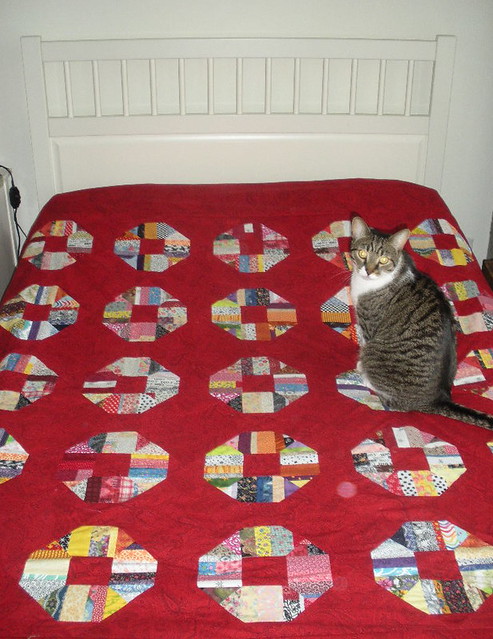
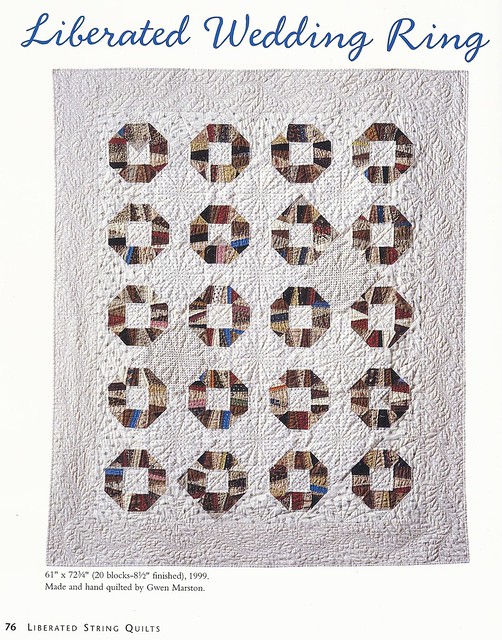
This Liberated Wedding Ring quilt is another from Gwen Marston's book, Liberated String Quilts.

I began making the blocks during a virtual online retreat with the liberated quilters Yahoo group at the end of January, 2010.


These were fun to put together and about a week later, I posted a Progress Report with the completed top, taken in my itty bitty loft in Dallas.

Johnny inspects the completed top

In that 5 year-old blog post, I mentioned how, Gwen's quilt has beautiful, traditional quilting . . . and I plan to attempt the same.  I realize now how the notion of beautiful traditional quilting completely intimidated me and is, in part, the reason this one has been folded up and put away for so long. Here's that inspiring-yet-intimidating image of Gwen Marston's beautifully hand-quilting from the book:

Liberated Wedding Ring

I have ordered some thread and am thinking about how to quilt the top in a way that nods at that beautiful, traditional quilting design but also has some of me in it.  I am thinking of a pieced scrappy backing, so that will be my first task toward finishing my big red liberated wedding ring quilt. 

Thursday, April 02, 2015

Then & Now - The String Star Quilt is Finished!

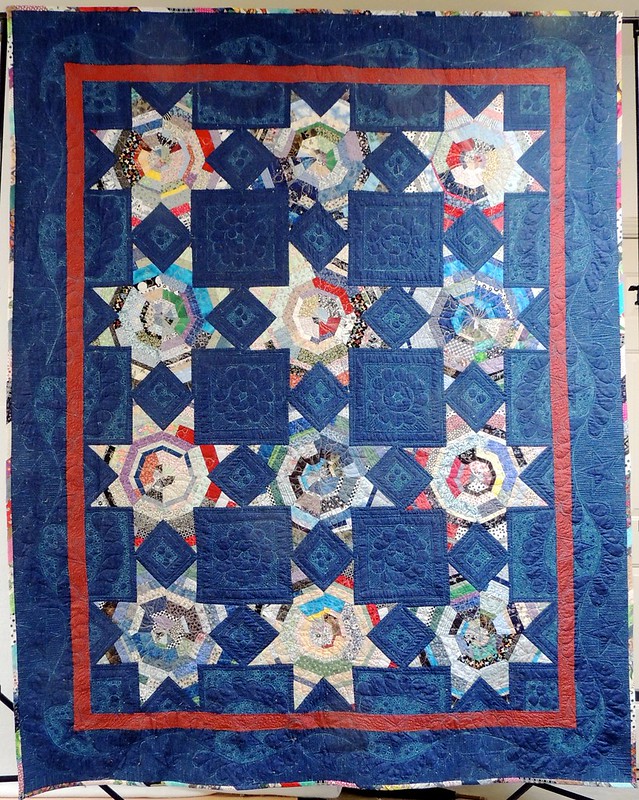
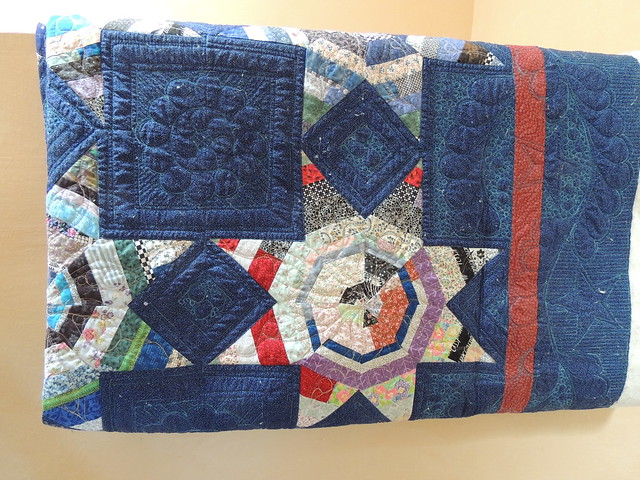
As I was quilting the golden oldie UFO string stars and thinking about the differences between my quilting tastes and skill set back when I pieced the string stars and now, the name for the quilt was born: Then & Now. The finished quilt measures approximately 74 by 90-inches and was made using templates in Gwen Marston's book Liberated String Quilts.

I set things up a bit too close to one of the skylights in the studio, so the natural lighting is a little uneven, but you get the idea.

Then & Now

Back Then, I struggled when putting together the star blocks–none of them were flat–and had problems matching the points/seams when sewing the blocks together.  Now,  I have been quilting twice as long as then.  I would have used a different technique to assemble the blocks–thank you Jan Krentz–with a better result: flat stars and matched seams. I would have chosen different proportions for the borders and probably included an inner border to float the star blocks.

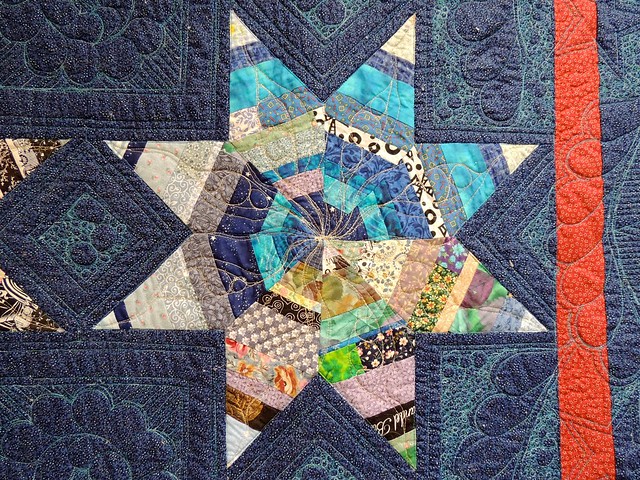
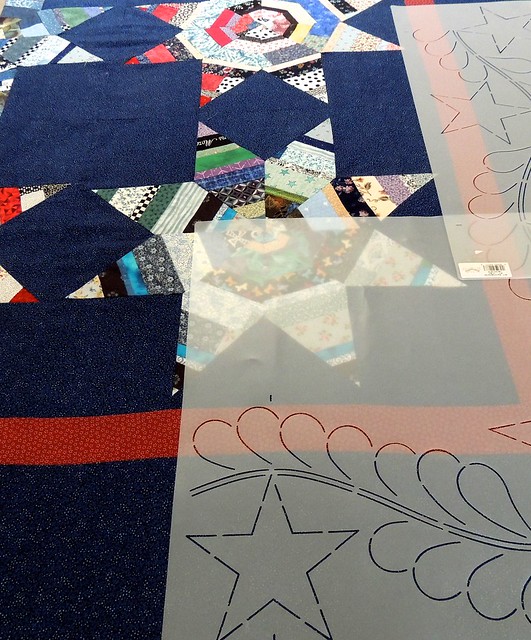
Then, I chose the stencils I used for the quilting design, but was afraid that my quilting wasn't up to the task.  Now, it's easier for me to just go for it, even if my quilting still really isn't up to the task.  I embraced the attitude that every quilt is practice for those that follow ... and I practiced a few things while I finished this quilt. I used the stencils for the border and the large square spaces, but winged it for the rest.

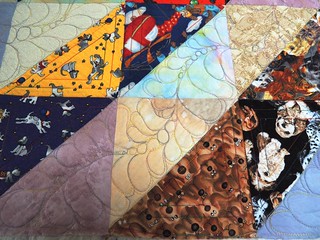
Then & Now - Detail

Celebrating this finish on these lists:

Can I get a Whoop whoop? on Confessions of a Fabric Addict
Crazy Mom Quilt's  Finish it Up Friday
Fabric Frenzy Friday on Fort Worth Fabrics
Lizzie Lenard's Free Motion Mavericks
QuiltShopGals' Creative Goodness
Richard and Tanya's Link a Finish Friday
Mrs Sew & Sow's Scraptastic Tuesday for April

Monday, March 30, 2015

Making String Binding from Small Scraps

Ready to useAmi asked for a tutorial of how I was making the string-pieced binding.

Bonnie wondered why I was using such small pieces when–as I also mentioned in email to others yesterday–there are faster and more efficient ways to make it ...  though, to be honest, this 9-plus yards of binding came together pretty quickly.

I decided to post about my process, answer the questions and ... have a reminder for myself, if I ever want to do this again.

My initial inclination would be to make wider string yardage, like this, and cut the binding strips (on a bias) from it, just like any other fabric. The diamonds that make up the string stars themselves were cut from fabric I made in the same batch as this, during a stash/scraps clean out.

Last year, I made more string fabric yardage (in a more narrow color palette, using width-of-fabric strips) for my Feather Bed quilt.  (I know there's a photo on my blog of that fabric, but cannot find it). It really is the best (and fastest) way to go ...

But since I ONLY needed enough string fabric for a binding, I got the idea to pull strings from my bins of small scraps.  Most of those are smaller than a 10 inch square.   At first I thought I could make a "double wide" piece from which I could cut two binding widths, but ... I soon realized that when those strips are put on a 45 degree angle that an 8 inch strip, with triangles cut from each end to create the angle, resulted in something around 4 inches wide.  My plan was for binding cut at 3 1/2 inches wide for a 1/2-inch wide double fold binding.

If you can make a wider piece of binding fabric using cut yardage or precut jelly rolls, I recommend you consider doing so. 

Being fully committed to using my smaller scraps, here's what I did.

I cut a pile of strips approximately 8-inches long in varying widths. The wider the strip, the longer the strip will need to be–more on that later.
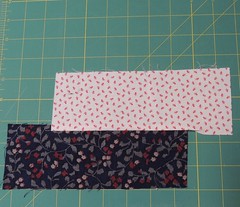
Sew strips off-set I didn't exactly put them in a paper bag (to randomly pull them out and add them), but my process was similar.  I dumped them in a pile on my table next to the sewing machine and randomly grabbed and added, usually only choosing to which end of the pieced strings I'd add it.

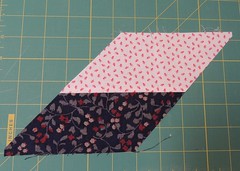
To begin,  align two strips along their long edges and offset on the left edge. Sew them together and press.

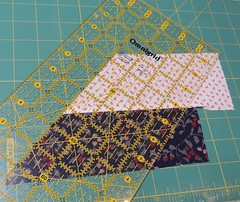
Now, using a ruler, cut this 2-unit piece into the shape and size.

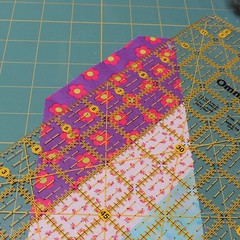
Align the 45 degree angle line on the ruler with the bottom edge of the bottom strip and cut the angle on the left side.

Then cut the strip to slightly wider than the desired width.  For my 3 1/2-inch wide binding strips, I cut mine at 4-inches.

Use ruler to trim at 45 degrees 45 degree angle
Trim to 4-inches wide Trimmed with angles defined

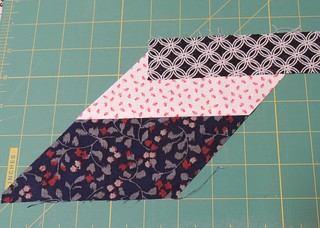
Once you have established the angle, all you need to do is add a strip, sew it on, press and trim.  When you add a strip, you align it on the left side, with the extra width on the right, like this.

Adding the next strip

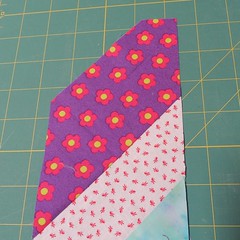
As you continue to add the strings, you will see the how and why of "the wider the strip, the longer it needs to be." If a wide strip isn't long enough, you could end up with something like this, where, after it is trimmed, the point of the angle on the right side looks "chopped off."  If this happens, just trim it parallel to the seam. 

The wider the strip ... Even the edge

When you start, it seems like it could take ... forever.  I started with 5 pieced binding strips, so that I could chain piece them--making it a little faster.  I also thought that if I made them each approximately 2 yards long,  which wouldn't become too unwieldy and could be be folded into quarters to trim to 3 1/2 inches before I joined them together. 

When my chain-pieced strips became long enough, I would add a strip to one end, then pull the other end around and add a strip there as well.   I am a few inches shy of 6 feet tall (2 yards), which made eyeballing my progress easy: waist-high, shoulder-high, eye-level, over-my-head, done.

When I got close, I actually stopped to measure the quilt and figure out exactly how much binding I needed–328 inches, which is a little more than 9 yards, so I stopped before I reached my 5 strips over-my-head or 10 yards goal.  And a funny thing happened when I sewed it to the quilt–a binding miracle: it was EXACTLY the right size.

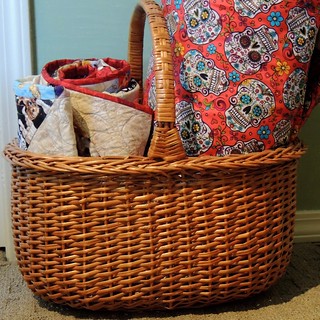
I started hand stitching down the binding last night while I watched television.  I truly AM a SLOW stitcher and have a ways to go.  It's now rolled up in the basket in the den waiting for me to return.

In the den

I probably used more clips to hold the binding in place than usual because of all the seams in the string-piecing. Every seam in the binding has a clip to keep it under control.

Since I cannot (yet) show you what's on my Design Wall (a super secret Cotton Robin project that won't be revealed until summer), I am sharing my process from work table and basket.

Sunday, March 29, 2015

This happened ...

I've finished quilting the string star quilt ... and decided it needed string binding.  And so, last night,  I started making the 10 yards of it I'll need. I didn't get very far ...

Making String binding

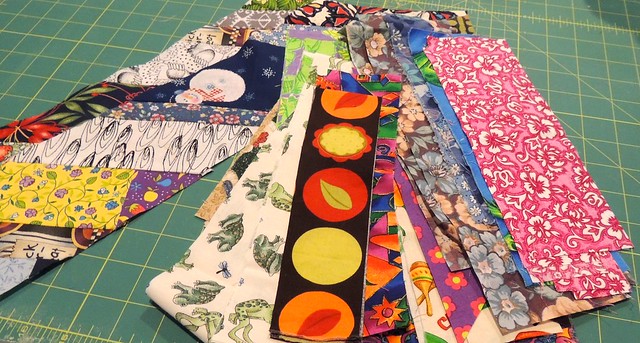
The binding made so far is on the left, the strings I have cut from scraps so far are on the right.

The "strings" for the binding are a bit wider than I used in the stars (to try to keep the thickness of all those seams to a minimum).  I will continue cutting strings from my scrap bins and sewing them together with a goal of spending my Sunday evening Slow Stitching down the binding.  Wish me luck!

Here's a peek at the quilt after it was washed–lint (from the exposed batting) and all.

After washing

Sunday, March 22, 2015

Quilting Progress

I made a lot of progress quilting the string stars quilt during the Friday Night Sew-In.  Here's a peek at where I am now:

Quilting Progress on String Stars

I've quilted everything that's marked and done some straight line quilting (with the help of a ruler) to add some stitch-in-the-ditch and echo stitching in the spaces around the stars.  I've added some unmarked, much more typically "me," quilting in the star blocks–I haven't yet decided if it's too stridently different from those classic marked feather shapes. 

I will be adding some fill designs around the feathers and inside the plain squares. 

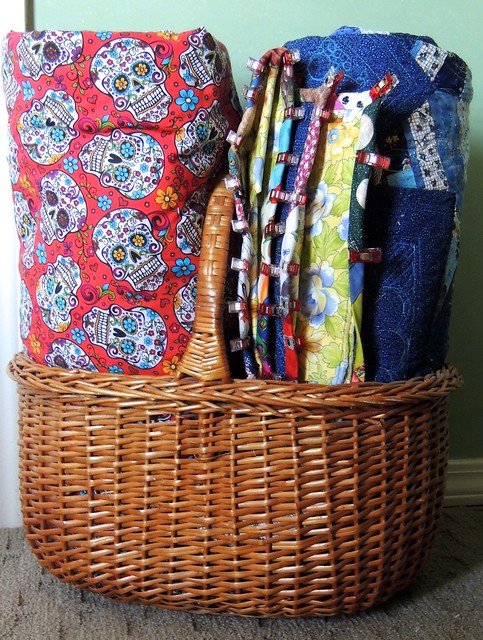
Waiting to be stitched and unstitchedIn the evenings, I've begun stitching down the red binding on the kids charity quilt –since I've already shared so many photos of that quilt in the last week, I'll show you how I stow quilts waiting for handwork in my den.  I expect to finish the binding on the little quilt today, as part of my Slow Stitch Sunday ... and I might think about unstitching some quilting on the other quilt that I started last fall, then decided it was wrong and needed to be ripped out ... 


Wednesday, March 18, 2015

Scattered Progress

I've been working on a brand new project, a very old project, and a couple of projects you've seen before.

I resurrected another of my moldy golden oldie UFOs–a string star quilt top–pieced a back, and pulled out the stencils I planned to use for part of the quilting design.

Marking a Golden Oldie String quilt

I don't usually mark quilts and I think my fear of trying this is what has kept it unfinished for so long.  I decided that it's time to face this particular fear ... and do it anyway. If you have a favorite tip for working with quilting stencils and/or marking a quilt, I'd love to hear it. 

Softly Crinkled after washingSpeaking of fears ... it turned out that my fear about the dyes in the backing fabric for the kids charity quilt was unfounded.

It came through the wash fine and is now softly crinkled and ready to be trimmed and bound.  I am planning to use a red tone-on-tone print for the binding.


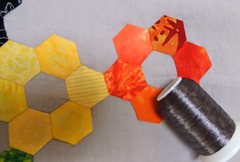
Planning to try a new threadAll the English paper piecing and hand appliqué on my little hex project is complete and it's ready to be quilted.  I decided to try this new metallic thread from Artistic in gunmetal.


First block for a scrappy QOV quilt
I think the best excuse for starting a new project (when you have a plethora of unfinished ones like me) is to make a quilt for a good cause.  I caught up with the guilds QOV mini-group and started a quilt that will be made from blocks like this one.

Lately, I have been feeling scattered and have allowed myself to flit from one project to another ... I am hoping it will end up resulting in a bunch of different kinds.

At least it makes for an interesting WIP Wednesday update ;-)


Thursday, February 20, 2014

Tiny Strings - My Quilt for Another Little Quilt Swap

Finished in early January, I waited to share this little 15 inch quilt until after swap decisions were made for Another Little Quilt Swap and it was sent on it's way.


I called it Tiny Strings because of those triangles which began as bits of string quilt fabric left after cutting shapes for a bed-size quilt.  They each measure 7/8 inch and contain 2-to-4 fabrics.  This quilt began when I came across a small ziplock containing a bunch of these sweet triangles that, I guess, I was unable to toss.

This photo, taken just after I began quilting it, shows some of the tiny strings and gives a little feeling of the scale.


I took a few other detail photos while I quilted it.  This quilt was made before Double Dare and you can see that the doodle-y style quilting in that quilt started here. 


1. Beginning to Quilt, 2. Doodle-y Quilting Design Fill, 3. Tiny Strings - Quilting Detail, 4. Tiny Strings - Border Quilting Detail

I'm happy to be able to share this secret project and am joining these link parties:

Finish it up Friday at Crazy Mom Quilts
FMQ Project Linkup at The Free Motion Quilting Project
Link a  finish Friday at Richard and Tanya Quilts
TGIFF on Amy's Crafty Shenanigans
Whoop Whoop Fridays at Confessions of a Fabric Addict

Friday, May 27, 2011

Almost Finished

Small ToteI will likely add a button closure, but other than that (and a wash to take out chalk I used to mark the spines for the quilting), it is done ;-)


Inspired by some other totes I've seen made from this pattern, I made (yet more) string fabric to use for one side of the straps.  I also added some metal rectangles to attached the straps to the bag.

Now . . .  to decide upon a summer knitting project to put inside ;-)

Tuesday, May 24, 2011

Not exactly a silk purse from a sow's ear

After I finished adding the mitered border to the string quilt in the previous post, here's what was left.

Leftover string "fabric"

I had 4 of the original string squares from the block lotto that weren't used in the quilt and the 8 triangles trimmed away when I mitered the corners of the string pieced borders. The angles of the strings weren't consistent–I feared that any design that put them side-by-side would be too confused.

Quilted StripsI added black to the triangles and squared all the blocks to the same size, about 5 1/2-inches square. My plan is to make a smallish tote to hold a knitting project. My directions for a tote like this are here: Summer Tote from Orphan Blocks.

I have the four sections for the bag assembled and quilted.  Lately I look at small projects like these as an opportunity to practice–as you can see, I am still working on quilting unmarked feathers, constrained to fit a designated space.

The thread was pretty randomly chosen from my thread stash ... I don't think I've ever used something with so much contrast  . . .  but doing so really forced me to see where I wiggled, jiggled or quilted myself into a corner :-)

Quilt Detail 

Check out other quilters WIP s on Wednesday (WOW) on Ester's Blog.

Sunday, May 22, 2011

The Story Thus Far

Every quilt has a story--here's the story of this quilt-in-progress thus far.

Strings & Chocolates on the Design Floor

A few years ago I won a set of 6 inch square string blocks in the Block Lotto.  Half were made from light colors fabrics, half were made from dark strings. I always planned to use them as fabric, cut them up and do something, but my idea of what that something was kept changing. Plus, whenever I had an idea, it always seemed to need more string squares . . .

One blockLast winter during Nancie's Bring Your Own Stash (BYOS) class, while I was working on a very traditional looking quilt and making my blocks from vintage feed sacks,  inspiration hit and I decided I would make a variation of her road trip quilt using the string squares.  I loved the totally different look you could get from the same basic unit.

I decided I wanted to use the dark and light values of the string blocks in my design and so I decided to make light and dark pieced blocks and alternate them. 

AfterOnce again, I knew I was going to need more light string squares and so, in February, I made some.

In February, in the block lotto, we were also making string blocks and turning them into heart blocks with dark backgrounds.  I really liked the look of those blocks and decided to use a bundle of dark, neutral hand dyed fabrics that I had purchased by the pound at an incredible yard sale at the MSU Museum. Although there are deep blues and reds and violets in those fabrics, they make me think of chocolates . . . and I have come to think of this quilt-in-the-making as Strings & Chocolates.

This afternoon, I pieced the string borders.  Since the string fabric in the blocks was pieced on a foundation fabric, I cut a dozen 7 x 19 inch rectangles--sized to to keep the "blocks" manageable--from muslin and chose strings that were medium-to-dark to tie to those almost disappearing blocks made from the dark strings.

I had planned to put string pieced fan shaped blocks in the corners of the border, but after I spread the top on the floor and laid the border rectangles around it, I knew that the corners should be mitered to echo the mitered look of the center of the blocks.  More foundations were cut and I returned to the bottomless bag of fabric strips and put together some smaller rectangular string blocks to extend the border on each side long enough for the mitered corners.

Strings & ChocolatesI ran out of steam before I could finish, but all the string pieces for the border are done and–even just folded into place--I can already tell that I like the revised, mitered border design very much.

Check out the projects on more design walls/floors/tables on Judy Laquidera's Design Wall Monday blog post.

Saturday, February 05, 2011

String Hearts and more Strings

Sophie's Heart #7This month's lotto block is this string heart.

My directions for making this block are here.

I pieced the string "fabric" for 10 blocks at last month's UFO night from a bunch of "strings" I've been tossing into a large zip lock for the past couple years ... and when I was finished, the bag looked exactly the same size.  Scraps and strings really do seem to reproduce on their own.

Here are the rest of my hearts.

Sophie's Heart #10 Sophie's Heart #9 Sophie's Heart #8
Sophie's Heart #6 Sophie's Heart #5 Sophie's Heart #4
Sophie's Heart #3 Sophie's Heart #2 Sophie's Heart #1

(You can see the virtual quilt made from 60 blocks from Block Lotto sneak peekers at the bottom of this post: String Hearts for February.)

Working on these string blocks, along with the interesting block (and technique) used in my feedsack quilt clicked and a new string quilt project was born.  For my Friday Night Snow In last night, I dipped into those strings, pulled out the lighter ones and pieced some more "fabric."

Before After 

If you look carefully, you can see that 16 string squares later, it DOES look like I made a dent in those strings . . .  though there are plenty left.

Friday, February 08, 2008

A Good Mail Day

I went to the post office yesterday (between snow storms) and picked up this beautiful birthday block from Kate:

Birthday Block from Kate

After working on some 1.5-inch squares for my quilt for the Doll Quilt swap, this 14 inch block looks huge to me.

Also in the mail were the first 16 of the 40 January lotto blocks I won–these are from Cindi, Juli, Kate, Nell and Rhonda.

16 String Squares

These are 6.5 inch string squares. (Directions for making them are here.)
Related Posts Plugin for WordPress, Blogger...