Showing posts with label orphan blocks. Show all posts

Sunday, August 30, 2015

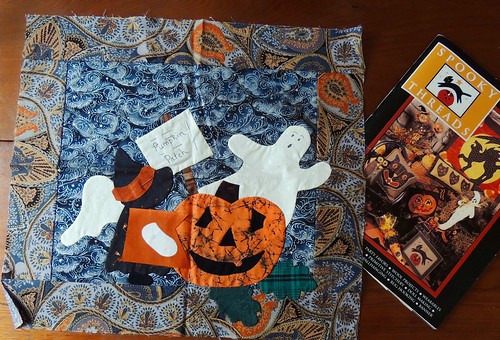
More Slow Stitching in the Pumpkin Patch

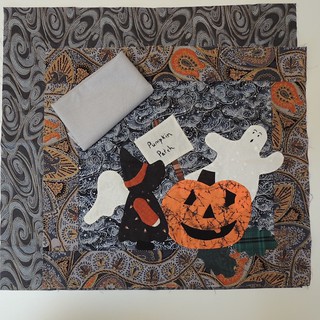
Auditioning FabricsI have finished the appliqué on all the parts included with this orphan and have pulled a couple of fabrics from my stash for the moon in the original pattern and an additional border to make the pillow cover that I plan to make from this a little larger.

I will be pin-basting a couple quilts this afternoon–a task which is my least favorite in quilt making–with the reward of some relaxing slow Sunday evening stitching to add the silvery moon and call this done.

Sunday, August 23, 2015

A Little Hand Applique on a Sunday Afternoon

Yesterday was the guild's Red Hen Auction.  One of the lots I won contained a nearly finished Halloween appliqué and book.

Pumpkin Patch Appliqué

I don't make many seasonal projects or Sunbonnet Sue blocks,  so I thought this would be good for me ... plus the price was right, since no one else wanted it and I cannot resist an unwanted orphan.

The pattern for the orphan is not in the book that accompanied it, but I found it on Sentimental Stitches, as part of an Angelic Sunbonnet Sue series. Here's her version.

The designer blogged about the series here and you can find the pattern for the wall hanging here.  Isn't the internet a wonderful resource? A quick search for Sunbonnet Sue + Pumpkin patch and I found it at the top of the search results.

To finish it as it was designed, looks like I only need to add a hand and a star and finish the appliqué ... then decide what to do with it.  Pillow cover, maybe?

It's my plan for some Slow Stitching Sunday later today.

Tuesday, May 12, 2015

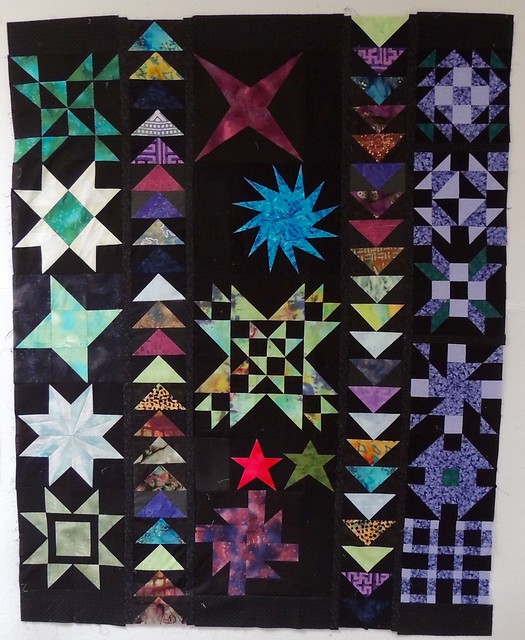
Orphan Stars and Geese in a Night Sky

I'm feeling stressed.  Sewing is calming ... but it can't be anything too complex or for which creative decisions must be made.   So I sewed together the second round of orphan blocks on my design wall. 

Orphan Stars and Geese - Assembled

It currently measures 56 by 66 inches.  I will likely add a 2 inch border for a finished size of 60 x 70.  I may not finish in time for the H2H deadline, but either way, both of the orphan blocks quilts will find their way to the charity Happy Chemo. 

I'm joining the lists for Mrs Sew and Sow's Scraptastic Tuesday–be sure to check out the fantastic quilt she made, starting with some orphans–and WIP Wednesday on Freshly Pieced.

Friday, May 08, 2015

So ...

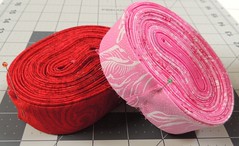
DSCN8560I haven't made much progress finishing the orphan block quilt.  I have pieced a back and made some scrappy pink binding. The scrappy pink binding is for the orphan block quilt and the red paisley is for the liberated wedding ring with the red background.

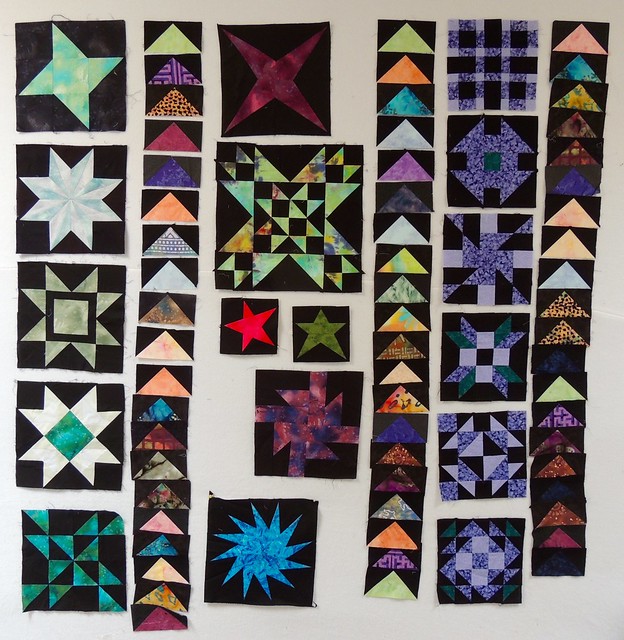
Even though I have made next-to-no progress on much of anything this week,  because I had so much fun playing with those orphan blocks, that I found some more blocks (with black backgrounds) and some time to put them on the wall to see if there were enough for another H2H quilt.

More Orphans

I only made a few of these.  Most are from an orphan block swap from a few years ago.   I think it's time to use them up.

I am joining the lists for QuiltShop Gal's Creative Goodness and Angie's WIPs Be Gone.

Sunday, May 03, 2015

Playing with (orphan) Blocks

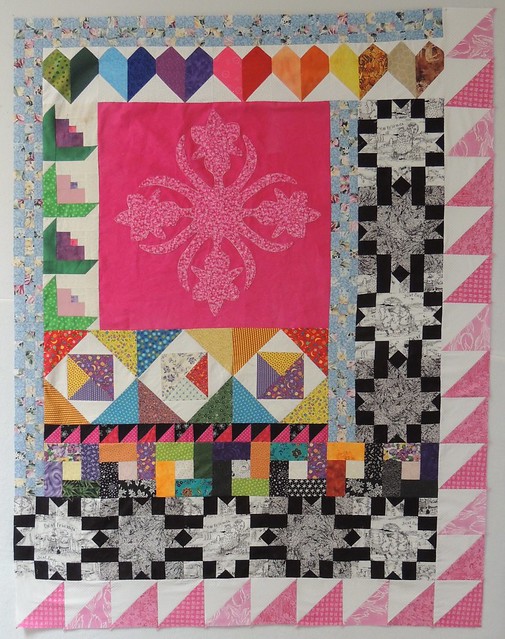
I went to bed last night thinking I would get up and rip out part of the progress I made yesterday.  I woke up this morning and kind of liked it ... and so left it and kept going.   It measures 51 by 65-inches which I think is a nice size for a lap quilt to use during chemo treatments or blood transfusions.

Orphan Block Quilt

I think it will be able to brighten up any institutional setting. 

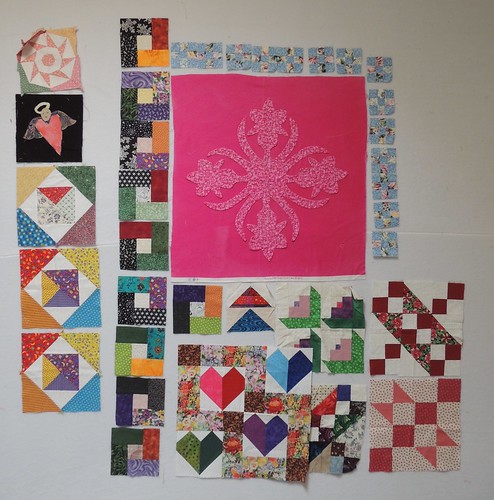
It is made from 2-inch, 3-inch, 5-inch. 6-inch. 9-inch and 10-inch blocks in addition to the 24 inch Hawaiian appliqué which I stitched down with buttonhole stitch on the machine.  Everything except the half-square triangles and a few of the heart blocks came out of my big ziplock of orphan blocks.  I expected that the blocks would be more randomly arranged, but since the blocks I had worked in this almost log cabin arrangement, I followed that path. 

The backing will be pieced because I have ALMOST enough of a pink/cream/green print.  I haven't yet decided how it will be quilted, I know the binding will be scrappy pinks.  In the meantime, it is pinned to my design wall for me to think about. (Follow the link to see what others have on their design walls in the link list on Patchwork Times).

When it's finished, I will be sending it on to Happy Chemo as part of the H2H challenge. 

While it hasn't been a WIP very long, some of those orphan blocks have been around forever, so I'm joining Angie's WIPS be Gone list. 

Saturday, May 02, 2015

May Goal for a Lovely Finish

I didn't meet my goal in April (though I made a start at it and expect to finish it soon).  I was, in part, overwhelmed by commitments and ... life.

My goal for a lovely finish in May is a bit of a challenge within a challenge.   It will start with this large, in-progress Hawaiian-style appliqué block.
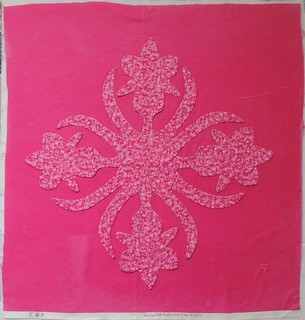
May Goal for #aLYoFThis project came from the estate of a quilter, donated to the local guild and sold, along with some other work-in-progress and lots of fabrics as a fundraiser for the guild at the retreat.

The appliqué was prepared by sewing it to fusible interfacing and turning it to turn under the edges.  It hasn't been stitched down, the interfacing shows in spots.   I suspect the craftsmanship and the choice of fabrics–that really is an in-your-face bright pink background–were the reasons it languished on the table unwanted while quilters scrambled to pick up more conventional (and more complete) projects.  I adopted it at the end of the third day and thought it could become the focus of a Plan B quilt that might be donated to Happy Chemo through the Hands2Help challenge which also has a deadline this month.

Updated to add that it's approximately 25 inches square.

Last night, I pulled out my collection of orphan blocks and chose some that I thought might play together nicely.

May Goal for #aLYoF

Now comes the fun of making some more elements, deciding what's in and what's out, arranging, re-arranging and putting it all together. I think it has possibilities ...

Tuesday, April 20, 2010

From Blocks to Tote - Tutorial is Ready

If you're interested to learn how I went from these pieced blocks and fabric squares . . .


Plain Fabric Squares for the bottom


. . . to my Summer Tote,


Summer Tote


The tutorial is ready. You can find it here:

Summer Tote from Orphan Blocks

If you make one, I'd LOVE to see it.

Summer Tote from Orphan Blocks

Summer ToteWilliam Morris said, "Have nothing in your house that you do not know to be useful, or believe to be beautiful." I think this quilted tote bag qualifies as a nice-to-have on both counts.

Do you have orphan blocks–blocks you made and loved but for which you have no project in mind? Then you might consider making a useful, beautiful tote bag of your own.

This bag is approximately 12 inches high and 16 inches wide (at the top edge). The bottom is 8 inches square. It is constructed from 6 1/2-inch pieced quilt blocks  and squares of fabric. (In the assembled bag, they will finish at 6 inches.)  It is based on Gay's So Sew Easy Schlep Bag pattern, which you can download from the linked page on her Sentimental Stitches site. My  Summer Tote differs in the following ways:
  • It's based on smaller squares and uses pieced quilt blocks in place of squares.
  • It is layered with batting and quilted
  • It does not have a separate lining, the quilted sections are self lined by the backing fabric and the seams are covered with bias fabric.
  • The straps are shorter and are constructed of two fabrics.  They are attached to more than the edge of the bag. 
Here are the notes and photos of my process.

CONSTRUCTING THE BAG
  1. Start with 4 blocks you want to feature.  Your blocks will appear as if they are set on-point in the finished bag. If you want to make 6-inch (finished size) stamp basket blocks like mine, you can find the pattern on the About Quilting site, here.

    Start with four quilt blocks

  2. Add 4 more same-sized blocks that will appear at the bottom of the bag.  I made 16-patch blocks in coordinating colors.  Directions here.

    Add four more blocks

  3. Since the blocks you add at the bottom will, for the most part,  become the bottom of the bag, I chose to use plain fabric squares, cut at 6.5 inches of a darker coordinating fabric.

    Plain Fabric Squares for the bottom

  4. At the top, add the half-blocks which, along with your featured blocks, will appear at the top of the bag.  You could cut two pieced blocks diagonally in half.  I constructed "half" 16-patch blocks and used whole squares (knowing they would be later trimmed to triangles) to prevent stretching until I was ready to finish the top edge of the bag.

    Half Blocks on Top

  5. Sew each column of blocks together, creating 4 vertical strips.

    Strips Sewn

  6. Layer the individual strips with batting and backing (cut larger all the way around) and quilt as desired.  These small strips are easy to maneuver and a great opportunity to play with free motion quilting.

    Strips Layered and Quilted

    There is an (unfortunately over-exposed) detail photo of the quilting here.

  7. Trim the quilted pieces.

    Trimmed Strips

  8. Lay out the pieces to form a windmill like mine and stitch the 4-patch in the middle together.

    Assemble the bag

  9. Fold the bag so the long edge of the strip is aligned with the adjacent edge, right sides together. (there is an illustration of this in the So Sew Easy Schlep Bag instructions linked above.) Repeat for each strip.  The bag, inside out, will look like this.

    Inside Out - ready for binding

  10. I bound the edges on the inside of my bag for a clean finish, since the quilted bag does not require a separate lining. I had a package of double fold bias tape in a coordinating green, so I decided to use it.  It was a struggle and I don't recommend it.  NEXT time, I'll cut my own binding strips and they will be wider.  You might decide to add a lining (so you can add interior pockets); if so, you also might decide that it's not necessary to bind the interior seams.
  11. Trim the top edge, if necessary, and bind.  I used a 2" strip for a 1/2 inch bond edge.

    Bind the Top Edge

    I sewed the binding to the inside first, stitching it from the outside to make sure I didn't lose any of the pieced squares' corners. Then I folded it to the front, turning under 1/2 inch and used a decorative stitch to sew it in place.

  12. Make and attach the straps. Weather you use the directions for the Schlep bag or follow mine below, before you cut anything, decide for yourself how long the straps should be.  We all have different preferences–do you want "handles" or a shoulder strap?  Measure a tote bag you have and love or use your bag and a measuring tape to come up with your personalized measurement.
TWO-FABRIC STRAPS

I liked the white background of my bag, but worried that white straps would be impractical and, like the William Morris quote at the top of this post, I wanted a tote that I thought to be beautiful and knew to be USEFUL.  I decided to combine the white background fabric with the print.

CUTTING
  • The white fabric was cut 1-1/2 inch wide and as long as my desired strap length plus 3 inches, doubled (for two straps).  In my case, this translated to almost a width of fabric for both straps. The finished straps will be this width (1-1/2 inches).
  • The print fabric was cut 2 inches wide and the same length.  You'll need two strips for each strap. (In my case, 2 widths of fabric).
  • Batting was cut at 1-1/2 inch wide and slightly shorter for each strap

SEWING

  1. Sew a print (2 inch) strip to each long edge of the white (1-1/2 inch) strip. Press seams toward the print fabric on each side.
  2. Turn under 1/4 inch of the long edge of the print fabric on ONE SIDE ONLY.
  3. With the straps laying wrong side up, lay the batting in place–it should fit on top of the white fabric exactly, with a little "bade" space on each end.

  4. Sew strips for Straps Press under one edge Add Batting
  5. Fold the print fabric (without the pressed under edge) over the batting.  If you are using fusible batting, you can fuse it in place now.
  6. Fold over the remaining side (with the pressed under edge) and pin in place.
  7. Stitch the second side down.  Depending on your plans for additional stitching (to add  body and strength to the straps), you could simply stitch it down by machine and add more parallel lines of stitching to the straps.  I decided that would add some free-motion quilting to my straps in the middle and stitch in the ditch on each long side, so I slip stitched mine in place.

    Fold over the side with raw edge first Fold over second side and stitch Right Side of Strap
  8. Fold over and stitch each end.  I wasn't concerned about "neat" and used a zig-zag.
     
  9. Position your straps and attach them to the bag.  Unlike the Schlep bag, I did not simply sew the end of the strap to the sewn edge at the top of the bag.  I knew I would be using this bag for books, groceries, and trips to the Dallas Farmer's Market and wanted to be sure the straps were attached.  On my bag, each strap extends inside the bag 1-1/2 inches and is attached to the bag along that inch and a half length. You might decide to attach your straps to the outside and cover the extra stitching with a coordinating appliqué.

    I machine stitched mine, basically following the stitching on the bag to make it less obvious from the outside, which meant I restitched along the line where the binding was attached to the top edge of the bag and did a generous amount of stippling beneath that in the white squares where the strap is attached to the bag.  In this case, more stitching gives those handles more structural integrity.
Your bag is now ready to put to work. Enjoy it's beauty and function.


Finished Bag
Related Posts Plugin for WordPress, Blogger...