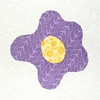


I made five blocks using three different techniques (with one variation) and three different stitches on the machine and took photos along the way. You can view my step-by-step photos with commentary on Flickr in my set Notes for Machine Appliqué Posies. I'll also go through them here--to make it easier to print them off for reference. As always, all the images are clickable for a larger image.
ABOUT THREAD AND STITCHES
Using these techniques, there will be nice, turned under edges on the appliqué. You want the nice edge to be the feature, not the thread. Use a clear (or smoke) mono-filament or mono-poly or thread in a matching color.
Three kinds of machine stitches work well with these techniques.
- Blind Hem Stitch - when using this stitch, the straight stitches go into the background at the applique edge, then the zig stitch comes into the appliqué.
- Zig-Zag Stitch - this is an open zig zag, not a heavy satin stitch. Use this stitch On the applique, at the edge.
- Straight Stitch - even IF your machine only sews a straight stitch, you can still do machine appliqué. In fact, Jane Sassaman recommends using a straight stitch to highlight the nice turned under edge.
First, two things about backgrounds.
- For all three of the methods I will describe, take a minute and starch the background squares. I usually spray the fabric pretty heavily, wait for it to soak in a bit, then press and repeat.
- Applique sometimes pulls the background in a bit, so start with a background square a little larger then you need and square up after the block is complete. For Posy blocks for the lotto, I started with 9-inch squares and squared them up to 8.5 inches for a block that will finish at 8 inches.

No comments:
Post a Comment