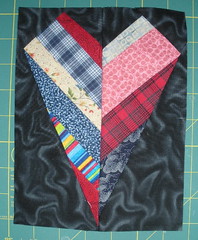
 This 6 inch by 8 inch (finished size) heart block is made in two steps: First you make the string pieced rectangles and then you use it to piece the heart block.
Many quilters have posted good directions online for how-to make string blocks. Kate published the basics on the Block Lotto blog when we made string pairs, here:
January Block Lotto String Square Pairs
Bonnie Hunter has a String piecing primer on her Quiltville site here:
String Quilting Primer
You’ll need two 3-1/2 by 8-1/2 inch rectangles of string fabric for each heart block —the strings should be at an angle and you’ll need a pair: one right leaning and one left leaning, arranged so that they form a V shape. You could piece each rectangle individually on a 4 x 9 inch foundation, or you might string piece something larger (maybe an 8 x 9 rectangle or 9 inch square, and then cut it to size.
FABRIC REQUIREMENTS
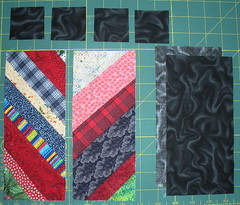 For each block, you’ll need:
 • Two string rectangles 3.5 x 8.5 (1 Left-leaning and 1 Right-leaning
• Four 2-inch squares of background
• One or Two background rectangles 4 x 8 inches
NOTE: Cut ONE back ground rectangle if your fabric is solid or dyed and looks the same on both sides (no right side). Cut TWO if your fabric is printed and/or has a right side and a wrong side.
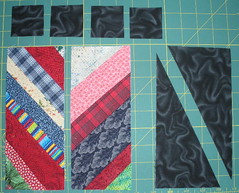 Slice the rectangle diagonally from corner to corner. If you are cutting TWO (print) Rectangles, you MUST stack and align them with WRONG SIDES TOGETHER before cutting the diagonal. You will end up with two mirror image triangle pairs (and can use the second pair for another block.
 If your fabric is solid or dyed and is the same on both sides, you will cut ONE rectangle and flip over one of the rectangles to make a pair of mirror image shapes.
SEWING THE BLOCK
1. Align a square, face down, with the top left corner of each of the string rectangles.
2. Sew across the square, diagonally from corner-to-corner. You can draw the line before you sew if that makes it easier—remember you are going to sew ON the line.
3. Trim the excess fabric (in the corner) away, 1/4 inch from your seam.
4. Press.
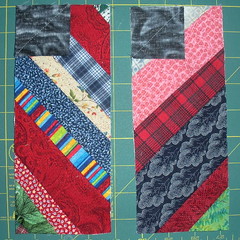
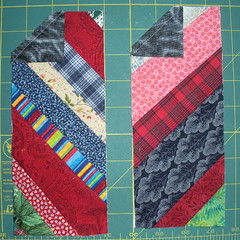
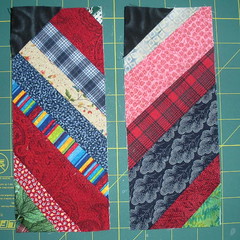
5. Repeat with the other two squares in the top right corners of the string rectangles.
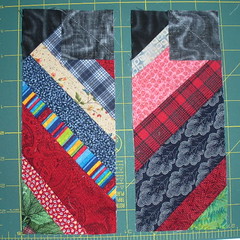
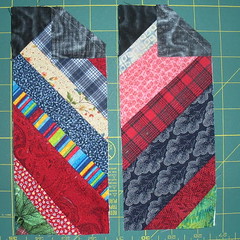
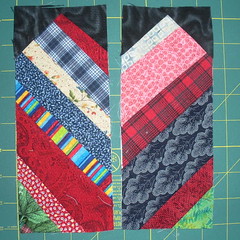
6. Lay out your block, placing the triangles on top for reference.
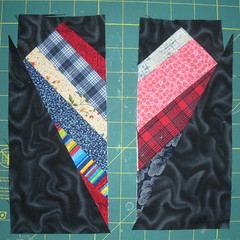
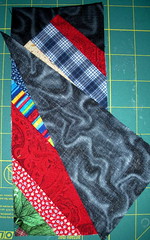 7. Flip one over and align the long edge of the triangle so that:
 • it is even with the intersection of the seam at the outside edge of the rectangle
• it crosses the bottom edge of the string rectangle 1/4 inch away from the point (so your seam will go through the point.
8. Sewn the triangle in place,
9. Fold back the triangle after it’s sewn and MAKE SURE that the triangle covers the rectangle underneath. DO NOT trim or press anything until you have checked.
The placement of the triangles does NOT have to be exact. Remember this is supposed to be fun. If you are having problems, try sliding the triangle up or down on the rectangle … or cut a larger rectangle to start.
10. Repeat on the other side.
11. Fold back the triangle and trim the excess string fabric away … but DON”T toss it.
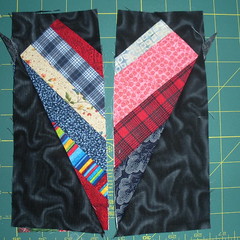
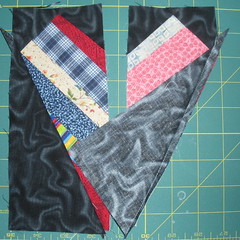
12. Press.
13. Sew the two halves of your heart block together.
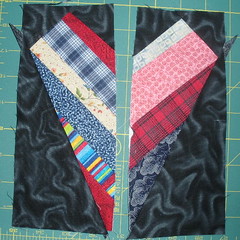
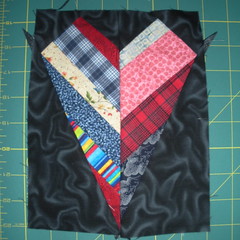
14. Press and square up and trim to 6-12/ inches wide and 8-1/2 inches tall.
BONUS BLOCK
I couldn’t toss the large triangles of string fabric that I cut away in step 11 … and noticed when I flipped them over, I saw the beginnings of a smaller heart block. I used 1-3/4 inch squares and a 3.5 x 7 rectangle. The sewing order is a little different for this one: you’ll need to sew the triangles together first, then add the squares at the top.
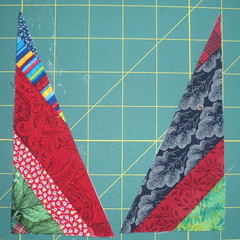
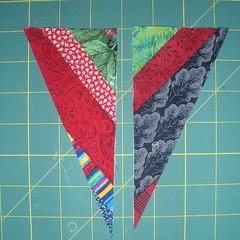
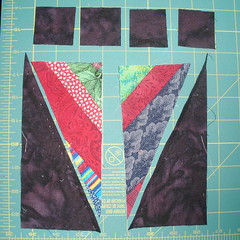
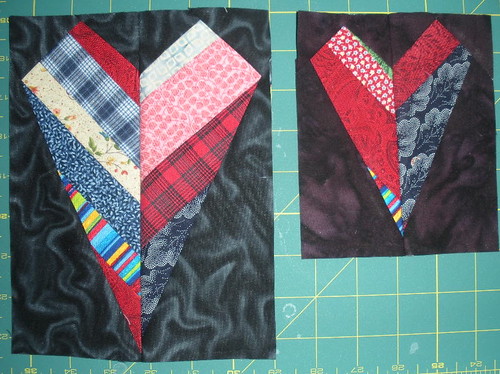
As you can see, the bonus block is a bit smaller with slightly different, but similar proportions to the “parent block”.

5 comments:
Thank you for sharing! What a fun block.
Great block tutorial! Soooo cute!
Sophie, your heart blocks are great and the tutorial is a nice addition to the post......I just might make some block to add to a quilt I'm working on. Thanks for sharing.
Have a wonderful weekend.
Love the heart block and the tutorial.I'll give it a try.
love the hearts!!
Post a Comment