Showing posts with label Guild. Show all posts

Monday, December 07, 2015

Another Workshop Project

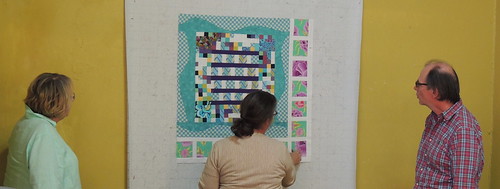
I was gifted with a guild workshop in November, along with the argument that I could pull fabrics from my stash so I couldn't say no. Life has been especially harsh (in case you wondered why I stopped blogging) and my heart wasn't really in it, but I went.

The workshop was taught by Karla Alexander.  Each student chose a project with curves from one of her books or patterns.

A bunch of us choose Electric Fence, the cover quilt from her book, Color Shuffle–clicking the book image will take you to Amazon.

I generally choose technique classes, not those based on making a quilt, so  I went into this one with the idea that I would make a smaller kid-sized version of the project–made from 20 blocks instead of 35–and concentrate on the technique and design ideas shared in the workshop.

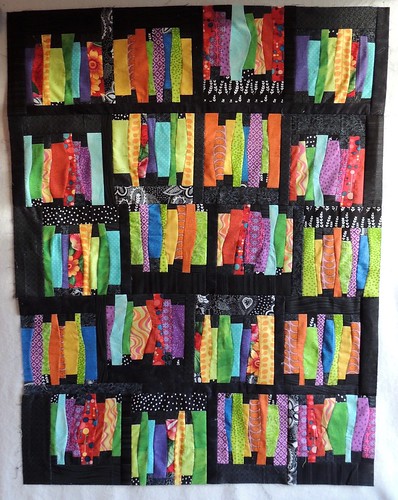
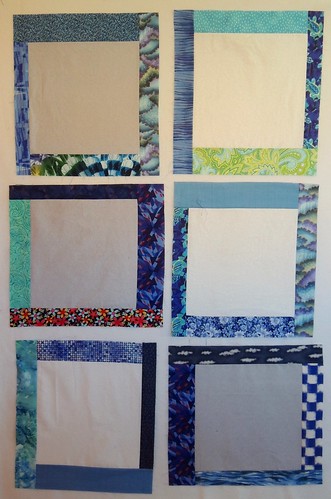
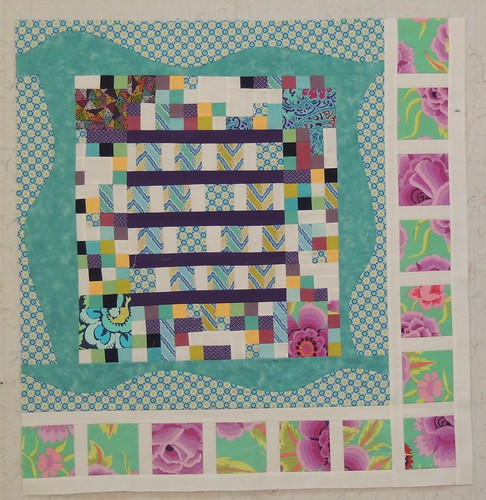
When I was choosing fabrics from my stash, it seemed my bright choices were going beyond "electric" and I started to think of this little quilt as Neon Fence.


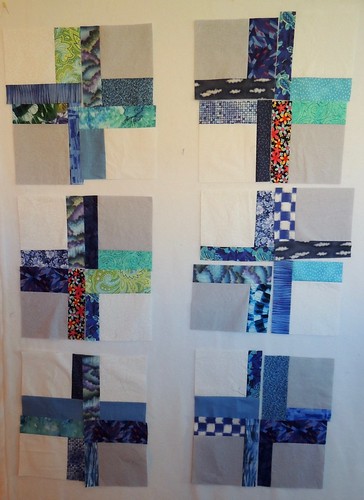
  Neon Fence - In Progress


Yesterday, as I was (finally) putting the blocks together, I thought about Do Androids Dream of Electric Sheep? and wondered if those electric sheep were jumping over neon fences? I'm not sure where that idea came from–I'm really not much of a fan of science fiction–but some jumping sheep may show up in the quilting design when I get there.

First, I need to decide up on borders.

But, for now, they are no longer blocks on the design wall waiting for me to DO something with them ... now it's an in-progress quilt on the design wall waiting for me to finish it up.

In the meantime, while all the fabrics were out ... some of them found their way into a December block for Blocklotto.com.  It's the last of the long rectangles, called Wonky Strips.


You can read more about guidelines and find a link to the pattern here: 


Monday, October 26, 2015

A New Community Service Project

Saturday, the Northern New Mexico Quilt Guild had a community service sewing day.  They need more large bed-size quilts and organized an interesting bed-sized scrap quilt for us to make.

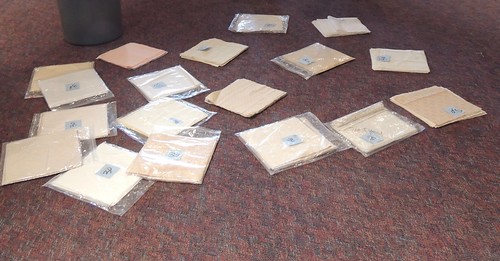
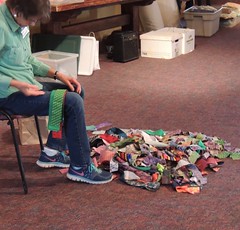
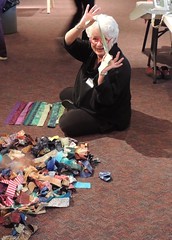
On the floor in the center of the room were packets of 30 background fabric squares.  In four piles spread around the room were  strips of fabric in different widths.   To create a quilt "kit", we picked up a background packet and then chose 120 of the strips–30 from each size/pile. It looked something like this:

Background packets

Picking Strips Picking Strips

It was a fun way for everyone to build their own kit.

I bordered about half my blocks during the morning. After a lunch break, we gathered our chairs for the guild meeting.  I came home after the meeting and finished making the blocks. I had 30 blocks bordered, sliced and re-assembled by the end of the day.

Here's some blocks on my design wall, showing step 1 and 2.


Community Service - Step 1 Community Service Sewing - Step 2

The quilt pattern we used (with the designers permission) is Scrappy Love by Cintia Gonzalez (of My Poppet) from Fresh Quilts magazine.


I am looking forward to squaring up and putting together my blocks and seeing ALL the quilts that came from those 4 piles of strips on Saturday.  

Joining the lists for Design Wall Monday and  Oh Scrap!


Saturday, October 17, 2015

6-Minute Circles, Redux

If you have followed my blog for a while, then you know I have embraced Dale Fleming's 6-minute circle technique and it has become a beloved tool in my bag of quilting techniques and tricks.

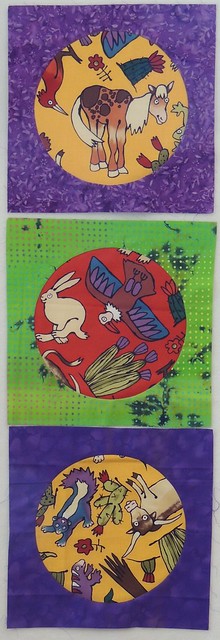
2 Circle BlocksRecently, I was asked to demo it for my mini-group and then we decided to practice by making circle blocks for a small group quilt.  This morning I needed some playtime, so I made these three blocks.

We are using two southwest-inspired fabrics for all the circles and adding fabrics from our stash to frame them–purple for the one with the gold background and green for the red background.

For those unfamiliar with the technique, there are a few good videos online of Dale Fleming demonstrating her technique:

Simply Quilts
The Quilt Show (you must be a member to view this one)

Her book is also a great resource and goes far beyond the "6 minute circle" in showing you how you can use this technique–here's a link to the kindle version:


I mostly followed the steps as outlined, until seeing the circle tutorial Marie put together where she leaves the freezer paper on until after the seam is sewn. I found it SO much easier to see where I was going ...

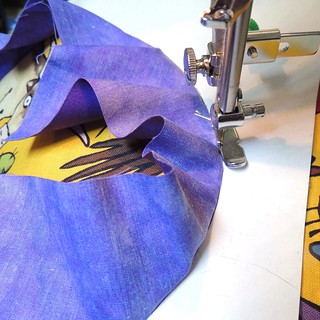
Sewing the circle blockMarie has great step-by-step photos of the entire process in her tutorial, but here's a quick look at what sewing the seam looks like.

I had not before switched to a zipper foot (as recommended by the author) so I thought I'd try it today. I liked how easily I could follow the edge of the freezer paper circle, but it bugged me that I couldn't see the needle going into the fabric like I could when I used my open toed foot.

Now that I've been making these circles for a while, I have a little checklist of methods and reminders that work for me:

  • Take the time to create a double-layer of freezer paper.  It creates a sturdier edge in the center and will last through 5 or 6 blocks.
  • If you are putting a circle in the center of a block, make it easy to get it centered perfectly by cutting the freezer paper the same size as the background/frame.
  • The circle (or whatever shape) is always cut to be the FINISHED size
  •  If you are gluing fabric-to-freezer paper, go lightly. When you are gluing fabric-to-fabric, be generous, especially along the circle edge.
  • Press well after every step. 
  • Leave the circle fabric large if you want to be able to move the frame around and decide what goes in the circle. Otherwise, I start with a square that is 1 inch larger than the finished circle size.
It's a fun block, which is 90% preparation and 1 seam.  Ours are 9 inches (finished size) with a 7 inch circle.  I have a couple layer cakes that could become simple circle quilts for community service next year.

Thursday, August 20, 2015

Returning To Quilting (and Blogging)

On Monday, I was asked to help begin the assembly of some pieced parts for what will become the Northern New Mexico Quilt Guild's 2016 raffle quilt.   I was flattered (and a little surprised because I'm not at all a perfectionist quilter).

It was the push I needed to return to quilting (and finally find the box with my favorite scissors, rulers and other go-to tools.)

2016 Raffle Quilt in Progress
The quilt pattern is a block-of-the-month pattern called Taos by Whirligig Designs (you can see the whole quilt about half-way down this page).  Here's how it looked when we were done with this step.

The organizers are changing the outer pieced border to appliqué–I volunteered to help with that, if needed, so you may get another peek in the future.

Since I was now reunited with my scissors and organized to travel, I caught up with the QOV Mini-group yesterday and made some progress on a scrappy star quilt I started last spring.

The end was in sight so I was motivated to keep going after I came home.  When the quilt top was completed, I realized that taking a photo wasn't going to be as easy as it was in my old house with it's long 1000 square foot studio.

New Photographic Challenge

On the plus side, I now have a deck, high enough to hang a big quilt–the only challenge being all the trees and vines in the back yard that could obscure a clear shot.


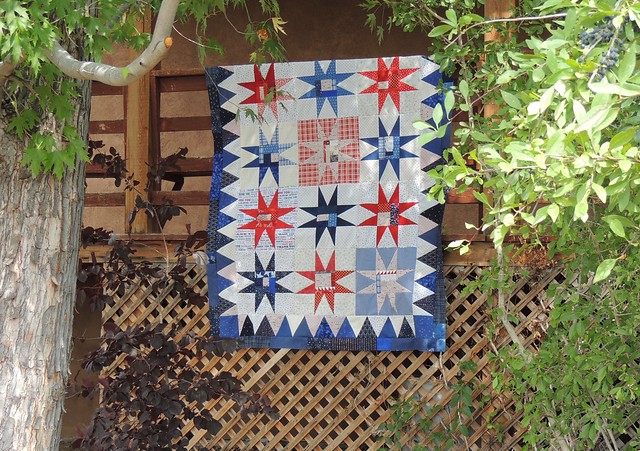
Block Lotto followers will recognize the stars with made-fabric centers (our April block) and the Many Triangles border (this month's block). The stars are a lot bigger (15 inch blocks) and the border is slightly larger (5 inches).   The completed top measures 60 by 75 inches.  I couldn't find my clamps, so you can't see it, but the scrappy blue triangle border goes all the way around ;-)

Updated to fix some grammar and punctuation and to join Angie's list for WIPS Be Gone


Wednesday, April 22, 2015

Challenged by Challenges

I love challenges, but may have over-challenged myself a bit this year ... to give you an idea, here are some of the things on my plate.

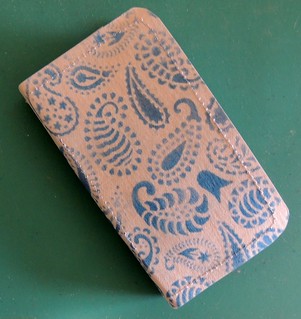
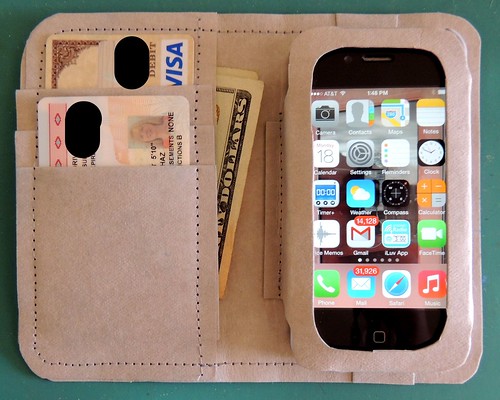
I have previously participated in one of C&T Publishing's Creative Troupe challenges - to use their paper-based kraft•tex™  product in some new colors.  I received a sample of the new light gray called stone.  I wanted to take advantage of the leather-like stiff nature of the product and designed this cell phone wallet.

Cell Phone Wallet - Outside Cell Phone Wallet - Inside

You can see all the other projects made on C&T's kraft•tex™ Pinterest Board. 

For me, it was fun, functional and I always intended to make another for myself adding some fabric for my version ... but procrastinated while I thought about buying a new phone.  I mention it because that experience led me to sign up for another Creative Troupe callout–to use their TAP (Transfer Artist Paper) product in an interesting way ... the deadline is approaching and I am still creatively stuck.

I know that sometimes I am a little frozen by fear.  I've blogged about my scaredy cat ways in the past and you would think that by now I would have just gotten over it.

Another example is the current round of the Cotton Robin (which I cannot share until after the round robin quilts are finished and home again).  I love the idea I have for the quilt at my house, but ... I am afraid that I will not be able to accomplish it. That deadline is also coming soon ... so I will be forced to face that particular fear soon.
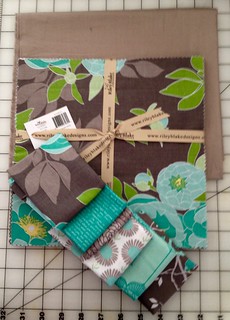
Preparing for the MQG Spring Fabric ChallengeI am curiously drawn to the Modern Quilt Guild's fabric challenges ... probably because making a quilt from a single fabric line is not the way I usually work and it is challenging for me to do so. I can't resist trying ...

I missed the announcement about the spring challenge, but when Marie offered to send me a package of the fat eighths of the challenge fabrics, I said yes, please.

Unfortunately, when I went to my local quilt shop, they had none of the Riley Blake Cottage Garden fabrics, nor coordinating solids ... fortunately, I found a layer cake and some yardage at fabric.com. Part of the challenge is to try something new ... I am planning to include some sashiko stitching–something I've long wanted to try, but never have.

The deadline for this one isn't until July, but some quilters already have finished quilts and a lot of others are much further than gathering fabrics.  You can find photos on instagram with the hashtag #mqgfabricchallenge

You'd think I have enough on plate ... but I have also signed up for the Poster mini-group at the guild (you create a piece of 6 quilts based on posters, with deadlines every 6 weeks).  I am also committed for the H2H challenge and haven't made much progress on that front ... and when Bridget sent email out last month about a scrap bag challenge for the Chicken River Modern Quilters and I had a conflict for that day, I promptly turned around and suggested it to our local Modern-ish mini-group.   The challenge comes from Victoria Findley Wolf's 15 minutes of Play.  The basics are you fill a quart-size ziplock bag with scraps, swap them, then make a quilt using ALL the fabrics in the bag you receive.

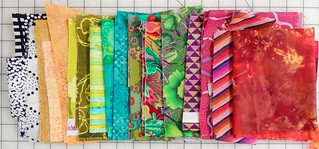
Here are the fabrics I pulled from my scraps.

The fabrics I put togetherIt's probably because I have packaged up and mailed fabrics, blocks and quilts so many times over the years, that I neatly pressed and stacked the fabrics in the ziplock I created.

It also helped me see the mix of fabrics that would be someone else's challenge.

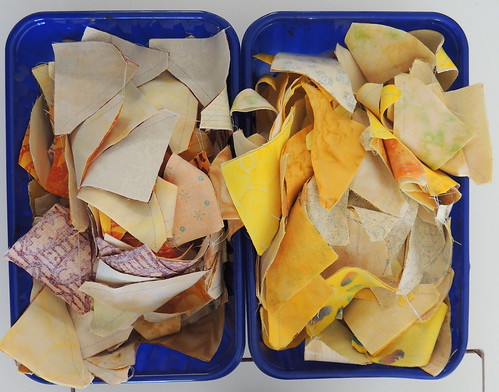
The result was that my bag looked neat and flat (on the left) and most of the others looked like the one I received (on the right).

The bag of scraps I created The bag of scraps I received for the challenge

I came home Monday night with the idea of making some liberated basket blocks, probably because it's on my someday list, but woke up yesterday with a new idea.  I unpacked the fabrics, considered each one, pressed them, and lined them up on the table ... asking myself if they could work in a quilt now in my head.  So far, so good ... just have to meet a few other deadlines first so I can dive in.

All the fabrics I received

Add to the pile a couple of personal challenges–I heard last week that the owners of the house I rent will be putting it on the market and terminating our lease early–which will mean a lot of downsizing (I'll never find a sewing space like this one) and packing and moving a lot earlier than I planned–and well,  I am definitely feeling challenged by challenges–in quilting and in life–right now.

I am joining the lists for WIP Wednesday and Ester's WOW ... even though most of the projects listed here are just barely in-progresss ... the good news is that I should have lots of progress to share going forward ;-)

Monday, April 20, 2015

Baskets and Stars on the Design Wall

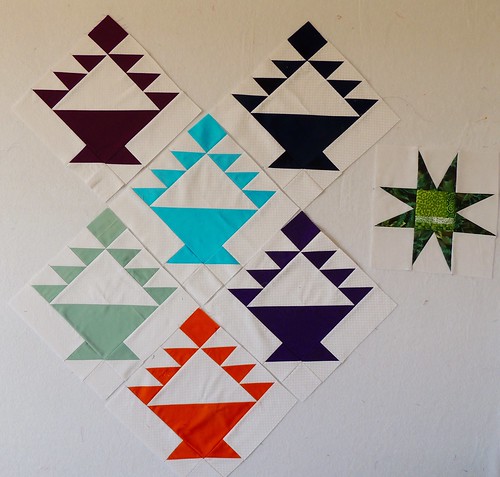
Today on my design wall:

Design Wall - April 20

I have only made one scrappy green 9-inch star block for the Block Lotto this month,  though I have also been making some larger red/white/blue ones for a QOV.  Once again, I feel myself running out of month ...

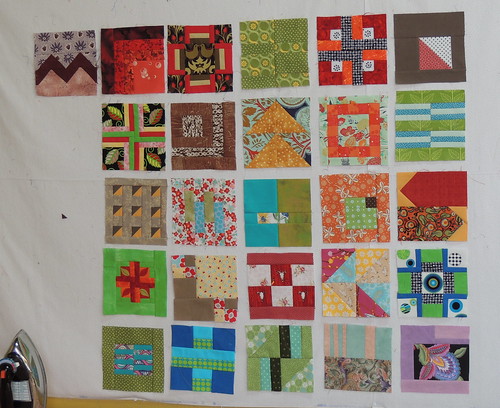
The 10-inch basket blocks (in solids with white-on-white background) are for the guild's April block lotto.  I want to make more to increase my chances ... because I love basket blocks and had a little brainstorm about how to set these in a different way. 

Sunday, March 15, 2015

Quilting with Friends

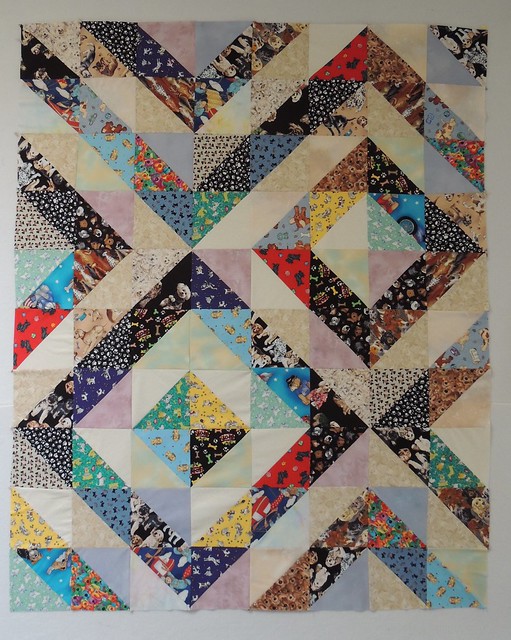
Yesterday (Saturday), the Northern New Mexico Quilt Guild (NNMQG) met to sew kids charity quilts. The quilt pattern was a bit of a mystery for which kits were supplied, or you could–as I did–bring a stack of 10 inch squares: 20 lights and 20 darks. I had a stack of 10 inch squares from a fabric exchange of dog-themed fabrics and thought they would make a fun kid quilt. Most of them are "darks," so I added some low volume and pastel squares to the "lights" to take along.

I am undeniably a control freak when it comes to the quilts I make ... I have to push myself to let go of my controlling ways and suspend disbelief for any kind of mystery quilt, but I persevered and ended up with, what one of the guild members characterized as an "old fashioned scrap quilt."

Today, it's what's on my design wall.  It is, undeniably, an anything-but-modern scrap quilt ... though in a different fabrication, I think the layout could be quite modern.  I have decided to choose to believe that the diverse fabrics make it one of those quilts that becomes more interesting as you get close enough to enjoy all those doggy fabrics and that it will be loved by the dog-loving kid that claims it.

Old-Fashioned Scrap Quilt?

And the ever-analytical me is thinking about how the fabrics I chose to combine with the mostly bright and bold dog prints resulted in that "old-fashioned scrap quilt" feeling.

The directions were dead easy–match light/dark squares and use the 4-at-once method to make Half-Square Triangles and then ... arrange as desired. Millie, our fearless leader for the effort, brought examples of possible layouts and one large quilt top she had made using this technique.   I confess this method of making triangle squares is my least favorite–mostly because you end up with HST units that have bias edges on all four sides ... but I continued to suspend disbelief and just did it. (If you are curious, you can find details of this method and some of my favorites in my free, downloadable HST tip sheet.)

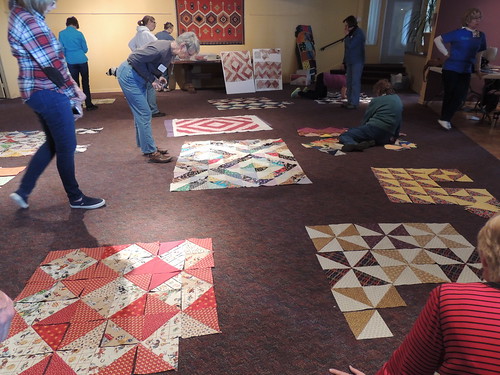
At the end of the day, we laid out our in-progress quilts on the floor in the middle of the room and had a walk-around to enjoy our collective accomplishments.

Admiring our progress

To anyone who is not a quilter, the effort it takes to pack up everything you need for a few hours of quilting with friends could seem a little crazy ... and not at all worth it.  We bring sewing machines, extra lighting, seat cushions (or sometimes a good chair), portable sewing machine tables, rotary mats, cutters, rulers, specialty templates, thread, pins, scissors, snips, seam ripper–the last of which I was glad I remembered because dyslexic me ended up ripping out and re-sewing one square three times before I got it right ;-)   I didn't bring an ironing board and iron, but wished I had, because quilters were queued to press all day long and an additional ironing station would have been a good idea.  The charity quilts committee were also shlepping kits, idea boards, instruction sheets, backing fabrics for the quilts we would make and a giant roll of batting. 
When I looked around the room, it was clear the quilters in the room were happy to have made the effort–Sandy and Fran's big smiles were pretty typical of those around the room. 

Sandy and Fran - Happy to be quilting with friends

Whatever the effort to gather and carry everything you need, it aways seems to make us happy to be  quilting with friends.   (Plus it was a good dry run for getting organized for for the upcoming guild retreat next month.)

I'm joining the lists for Oh Scrap! on Cynthia's blog, Quilting is More Fun Than Housework,  and Judy's Design Wall Monday. 

Monday, January 19, 2015

Blocks on the Wall

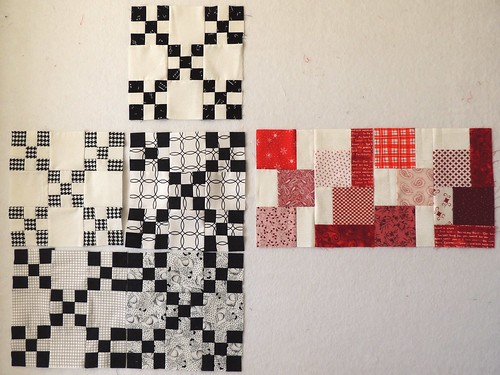
Here's a look at my design wall today.

Design Wall - January 19, 2015

 On the left are five black and white Double Nine-Patches for the January Block Lotto. You can read more about these (and download the block pattern) here:  New Year, New Block.

On the right are a pair of red and white blocks called Serendipity blocks for the new block lotto at the local guild ... as many years as I have been organizing the lotto for blocklotto.com, I have to support anyone who is taking on a similar project.

On the wall just before this photo was taken is my first February lotto block. Now all I have to do is write up the block pattern.

There are some much more interesting design walls over at Judy's Design Wall Monday link up.

Monday, November 24, 2014

When you can't quilt ... PLAN

Over the weekend, I was shocked to find that simply pushing a rotary cutter was painful and the up and down of working on blocks on a design wall and sewing and pressing seams wore me out.  I'm frustrated that a couple of projects I hoped to plan this month ... may not happen.

In the meantime, I'm PLANNING for the future.

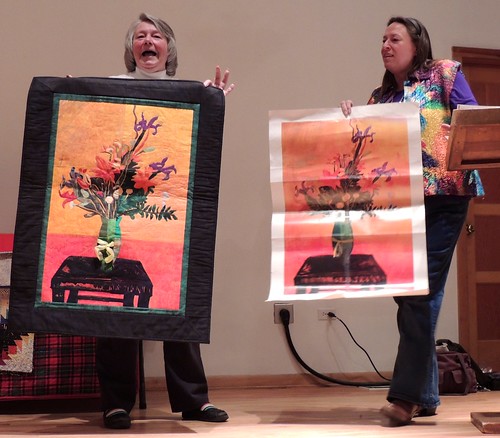
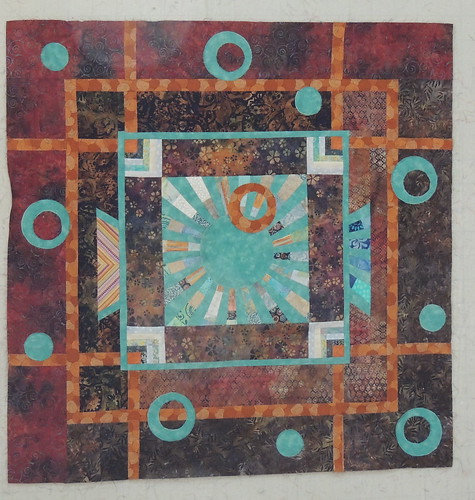
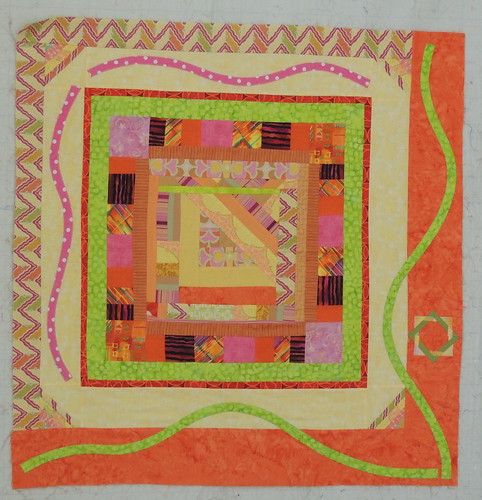
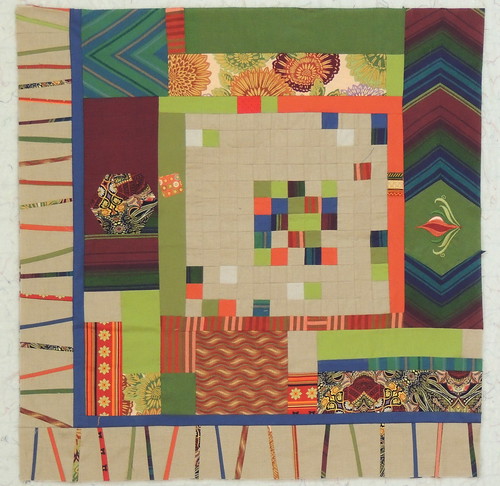
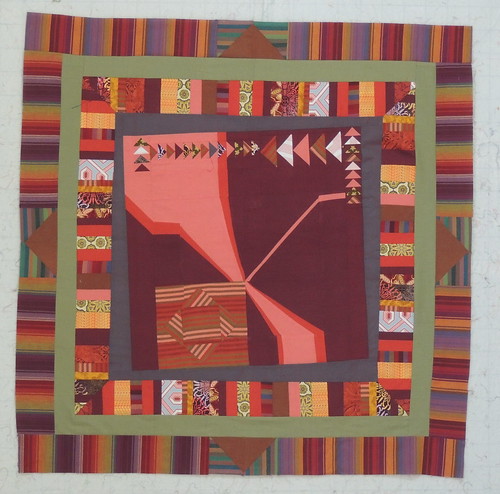
Just about the last thing I did before getting hit by the cell phone menace early Tuesday morning was attend the guild meeting.  Myrna (on the left) shared a variation of the slice quilt that she will be organizing in 2015. Each person in a group of six, buys a poster, slices it into 6 pieces (in any way she wants) and hands them out to the other members. This is Myrna's quilt and the poster she used for her piece (held by guild president Cindy).

A Great Challenge Idea

I have ALWAYS wanted to work on a slice quilt.  I signed up immediately and hope that enough other members who need to meet in the evening or on the weekend will join me. 

Julie has announced that she'll be leading the Cotton Robin one more time and I can't wait. This year, she is asking us to challenge ourselves with a color theme that's new to us and ... I have an idea.  Click over to the cotton robin to check out the dates for this year (and also look at all the quilts we made last year–it was big fun and I am ready for more of the same.) 

I may start my Cotton Robin quilt with a little hand appliqué ... I'm thinking I might be able to handle that while I'm mending. 

I took paper and colored pencils to the urgent care today and sketched an idea for a modern quilter's code ... as it turned out, I waited for more than 2 hours before I was seen and spent another 2 hours mostly waiting once I made it to the back of the house, so I was glad to have something with which to entertain myself. 

For those that are following my saga, the consensus continues to be that I'm bruised but not broken, which is good news, if a little unbelievable because everything still hurts so much ... 

Friday, September 26, 2014

... And I Helped

Earlier this summer, I shared some of the Tula Pink sampler blocks I made for a group quilt being made by the Chicken River Modern Quilters in Las Vegas (New Mexico) for a fund-raiser for their guild.   I ended up making 11 blocks.  Now, the quilt is finished and it is fantastic. 


The setting is the one called Urban Planning.  When I flipped through the book, it wasn't my favorite option, but now, I think it's pretty perfect for showing off our collection of diverse blocks.  It's a lovely group effort and I'm happy to have been part of it. 

If you are in the area, it's hanging at Thread Bear in Las Vegas. 

I'm sharing this great group finish on the lists for: 

Saturday, June 21, 2014

Quilting on Saturday

My Friday Night Sew-in was a success ... although the progress I made isn't exactly eye candy-worthy. 

680 Cut TrianglesI managed to find enough yellows in my scraps and stash to cut 680 triangles.

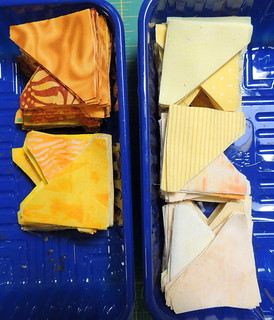
It doesn't look all that impressive in the photo, but there are 340 light yellows, 170 medium yellows and 170 dark yellows.

And ... I paired them up and chain-sewed into the night until I had 340 Half-Square Triangle units, a little more than I 'll need to make 21 blocks.

I didn't manage to push on and actually press them ... and so this effort ended looking like this–light+medium in one bin and light+dark in the other.

It's not pretty, but it is progress on a Scrap-Happy Saturday.   Check out the list to see some beautiful yellow scrap projects ...

340 HST Units

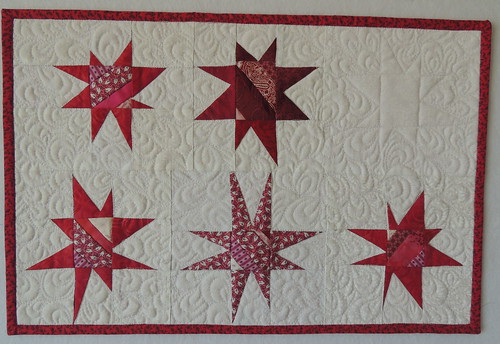
I couldn't face the iron last night, but I did decide to play with some random liberated star blocks I made in February (from Pink scraps) and work on the North New Mexico Guild's charity effort this month: placemats for Kitchen Angels.

Placemat for Kitchen Angels

(The placemat has square corners, only the photo is skewed.) 

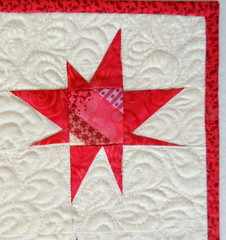
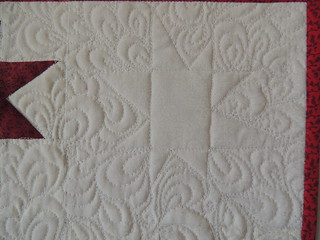
Each fall, around Thanksgiving, Kitchen Angels puts together Holiday baskets for each of their homebound clients including a new placemat, made by members of the guild. I hope someone will enjoy my little scrappy, wonky stars. Since I seemed to be having a little tension problem when I was free-motion-quilting the Cotton Robin quilts, I decided to try again and see what happened ... and, for whatever reason, this time, everything went well. Here are a couple detail photos of the quilting.

Background Quilting Detail   Quilting Detail (in the "empty" square

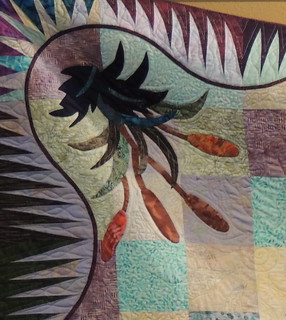
Since my placemat was made,  I didn't have to lug my machine and equipment to the meeting and stick around and sew ... which is probably a good thing since I was up, happily sewing at home last night, far too late and barely dragged myself out of bed in time to make it to the guild meeting.  I am glad I did because ... the raffle quilt has been finished and we got our first look. 

First Look

Clearly, I wasn't the only one snapping photos.

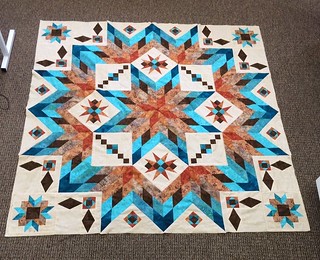
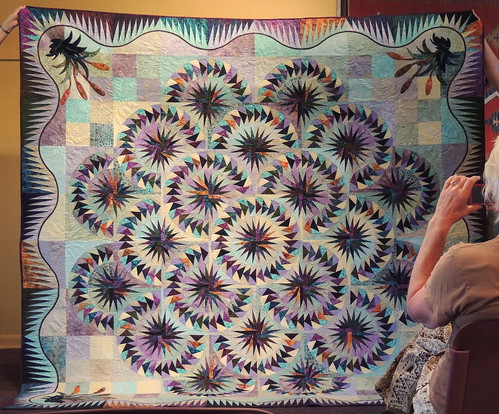
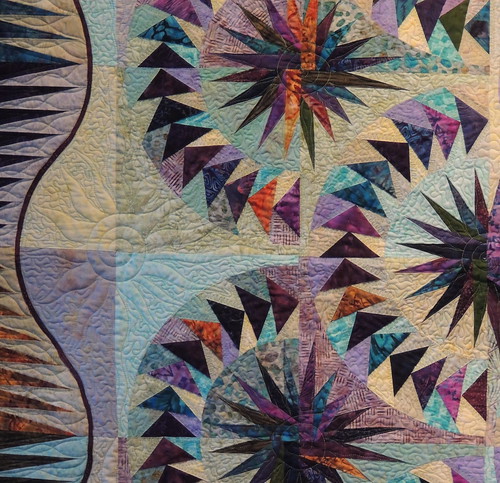
Corner Appliqué DetailThe pattern is Misty Mountain Pond by Judy Niemeyer ... you can find it here:

Misty Mountain Pond

I love the colors and the variety of fabrics the organizers chose.

Nicole Dunn's quilting design is exquisite and feels just right for this quilt.

I'll let you know when I have tickets to sell ...

Quilting Detail

Friday, May 30, 2014

1000th Post Giveaway Winners and Playing Catch-up

I thought I would have a  new finish to share today, but last Friday,  I strained my back moving a heavier-than-expected box that was delivered when I was away.  It put me out of commission for a few days and has slowed me down for the past week.


But I did manage to choose three winners for my 1000th post giveaway and contact them.  

(I found I couldn't pick just one, so I generated three numbers.)

I completely forgot to share the results here until this morning.  

And the winners are: 


I will be pulling fabrics and making your prizes soon.  Also vying for my attention in the near future are the usual end-of-the-month/beginning-of-the-month rush of activities for the Block Lotto and finishing up the last quilt for the Cotton Robin ... I keep meaning to double check the deadline for the Cotton Robin quilts, but never get around to it–a sure sign of what denial looks like on me ;-) 
As the Block Lotto sneak peekers know, I sent out the most tardy, most sketchy block pattern ever for the June block.  This one could use a tutorial (or two or three) about some of the techniques involved and June is only two days away ...

Finally joining the local guild SEEMED like a no-brainer, good idea, but I realized this morning that this guild has no speakers, just business meetings with monthly deadlines for things that they want from me, followed by Show & Tell.  Now that my Proto-Kitty is almost done–I have one more small tweak in mind–I'll be making a few more for the guild's gift shop/booth and some ribbon toppers.  At least I am meeting some local quilters.  And at the next meeting, we're making placemats/napkins–all for a good cause, but ... I'd love to see an occasional speaker or two and have a chance to learn something new in a workshop.

... And I really want to get back to my Feather Bed quilt! I thought that it might be my goal for a Lovely Finish in June–this quilt is for me and it would really put a smile on my face to finish  it and put it on my bed soon ... but I am going to have to play catch-up pretty quickly to make it happen.

Tuesday, May 06, 2014

Opportunities

The Chicken River Modern Quilt Guild has begun work on an opportunity quilt made from some of the blocks in Tula Pink's City Sampler.  I saw it as an excuse opportunity to try some of these blocks.

Also as a rationalization opportunity to buy the book.  It's been sitting on my wish list for a while.

I wasn't able to make it to the first sewing day to work on blocks (and buy a copy of the book at Thread Bear) and I started thinking that buying the Kindle version could be the way to go for me.

I waffled then downloaded the free sample to my iPad to see how I liked it first.

Which also meant, I made the blocks that were included in the sample pages, #1 through #5.

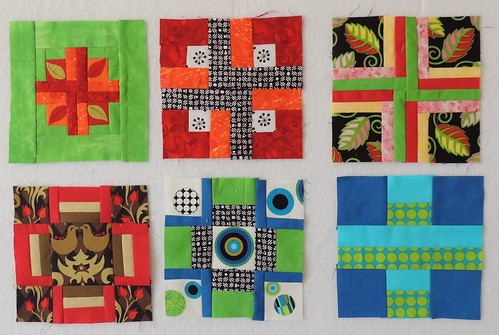
First 6 blocks for the Opportunity Quilt

The sixth block (upper left corner) is a duplicate of one of the blocks ... made with fabrics that were cut too narrow. It seemed to fit with the themes of crosses so I decided to include it.

I found I didn't really care for using this book in the Kindle format. In the hard copy version, directions for each of the 100 blocks are spread across two facing pages, with the block photo on the left and the cutting directions and layout showing assembly on the right.  In the Kindle version, this is spread across three pages (cutting and layout are on separate pages) and I ended up swiping back and forth a lot to see which fabrics go where. Your mileage my differ ... and I'd love to know about others' experiences using e-books for quilting.

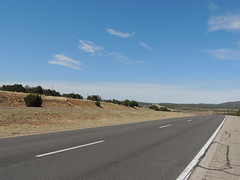
The Drive to LV, NM mostly looks like thisYesterday, I drove to Las Vegas for the guild meeting. I left (too) early, so I could feel unrushed–autocorrected to uncrushed, so yea, that, too–and enjoy the drive and the beautiful spring day.  Most of the 70 miles between here and there look a lot like this–open road, blue skies, rolling hills and mountains in the distance.

I don't make this trip often and didn't think to check for construction ... there was some, but not enough to slow things down much.

I was looking forward to the opportunity of seeing everyone and the results of their round robin. I had seen the quilts near the beginning and now the tops were done and being returned to the owners.  I was also curious to see how well my sampler blocks would play with the rest–I had serious doubts about a couple of them.

After potluck dinner and show and tell, the round robin quilts were revealed.

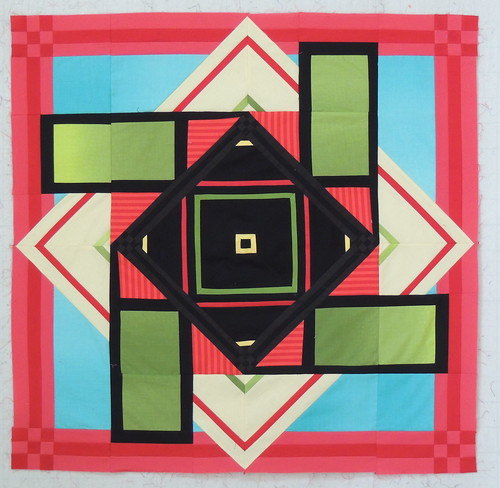
Bridget's quilt started out quite Amish and ended looking very much like a piece of Modern Art.

Bridget's Round Robin

It's almost impossible to see Beverly's center in her quilt, the additions were so well integrated in the design.

Beverly's Round Robin
Lin's piece came with an optional circle which could be added to the center ... which was auditioned in a few places–this was my personal favorite placement.

Lin's Round Robin with Added Circle

There was a question about orientation for a few of the quilts.  This is Betty's quilt, in the orientation decided by consensus.

Betty's Round Robin


Ann's quilt was rotated around the design wall, trying every side up. They all look the same size here, but Ann's was the smallest of the group.

Ann's Round Robin

Michael wanted his quilt to evoke the feeling of centrifugal force–if I'm remembering that right. I think the quilters delivered.

Michael's Round Robin

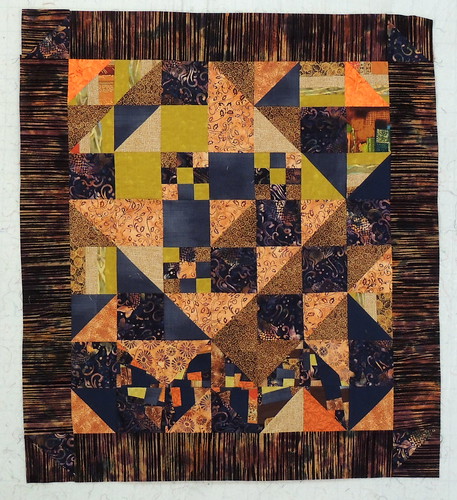
The last quilt is Linda's.  It's missing a "round" (because life happened) and there was a lot of discussion, at the wall and around the room, about what could/should be added.

Lin, Ann and Michael talking design

What would you add?


Deborah's Round Robin

And, in case you're wondering ... here are my City Sampler blocks, again,  mixed in with the rest made so far.

Tula Pink City Sampler Blocks so Far

I think it's a good start. Now that I have the book in hand, I am sure it will continue to be an opportunity to sample some more of these blocks.
Related Posts Plugin for WordPress, Blogger...