Monday, November 09, 2015

Reflecting on Workshops

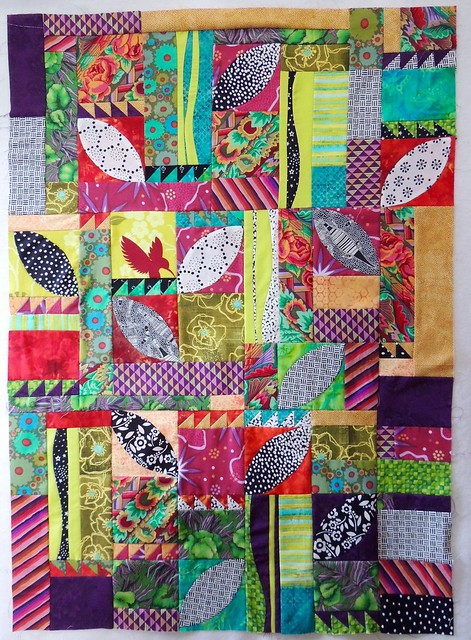
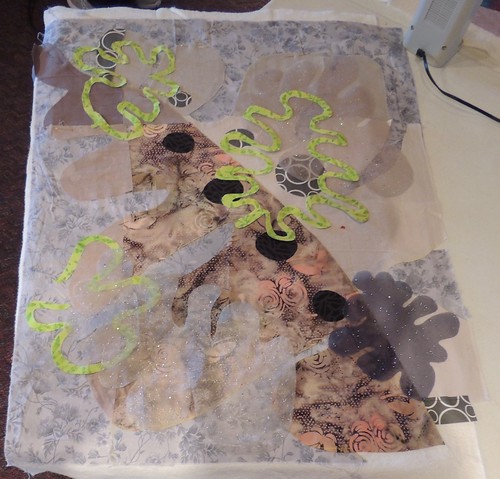
I gifted myself with a 2-day workshop with Patty Hawkins for my birthday yesterday and so, today, my design wall is a portable one.


Work-in-Progess on my portable design wall

The organic-looking shapes are "me," but the rest of it is completely outside my comfort zone in terms of colors, techniques, process and ... well, just about everything else. I came home feeling completely spent and absolutely loved it.

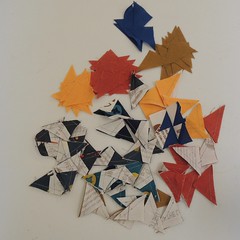
We started by sketching and abstracting a shape from a magazine page, then constructing a paper collage from construction paper (with a bit of newsprint) ... not using scissors. Can you find the torn paper collage (value study) of my leaf-inspired shape in the gallery of collages?
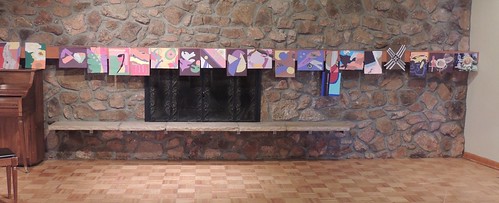

Gallery of Paper Collage

Letting go and just following the process where it led me was not easy for me, but well worth the journey.  While my project is far from done, I came home with a clear idea of where I wanted to go.

As I looked around the room and the great variety of projects, I saw that some others had followed a different path, using familiar-to-them shapes in their usual color palettes–they stayed in their comfort zone and used what they knew would work ... and ended up with very successful pieces that definitely looked like "them," but I wonder if they came home feeling creatively spent and what they felt they learned from their effort.

A couple others raced through the workshop, as if it was a competition and produced multiple pieces–which may or may not have embodied the process and techniques we were there to learn ... but I have no doubt that they went home feeling like the "winner" of the day. 

We all approach learning in our own way.  As adults, it is harder to let go of what you think you know and try something knew.  I actively had to work at it as I know some of my classmates did.  Over the course of the two-day workshop, I felt like I could almost see the lightbulbs coming on over the heads of those  that had, like me, suspended disbelief and worked out of their comfort zone, following the path presented to us. 

Thank you Patty, for teaching me a new way to look at design and nudging me along an uncomfortable, but rewarding path. 
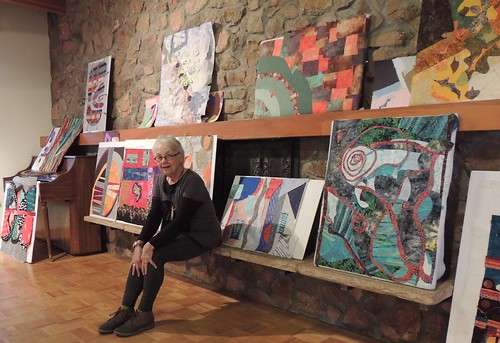

PattyHawkins

If you have a chance to take a class with Patty, don't miss it. She's a great teacher (and encourager).


Monday, October 26, 2015

A New Community Service Project

Saturday, the Northern New Mexico Quilt Guild had a community service sewing day.  They need more large bed-size quilts and organized an interesting bed-sized scrap quilt for us to make.

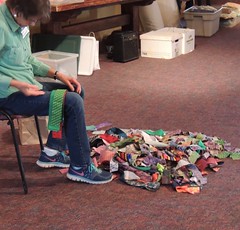
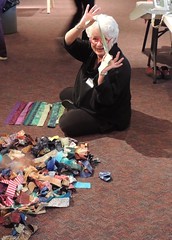
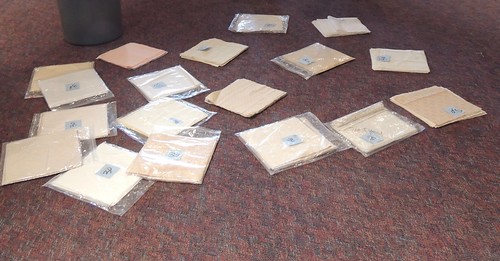
On the floor in the center of the room were packets of 30 background fabric squares.  In four piles spread around the room were  strips of fabric in different widths.   To create a quilt "kit", we picked up a background packet and then chose 120 of the strips–30 from each size/pile. It looked something like this:

Background packets

Picking Strips Picking Strips

It was a fun way for everyone to build their own kit.

I bordered about half my blocks during the morning. After a lunch break, we gathered our chairs for the guild meeting.  I came home after the meeting and finished making the blocks. I had 30 blocks bordered, sliced and re-assembled by the end of the day.

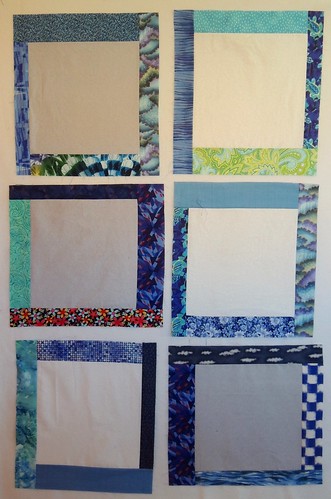
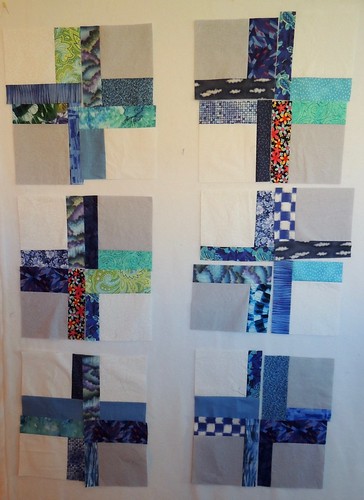
Here's some blocks on my design wall, showing step 1 and 2.


Community Service - Step 1 Community Service Sewing - Step 2

The quilt pattern we used (with the designers permission) is Scrappy Love by Cintia Gonzalez (of My Poppet) from Fresh Quilts magazine.


I am looking forward to squaring up and putting together my blocks and seeing ALL the quilts that came from those 4 piles of strips on Saturday.  

Joining the lists for Design Wall Monday and  Oh Scrap!


Wednesday, October 21, 2015

QOV Works in Progress

I feel stalled on my quilts for Quilts of Valor ... so maybe blogging about these works in progress will help me kick my butt into gear.

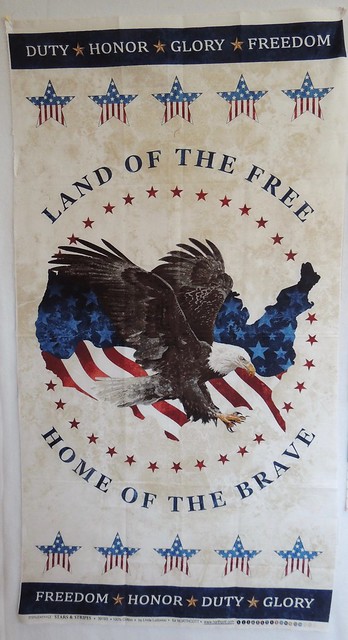
It starts with a PanelMy guild's QOV mini-group has started a challenge.  We each start with one of two panel designs ... and make a quilt (top) by January. This is mine.

I have an idea about where I want to go with this, but ... haven't yet actually done ANYTHING beyond thinking about it.

Since I haven't EVER made a quilt using a panel, this may turn out to be more of a challenge than I envisioned ... but, you know, I have a very hard time saying know to a challenge ...

The colors are actually more dull and muddy-together than they appear on my screen. One of my goals is to do something to help pull apart the image of the eagle from the top half of the U.S. by repeating all the colors in my quilt.

In the meantime, I have started using the bag of 1 1/2-inch QOV strings that were gifted to me.

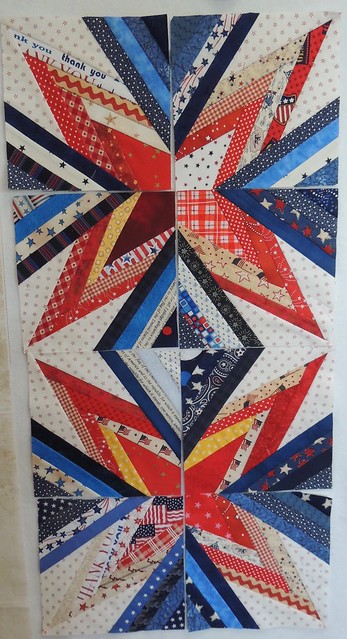
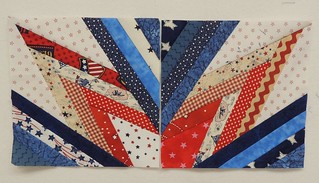
Foundation pieced string blocksI simplified a block that caught my eye when reading blogs–I can't exactly remember where, does anyone recognize it? Anyway I drew a foundation pattern with pencil and paper and have been paper-piecing these blocks.

After making a couple test blocks from my hand-drawn pattern, using a leave-in stabilizer for the foundation, I decided I liked it well enough to create something more precise in EQ.

Then, I woke up a few weeks ago, on the morning when the QOV mini-group meets, thinking about using the method where the foundation is printed on (the non-shiny side) of freezer paper and you don't sew through the paper. I thought it would be an easy thing to print some foundations onto freezer paper and try it at the mini-group ... turns out the hardest part of the process is getting the freezer paper–cut off the roll–to become flat enough to go through the printer. This is easier said than done ... but I did it, though I was late for the mini-group.

These eight blocks represent the original 3 (with foundations) and 5 made using the freezer paper method. I will need 80 of these 7 1/2-inch blocks to make a quilt that is 60 by 75 inches.

And then, there's this ... still waiting for me to quilt and finish it.


New Photographic Challenge

The backing and batting are ready ... I think I just needed to think through the how and where.  There isn't enough space in my sewing room to open the work-table I would ordinarily use to baste a quilt and I am still thinking about the best way to do it in the space I have.  I may take it with me and see if I can use the tables at the quilt shop after the meeting today. I am looking forward to quilting it ... as usual, it's the basting that slows me down.

Joining all the pretty appliqué project links at Esther's WOW (WIPS on Wednesday) and WIP Wednesday on Freshly Pieced.


Monday, October 19, 2015

Row Quit Progress

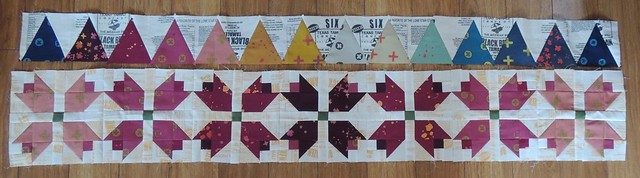
On the Design WallThe row quilt progresses

Here it is with it's third row complete–Twinkle blocks, which are this month's block pattern on Blocklotto.com

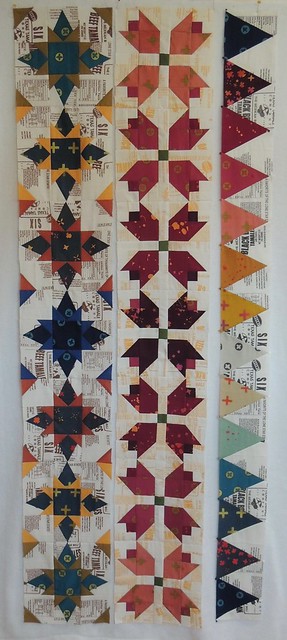
I thought I should come clean and show you how they live on my small design wall  ... not as rows, but as vertical strips.   The design wall is narrower than the rows, but even vertically, it still works to give me an idea to see how I like the blocks and colors adjacent to one another.

In addition to making the 7 Twinkle blocks this week, I also played with all these tiny leftover triangles.


Tiny Bonus Triangles

Believe it or not, when they are this small, I usually toss them, but I think those shiny irridescent shot cottons sucked me in and I couldn't resist playing and seeing what they might become. 

I posted more details on my process (both for the row and the leftovers) on the Block Lotto today:

 Week 3 - Twinkle.

Twinkle BlockYou can find more information about the 9-inch Twinkle block, with links to the block pattern and paper foundation piecing version here:

Twinkle, Twinkle, Monochromatic Stars in October.

Sunday, October 18, 2015

More Circles ... For a Good Cause

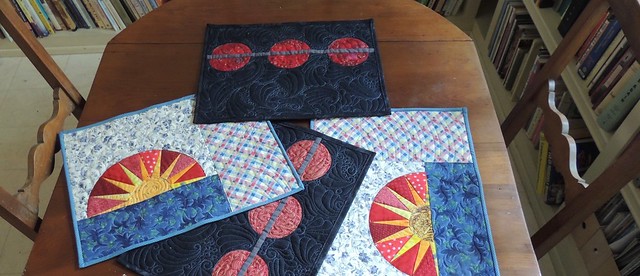
I used the sample blocks from the 6-minute circle demo I mentioned yesterday to make placemat's for one of my guild's community service projects. You might recognize them as two of last year's lotto blocks: Sunrise and Bead-on-a-String.

4 Placemats for Kitchen Angels

I had fun playing with quilting designs over the weekend and finishing them up–the bindings are sewn down by machine, so no Slow Sunday Stitching for me today.

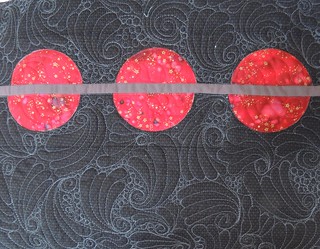
I wanted to try Karen's Feather Galaxy fill pattern ... but I never quite found my rhythm.

Quilting for "Beaded Placemat"The dark gray thread showed up a lot more than I expected on the gray-on-black background, too.

I will likely try it on another project and probably change it up enough to make it work better for me. You can see what it's supposed to look like in this YouTube video.

Even if it isn't "right," I really do love the combination of spiral, feather shapes and pebbles.

Saturday, October 17, 2015

6-Minute Circles, Redux

If you have followed my blog for a while, then you know I have embraced Dale Fleming's 6-minute circle technique and it has become a beloved tool in my bag of quilting techniques and tricks.

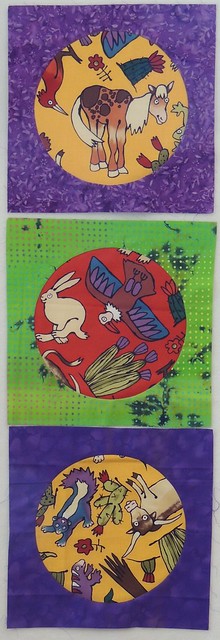
2 Circle BlocksRecently, I was asked to demo it for my mini-group and then we decided to practice by making circle blocks for a small group quilt.  This morning I needed some playtime, so I made these three blocks.

We are using two southwest-inspired fabrics for all the circles and adding fabrics from our stash to frame them–purple for the one with the gold background and green for the red background.

For those unfamiliar with the technique, there are a few good videos online of Dale Fleming demonstrating her technique:

Simply Quilts
The Quilt Show (you must be a member to view this one)

Her book is also a great resource and goes far beyond the "6 minute circle" in showing you how you can use this technique–here's a link to the kindle version:


I mostly followed the steps as outlined, until seeing the circle tutorial Marie put together where she leaves the freezer paper on until after the seam is sewn. I found it SO much easier to see where I was going ...

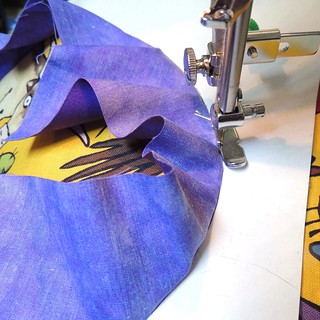
Sewing the circle blockMarie has great step-by-step photos of the entire process in her tutorial, but here's a quick look at what sewing the seam looks like.

I had not before switched to a zipper foot (as recommended by the author) so I thought I'd try it today. I liked how easily I could follow the edge of the freezer paper circle, but it bugged me that I couldn't see the needle going into the fabric like I could when I used my open toed foot.

Now that I've been making these circles for a while, I have a little checklist of methods and reminders that work for me:

  • Take the time to create a double-layer of freezer paper.  It creates a sturdier edge in the center and will last through 5 or 6 blocks.
  • If you are putting a circle in the center of a block, make it easy to get it centered perfectly by cutting the freezer paper the same size as the background/frame.
  • The circle (or whatever shape) is always cut to be the FINISHED size
  •  If you are gluing fabric-to-freezer paper, go lightly. When you are gluing fabric-to-fabric, be generous, especially along the circle edge.
  • Press well after every step. 
  • Leave the circle fabric large if you want to be able to move the frame around and decide what goes in the circle. Otherwise, I start with a square that is 1 inch larger than the finished circle size.
It's a fun block, which is 90% preparation and 1 seam.  Ours are 9 inches (finished size) with a 7 inch circle.  I have a couple layer cakes that could become simple circle quilts for community service next year.

Wednesday, October 14, 2015

Row Sampler Progress - Week 2

The second row I added is made from the Many Triangles blocks we made in August. You can find the link to the block pattern for the blocks (which are 4 1/2 by 18-inches) in this post on Blocklotto.com

Fabrics Cut for Many Triangles Row Earlier this week in another Block Lotto post, I blogged about how I modified the pattern to create a row from 3 1/2 of the wide blocks and my thinking when I chose the fabrics used in this row.  You can find the details here:

Week 2 of 12 + 12 = 1

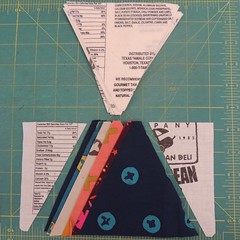
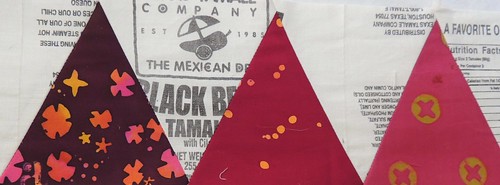
Below is a closeup to show you the black bean tamale sacks (printed with black ink) I used for this row and how they look in combination with my other fabrics.


  Detail photo - Row 2

And here's how the completed row looks next to the the row of tulip blocks. 


Two Rows Done

I am joining the party for WIP Wednesday on Freshly Pieced.

Tuesday, October 06, 2015

Signs of the Season

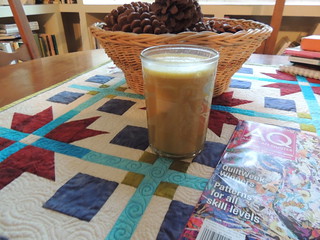
Pumpkin Spice LatteYesterday, I enjoyed my first pumpkin spice latte of the season ... along with a flip through the recently arrived AQ.

I make mine by adding a heaping tablespoon of pumpkin crack butter, made from the recipe that I blogged about a couple years ago, here.

I also woke up looking for my slippers, feeling like oatmeal for breakfast ... and wondering if it was time to turn up the thermostat and find out how well this new-to-me house is heated. (The previous tenant intimated, it wasn't so good.)


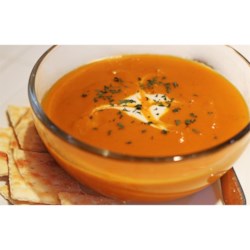
Last night, I craved soup for dinner.  I tried this recipe for Curried Carrot Soup.  It was very easy and pretty tasty.

The photo from allrecipes.com

I am thinking about pulling out one of my flannel quilts for the bed.

I'm also planning to pull out some yarn from my stash to knit some socks–it is Sock-tober, after all.

It definitely feels like Fall at Sophie Junction.

Monday, October 05, 2015

12 Weeks, 12 Rows, my New Sampler Project

Glimpse of my New ProjectI shared this photo of my test block for my latest quilt idea with a few of the commenters on my Saturday post with the brown tamale sacks.

(If I didn't send you a link to the photo, you may be a no-reply blogger)

I've had this idea to combine some Allison Glass Handcrafted fat quarters that I couldn't resist when they were offered on Massdrop with the tamale sacks to make a sampler quilt from this year's Block Lotto patterns with a folk art feeling.

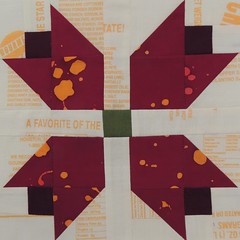
I questioned my decision after a friend made a pair of beautiful quilts from the same Allison Glass fabrics and expressed the opinion that they only work with one another and no other fabrics.  So, before I did anything else, I first made this test block, using my Tulip Quilt Block pattern.

Larger size Tamale bag
Your mileage may differ, but I kind of fell in love with it.

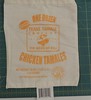
The background for this one came from the chicken tamale sacks which are printed with a bright yellow ink. These are the larger sized (one dozen tamales) variety. 

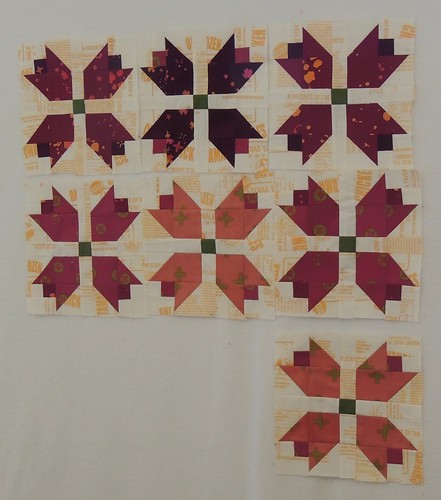
I was so happy with the result, I quickly made the rest of the blocks I needed for sampler row quilt I am making.


7 Tulip Blocks for a new project

I will be blogging weekly updates over on Blocklotto.com with lots more detail, my thoughts on the project, and the design decisions I make along the way,  beginning with this post: 


Of course, I'll be sharing my progress as it appears on my design wall, here, as well.  Be prepared to see lots of tamale sack blocks on my design wall. 

My plan is to complete one row each week for the next 12 weeks.  Sounds easy, right?  Do you have any projects you wanted to finish by the end of the year?  What could you accomplish in 12 weeks?

Saturday, October 03, 2015

What's next?

I do need to start QUILTING things ... but in the meantime, I have started a new project:

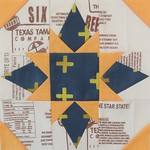
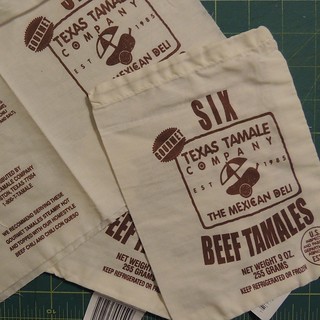
Cotton Food PackingI acquired some of these (in a couple flavors/colors) when I lived in Texas–Thank you, Texas Tamale Company. I wondered if they could be used as quilting fabric ... I am about to find out.

While not exactly scraps, they are close enough and printed in the appropriate color–shades of chocolate– to share with the Rainbow Scrap Challenge list today.

Thursday, October 01, 2015

A Tale of Two Quilt Projects

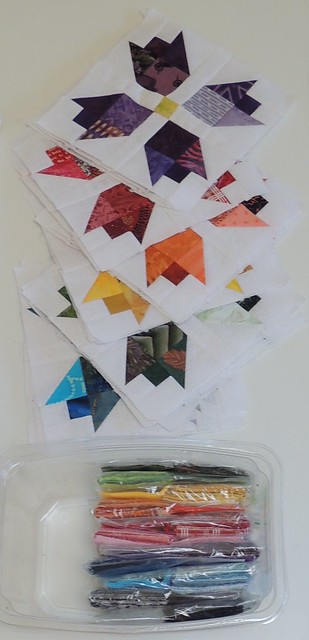
Two projectsTwo weeks ago, I have a pile of scrappy tulip blocks and a set of ziplock bags containing a little over 700 colored squares.

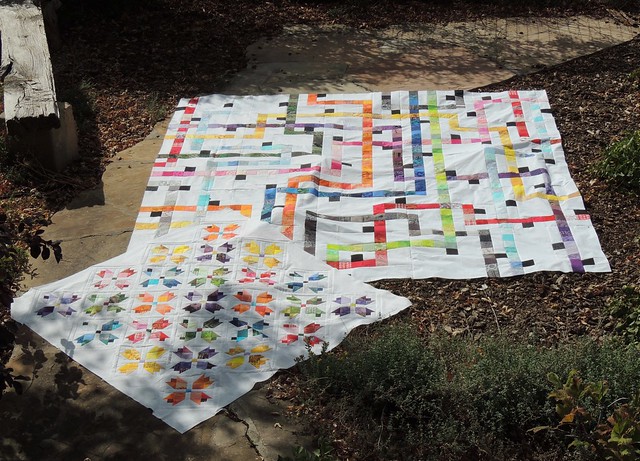
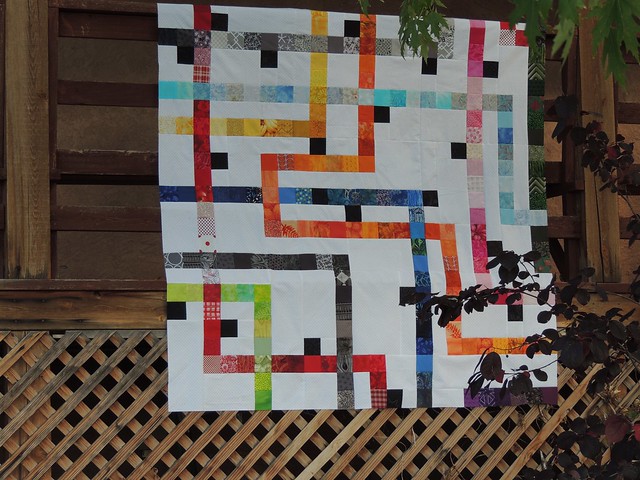
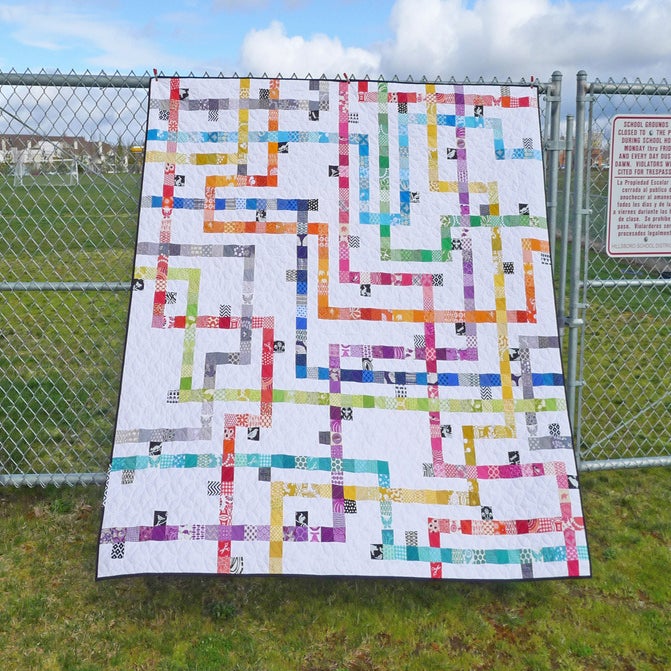
Today, I made the last block of the Tokyo Subway Map quilt and completed putting together the quilt top.

Here's how those two projects look now.

The smaller quilt is approximately 60 inches square. I still haven't decided if I will add borders.

The larger quilt is 100 inches square ... which is why I took it outside for it's photograph.

2 Projects

Both are made from pretty much the same set of scraps.

In the original Tokyo Subway Map QAL, there is some appliqué and more small squares on the back. I like the design–you can see a photo of someone else's quilt in the original Flickr group here–but I am not sure I'm up to cutting another 100 or so of those squares ... maybe I will combine that task with yet another scrappy work-in-progress ... and then the real adventure can begin (quilting that monster).
I'm sharing these projects with these lists:

Creative Goodness on Quilt Shop Gal
Can I get a Whoop Whoop? on Fabric Addiction

Sunday, September 27, 2015

Progress Report and Lessons Learned (So Far)

I am still improvising solutions for working on large quilts in my small space with a smaller design wall.  This weekend, I went outside.

9 blocks

I am making a very large (100 inches square) version of the quilt. This chunk is 9 blocks (upper left corner) of the 25 blocks in the quilt. Because I decided to forgo cutting the 891 white squares in the original design and cut larger sections as each block allowed, I got a little bit of a jump start on the quilt-along schedule. Also, I am a little obsessed with it ...

Making the blocks out of numerical order made it easier for me to see the transitions of the various colored subway lines.  This corner includes blocks numbered 1-3, 6-8 and 11-13.

I mentioned before that I had saved the block patterns from the original QAL in 2010.  While I did save the block diagrams, I did not save the helpful blog posts ... that are now no longer online.  Oops.

I've approached cutting the white background into larger pieces where possible by cutting for the individual blocks as I assemble them.  I print the block diagram and mark it up to know what sizes I need to cut from the background.  I start with width of fabric (WOF) strips that are cut in widths that are equivalent to 1 square, 2 squares and 3 squares. As I am making the decisions of how to chunk the background area, I am also thinking about how the block can be sewn together and pressed, since the pieces in a single block will no longer be a simple 8-by-8 grid.

I suspect the time saved by not cutting those 891 small white squares is now being spent deciding what larger sized chunks I need for each block and puzzling the pieces together–but since I enjoy that kind of a challenge, it's all good :-)

It's going to be a monster quilt–had I made a single block before cutting the 709 colored squares, I think I would have decided to make a smaller quilt–but I am looking forward to quilting it and already thinking about the quilting design.

Because the scrappy orange line is prominent in this section, I'm joining the last orange link-up for the Rainbow Scrap Challenge. If anyone has been eying the Tokyo Subway Map Quilt pattern but not sure they want to cut all those squares, I was thinking how one could cut the squares from one color each month as part of the RSC (there are 12 colored lines in the quilt).

I am also joining these lists:

Oh Scrap!
Design Wall Monday
Creative Goodness

Sunday, September 20, 2015

Missing My Big Design Wall

I have some ideas about how/where I can put a big design wall in my little sewing room, but until that happens, I have been making do with the living room floor.

Missing my big design wall

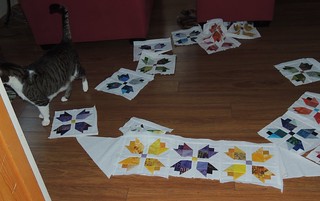
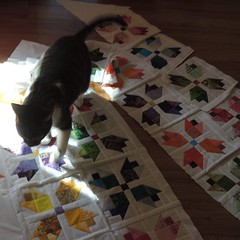
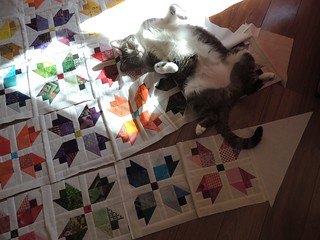
It seemed like it would work OK, until one of my cats decided to have fun and kept passing through, messing things up and nonchalantly leaving the scene of the crime.

Fleeing the scene of the crime ... Johnny Strikes again

... but the sun is in this spot ...When caught in the act, he quickly switched gears and tried to distract me with flirting ...

Incredibly, I did get the blocks sewn together.

I haven't yet decided on borders, binding or quilting design ... but I figure I have enough time to make those decisions and finish this in time for Spring's arrive in 6 months.

Sharing my adventure with the list for Design Wall Monday.

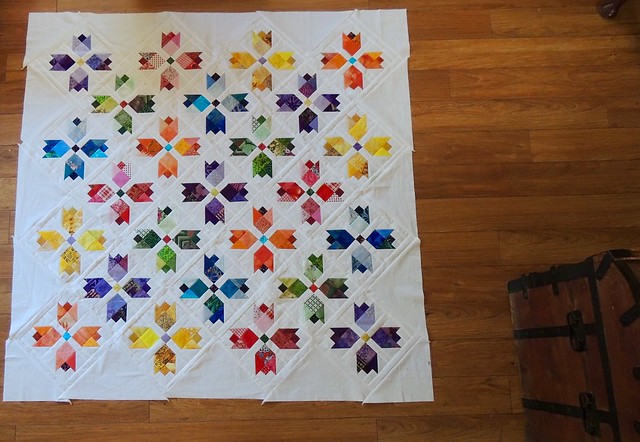
Very Scrappy Tulip Garden quilt top

Wednesday, September 16, 2015

Symbiotic Projects

Two projectsSoon after I blogged about joining the Tokyo Subway Map QAL, I had one of those, "what was I thinking?" moments.  I never cut all the fabrics for a quilt before sewing and I hated the idea of spending all that time doing nothing but cutting.  While I confess that I am going to cheat a little, the quilt, as designed, is made from 1600 squares cut from 12 colors plus black and white.

Playing around with the very scrappy Tulip blocks gave me an idea and a way to break up all that cutting ... and reward myself for slogging through it.

As I was going through my scrap bins, I pulled scraps large enough for either project, and after I cut everything I could from the scraps in one color, I took a break and sewed 4 tulip blocks in that color.

Now I have all the colored squares cut (and about half the black-on-black squares I'll need) AND I've made 25 Tulip blocks, enough for a throw-sized quilt.

In case you missed it in an earlier blog post, the Tulip block is this month's pattern for the Block Lotto and you can find the link to the pattern in this post on Blocklotto.com, and there's a badge in the sidebar of this blog that will take you to the details for the Tokyo Subway Map Quilt-along.

I picked up some a white-on-white print for the background and I am itching to start making Tokyo Subway Map blocks ... but maybe I should use that as the reward for getting the Tulip blocks sewn into a top and keep the symbiosis going to get both projects closer to "done, done."

I am joining the list for WIP Wednesday with these two projects.


Saturday, September 12, 2015

Orange You Going to Ask?

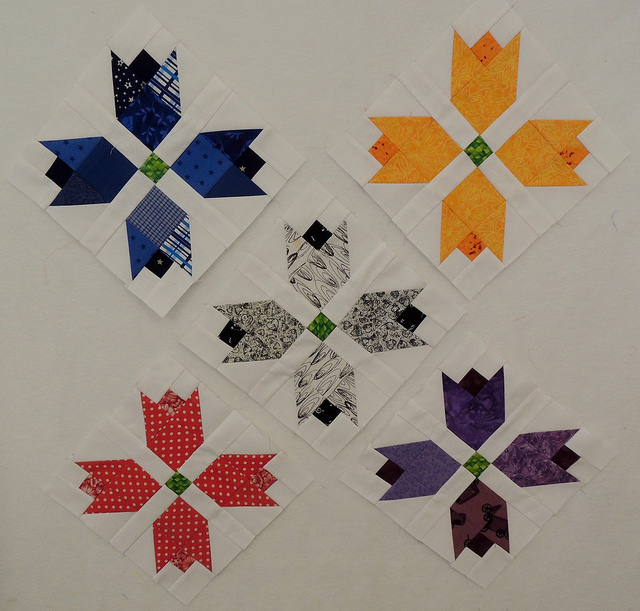
A couple days ago I shared some very scrappy purple tulip blocks, made using this month's Block Lotto pattern.  I was making them for a small project idea I had for a sewing machine cover, similar to the one in this post, but decided the scale was wrong and I needed a smaller, different block.   I woke up with a new idea today, but I wondered what to do with the purple blocks?  Were you also curious about their future?

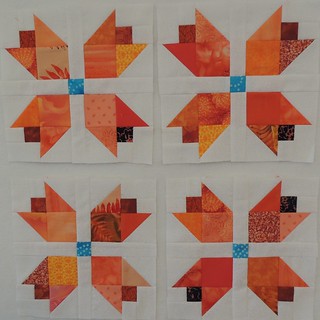
Scrappy Orange Tulip BlocksI decided that the answer was to make them some colorful friends.

Even though I really haven't participated in Angela's Rainbow Scraps Challenge much this year, I decided to go with the flow and start with the September's color and make some very scrappy orange tulips.

I sorted through my orange scraps and found twenty fabrics (plus one in a complimentary turquoise for the center).  Things are shuffled so that each block is made from 16 different fabrics.  At times I wondered if maybe I was making these blocks a little TOO scrappy.  They look very different than the ones we're making on blocklotto.com which can be made  from two (or more) tulip fabrics per block.
After making the orange blocks, I was on a roll, so I kept going–organizing my scrap bins and also cutting squares for the Tokyo Subway Map quilt along the way.

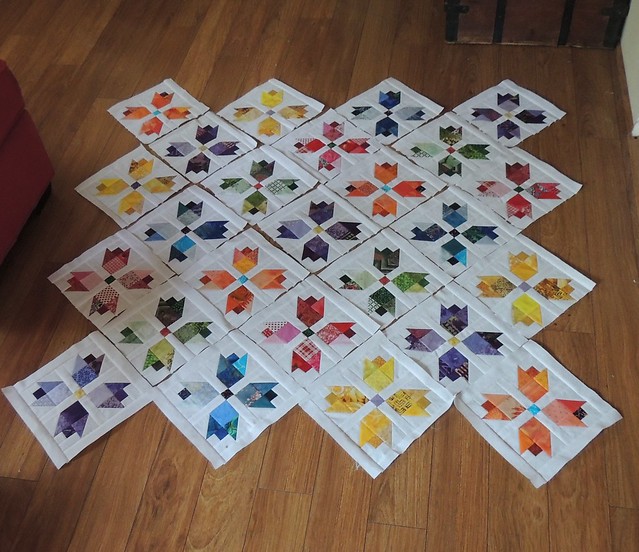
Next I made some red tulips to add to the mix and put them all together on the design wall and they looked like this:

Scrappy Tulip Blocks

I envision that with the addition of some more blocks, this will become a colorful, scrappy, throw-sized quilt.  Making them is kind of like eating potato chips, so who knows if/when I will be able to stop ...

Wednesday, September 09, 2015

Scrap-Happy Works in Progress

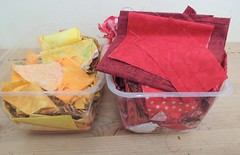
My scrap bins - it starts hereThis is how scrappy projects begin at my house, with my sorted-by-color scrap bins. They go from neatly folded 5 inch squares, stacked on end with everything visible, to this messy (non) arrangement ...

The bins are re-used produce containers which once contained spinach or mixed lettuces.

In this case, I used some of these fabrics to make a couple of Sunrise blocks (from last year's Block Lotto).


Scrappy Rising Sun blocks - in progressSome friends from the Modern-ish mini group asked me to demonstrate Dale Fleming's 6-minute circle technique and I was working on some samples to use in my demo–hint, it's a great technique for other kinds of curves besides those perfect circles :-)

As someone who already has more orphan blocks and UFOs than any sane quilter should, I didn't want to produce more, so I'll be using my demo-samples to make placemats for the guild's community service group's annual effort.  The placemats go to Kitchen Angels.
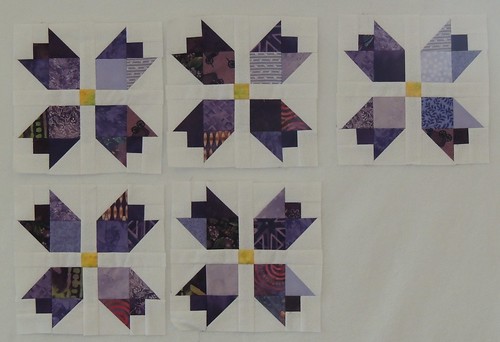
A couple of days ago, I had a little idea about how to use this month's Block Lotto pattern and so yesterday, pulled out the purple bin of scraps and made these five scraptastic Tulip blocks.

Scrap-tastic Tulip Blocks

There are 25 different purple fabrics used in these 5 blocks. I like them, but not for the original project idea, so I'll be pulling out some more of the scrap bins and making more for my new idea :-) 

My quilting mojo must be coming back in a fashion, because I also had a new idea for some 1 1/2 inch strips gifted to me by someone in the guild's QOV mini-group.  At our meeting last week, I created some test blocks. 

Testing a block idea for a QOV quiltHere are the first two. I think it has possibilities and plan to make many more.

The foundation pattern I used was drawn with paper and pencil. Now I am struggling playing with EQ to create a more precise version. It looks like it should be so easily done, but for me ... not so much.

I am amazed at this group, not only for the beautiful QOV quilts they create, but how they all show up SO organized and focused and ready to sew for three hours before they pack it all up and take everything home again.

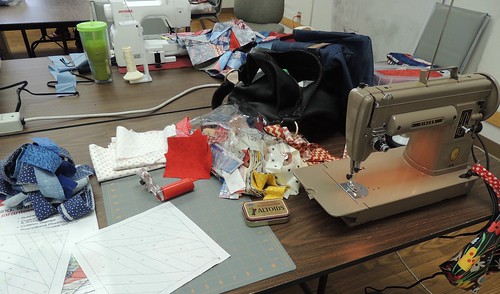
I am a lot LESS organized.  Here's a peek at my work area last week. I usually take Isaac, my trusty workhorse of a sewing machine (AKA a Singer 301).

My messy space at the QOV Mini-group

Now that I've decided to move forward with this block idea, maybe I can get things a little more organized for next time. 

As you can see the mojo's coming back, but maybe I could use a bit more focus ... 

I am joining the lists for Scraptastic Tuesday and WIP Wednesday. 


Tuesday, September 01, 2015

Design Wall Tuesday ... Tulips in September

I couldn't share this yesterday because it's the September block for the Block Lotto and had to be kept secret until today.


This block looks like a traditional block, but when I went looking in Brackman's Encyclopedia of Pieced Quilt Patterns, I couldn't find it, so I am just calling it Tulip.  I had fun playing with the different ways one could scrappify it.

You can find my block directions and fabric guidelines for the Block Lotto this month in this post:

Think Spring (!?) in September

If this block appeals to you, it's easy to jump into the Block Lotto and play along (and maybe win a pile of blocks).

I am belatedly joining the list for yesterday's Design Wall Monday.

Sunday, August 30, 2015

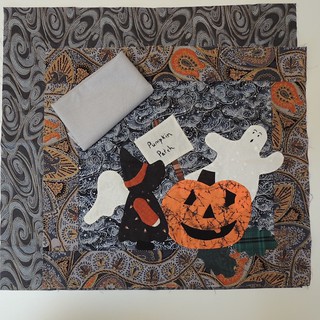
More Slow Stitching in the Pumpkin Patch

Auditioning FabricsI have finished the appliqué on all the parts included with this orphan and have pulled a couple of fabrics from my stash for the moon in the original pattern and an additional border to make the pillow cover that I plan to make from this a little larger.

I will be pin-basting a couple quilts this afternoon–a task which is my least favorite in quilt making–with the reward of some relaxing slow Sunday evening stitching to add the silvery moon and call this done.

Thursday, August 27, 2015

Tokyo Subway Map Quilt-Along

I was surfing blogs this morning and Celine mentioned on Espritpatch that there is a new Quilt-Along starting next month for Elizabeth Hartman's Tokyo Subway Map quilt.

Back in 2010, I followed along (and saved the directions) when Elizabeth shared the design as part of the original QAL, tucked it away and thought of it as a someday quilt.

The pattern as written is made from 1600 2-inch squares. I spent some time back then thinking about how I would change the dimensions and cheat the background, using larger squares and rectangles as much as possible.  Now that my scrap bins are filled or overflowing and with the support of other quilters who will be quilting along, maybe it's time to make a serious start on this quilt.

Click the QAL image above (and in my sidebar) or this link for details on Nina's blog, Nina with Freckles.

If you have no idea what I'm talking about, here's a link to the pattern page and an image of this great, modern, scrappy quilt, inspired by the Tokyo subway map:


Do you have one of those someday quilts that you've seen online or at a show or in a show, saved the pattern and know that you WILL make it one day in the future?

Tuesday, August 25, 2015

Three Questions for My Quilting Friends

First, because it's (almost) WIP Wednesday and two of the three questions I have for you are about this piece, here's what happened with my scrap bag challenge.


Scrap Bag Challenge Progress

The bag of scraps I received for the challenge
To refresh your memory, some local friends and I exchanged quart-size zip lock bags filled with fabric scraps.

The challenge was to use all the fabrics we received and make a little quilt.

It's OK to add your own fabrics, but you must use everything you find in the ziplock bag.

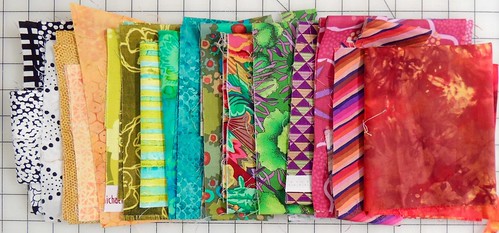
Here's a better look at the fabrics I had to include:

All the fabrics I received

And now for my three questions for you:

         Do you see what I see?

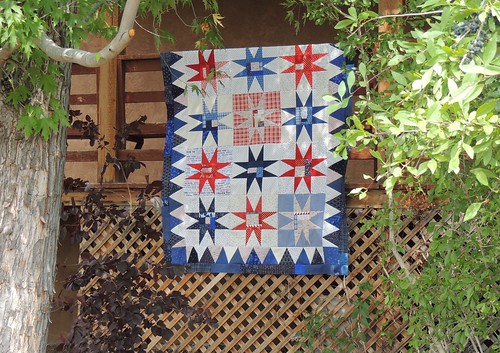
  1. This was one of those projects that took on a life of it's own and ended up being something completely different that I first imagined it.  An idea took hold and I ran with it and now I wonder if I made my intent clear.  My question for you is, what do you see in this design?  

  2. Borders?


  3. Does it need borders?  If so,  how wide and what color?  Keep in mind that it was made primarily from someone else's scraps, with some of mine added, so I don't have any more of any of the fabrics. The pieced top currently measures 26 by 37 inches.  It will be a wall hanging, or possibly be used as a table mat.   

  4. What three words describe your quilts? 


  5. As I was playing with these scraps, I started thinking about how you think the challenge is to use all the fabrics, but you find that it's also about how do you make a quilt from fabrics not chosen by you, in combinations you might never choose to combine and have it turn out looking like a "you" quilt. That led me to think about what makes it feel like me and I came up with these three words that often apply to the quilts I design and make: scrappy, organic and color-saturated.  What three words do you think describe your quilting style? 
I'd love to read your answers to one, two or all of these questions in the comments.

Because it's already Wednesday in Australia, I'm linking with Ester's WOW (WIPs on Wednesday).  Be sure to click over–she has quite a WOW to share today. 

Updated Sep 29 to this improvisational effort still in progress with AHIQ.
Related Posts Plugin for WordPress, Blogger...