
This year, my hands touched six of the quilts made by the group (plus my unfinished twin quilt which is my work-in-progress to share today). Here are some details (and a lot of photos) from my Cotton Robin journey this year.
At the end of last year/beginning of this year I was on a bit of a binge of making and using pieced made fabric and that is reflected in the center and fabrics I sent out into the world for my quilt.
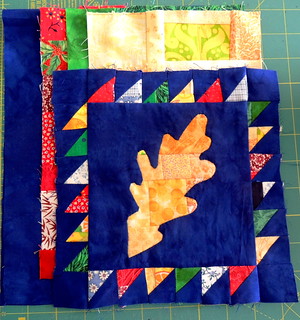 I used made fabric for the oak leaf which is reverse hand-appliquéd and for the 1 inch half-square triangles.
I sent along more squares of made fabrics along with some of the blue batik background.
In last year's Cotton Robin, none of the fabric I sent along (normal, commercial yardage) was used by anyone, so I wouldn't have been surprised if all the funky bits of pieced made fabrics came back to me ... but that didn't happen.
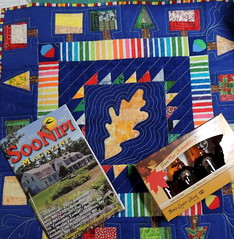
My quilt arrived last weekend, with a maple syrup sampler and a magazine from New Hampshire ... I was immediately made nostalgic for that corner of the world.
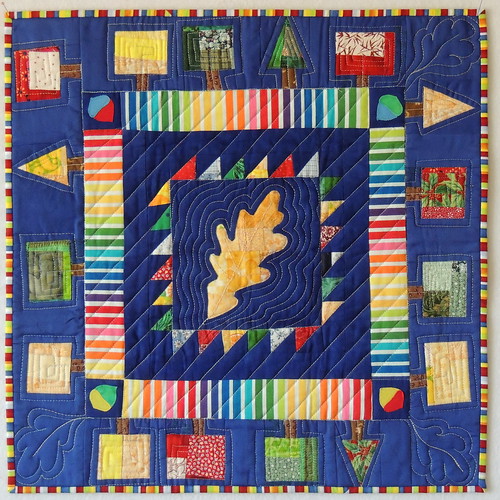
 Elizabeth (in Michigan) added the first borders, with the colorful stripe and the acorns in the corners.
Glen (in Louisiana) used some of the made fabrics to create the trees in the second border.
Marie turned the little top into a quilt.
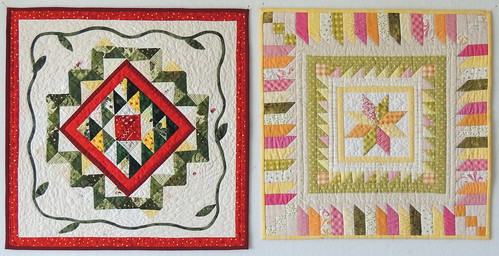
Here's my beautiful little quilt and some detail photos. The quilt is just under 19 inches square.

When the center block for the first round arrived last winter, I had no idea who had made it. It turns out, it was Glen.
 Whenever I looked at the lovely hand-appliquéd lemon wedge, that phrase, "when life gives you lemons, make lemonade," kept coming to mind.
 As usual for me, whatever I've BEEN working on can heavily influence my creative process. In February, it was stitchery (the redwork pillows I stitched during the Olympics) and inset circles (for the Bead-on-a-String blocks we made for the Block Lotto.
After rejecting the idea that I could piece all the letters in that phrase that was firmly stuck in my head and squeeze them into a small border, I decided to stitch it ... in the round ... around the lemon.
After figuring out what size the circle would have to be, I used Adobe Illustrator to wrap the text around it. First I stitched the words, then I cut the circle and appliquéd it onto the block. Then I cut away the comers of the block and had a moment of terror when I wondered if I'd just broken a rule ...
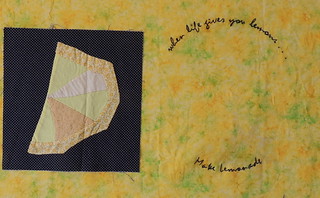
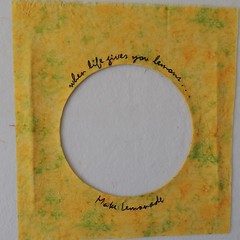
About that time, I think, Julie posted something about how our borders couldn't be a single fabric border, so, to be sure I wasn't breaking the single-fabric rule, I added some piping and a black and white fabric. It didn't feel quite done yet, so I decided it needed something more to continue the circle. I conferred with a friend who was not participating in the Cotton Robin (since I had no idea whose quilt this was) and I added more embroidery to continue the text around the circle with a line with X's and daisies.

This project was sent on to Marie, who added the second round, and Sandra, who finished the quilt and it came out like this:

Next for me was Marie's center, with the first round added by Mary Jane. The note that was traveling with the quilt said it would hang in her vacation cabin with a collection of quilts with a rainbow theme.
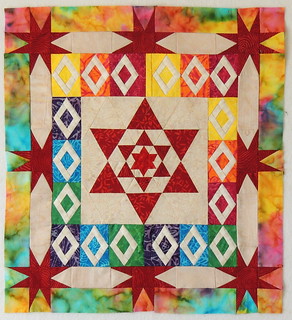 I forgot to take a "before" photo, but this is Marie's quilt in progress, with both Mary Jane's border and mine added.
Mary Jane had done a great job interpreting the rainbow theme in her round, but it made for a hard act to follow.
There was some red batik fabric included in the package. While I was considering how I might repeat some of the elements of Marie's 6-pointed star in the border, I happened across a book on my bookcase, Friendships in Bloom, which was full of round robin quilts and patterns for various kinds of rounds, including this one with the partial star blocks. Finding the multicolor hand dyed fabric in my stash was another lucky accident. It's not the kind of thing I normally buy, so it surprised me when I found it, but I thought it was a good choice to pull in all those rainbow colors and frame the quilt.

I resized the directions to create a much smaller border and used a Tri-Recs ruler to cut the tiny triangle units I needed. I sent the top onto Rachel, who added some perfect (and amazing) quilting to finish this one.

Next it was my turn to finish a quilt ... actually two, because I volunteered to finish up a quilt for someone who had to drop out of the round robin. But first, while I had been flipping through Friendships in Bloom looking for ideas, I happened upon a border idea that I thought would be perfect for my oak leaf center so while I was waiting for the last quilts to arrive, I made a twin center. At the end of May, I took this photo of my design wall.
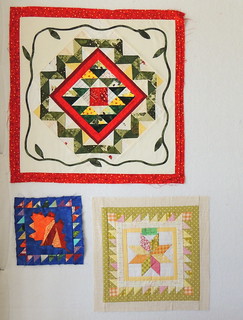 At the top is Liz's quilt, with rounds added by Maria and Elizabeth, ready to be quilted.
Below it on the left, is my twin center, not exactly the same as my yellow oak leaf, but another leaf (I used quilting stencils for the leaf patterns) made from orange made fabric.
And on the right, is Kristin's center with one border added by Marybeth. I loved the colors in this quilt and was glad that there were some fabrics (from a jelly roll, maybe) included because I didn't find many fabrics in my stash in this fresh color palette.
I haven't made any progress, except for deciding upon a design in my head, with the leaf block ... and it is my WIP Wednesday contribution.
I loved all the clean lines in Kristin's quilt so far, so I continued them with a piano key border of her fabrics (and some of mine) with half-square-triangle-like points at the end of each "key."
I quilted it with a lot of free-motion stitch-in-the-ditch to accent all the lines and some tiny 2 inch feather wreaths in the background of her Lemoyne star center. I used what I think is an old Caryl Bryer Fallert-designed gradient fabric in some of the colors from Kristin's fabrics for the backing and what was probably an even older Moda Marble in the same yellow as the plain border in the quilt (I suspect the border was made from a new Moda fabric which is why the colors matched exactly). Here are some of the in-progress photos.

And the finished quilt.

The quilting for Liz' quilt started out pretty much the same way, with lots of stitch-in-the-ditch to outline all those triangles in her center and Maria's first round. Me being me, I couldn't resist going back and adding feather shapes in all the light halves of those half-square triangles ... I also kept thinking about adding something to that vine ... that something turned out to be more leaves, some berry clusters and a lot of flowers, which also were used as filler for the rest of the background. As I said last night at a meeting with the Chicken River Modern Quilters, "My name is Sophie and I am an over quilter." I sometimes manage to restrain myself–I was pretty proud of the restraint I showed in Kristin's quilt–but not usually ... here are some details from this quilt (taken from the front and back).

And here's the finished quilt. I chose a darker red fabric for the binding to echo the two reds in a border between the center and first round.
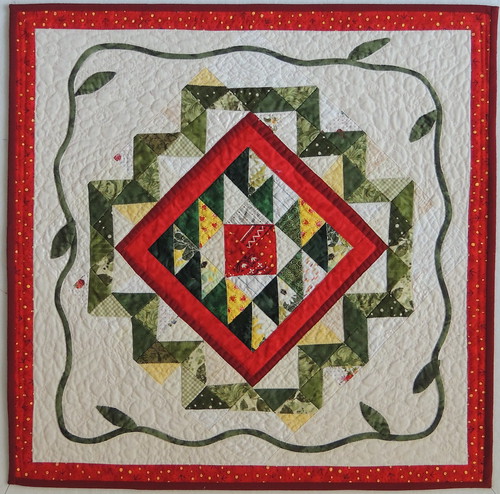
(I couldn't decide which way should be "up" for this quilt. I like this orientation. )
I washed and blocked both quilts before adding the binding. I was a little afraid of the red fabrics in Liz' quilt, but thanks to some color-catchers doing their job well (and turning quite red), it all turned out OK. When I was done with the last round, I was a little surprised that both quilts ended up being almost exactly the same size. Here they are together on my design wall where I enjoyed them until it was time for them to go home.
Are you wondering yet where the sixth quilt that passed through my hands is? As it turns out, I made the seven sisters center that Kate used for her Cotton Robin quilt. I sent it to her a long time ago as part of a block exchange. It was fun for me to see what robineers Marie, Vivi and Mary Jane did to it.

Good bye quilts, good bye Cotton Robin. I hope Julie is up for another round, because I'm ready to commit ... again :-)
9 comments:
I must keep up better with each one I finish!!!!!
I love my quilt. I have it hanging at work, so pretty. I chose the orientation with the leaf in the middle bottom. Thanks Sofie.
I have to say that While I love my lemon block, it was the very first thing I hand appliqued. I hated hand applique. Still do in fact. But I did finish a full lemon quilt and I have to say, this one looks way much better!
Thank you for putting so much love into my poor little block!
OMG! You have been busy. I just can't imagine doing all that. You 3 must be very good friends.
Hugs
I love the way the quilts turn out. I get chills just thinking about quilting on a quilt that belongs to someone else! Oh the stress!!!!
These round robin quilts are wonderful! So fun to share creativity with friends.
What a wonderful collection of quilts you've all made together. All of them look great :)
That was fun to see all those quilts as they developed.... each one is so unique!
Glad to see you counted that hexagonal block - I knew it had come from you (but couldn't remember why - that's what my memory is like these days)and I've been so stuck to find something to do with it. Not sure why, but then I guess that's why we call it stuck... Anyway, I'm pleased to have it turned into something finished :)
Post a Comment